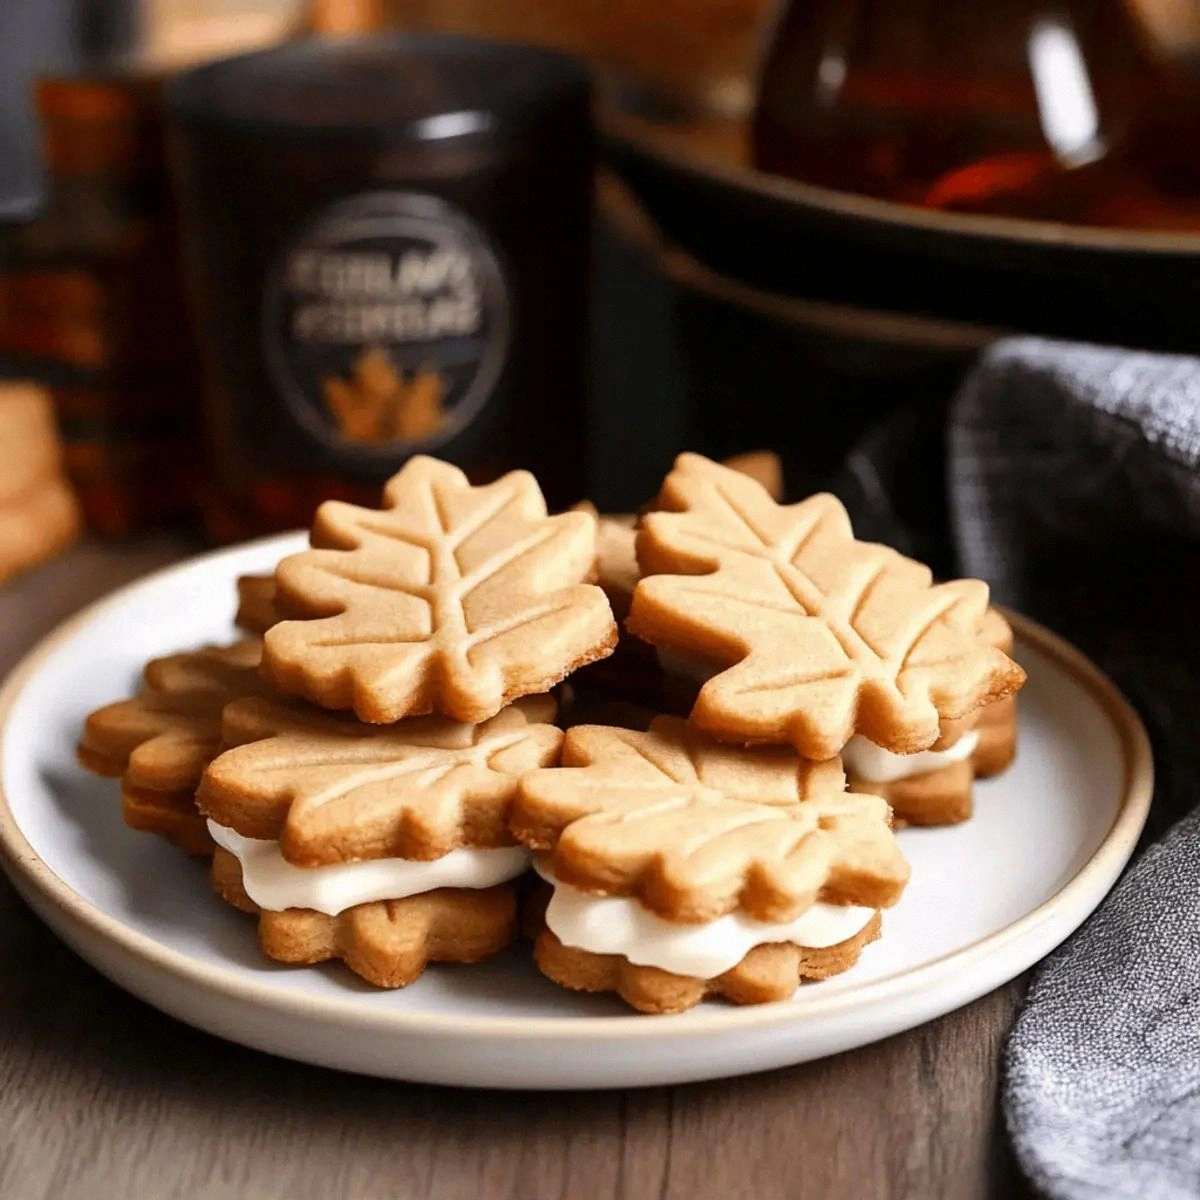
Picture this: a cold November afternoon, the wind rattling the windows, and my kitchen smelling like a maple‑scented dream. I was halfway through a batch of ordinary sugar cookies when a sudden craving for something richer, more autumnal, hit me like a gust of pine‑scented air. I grabbed the nearest bottle of pure maple syrup, tossed in a dash of maple extract, and, in a moment of reckless inspiration, shaped the dough into delicate leaves. The result? A cookie so unforgettable that I’m willing to bet you’ll be daring yourself to taste it and not go back for seconds.
The first bite is a symphony of flavors: buttery, slightly crisp edges that crumble like thin ice under a gentle footstep, a buttery‑soft interior that melts on the tongue, and a sweet‑spicy maple frosting that coats the palate like velvet. The aroma alone is a hug from Mother Nature herself—warm, woody, with a whisper of caramel that makes the whole house feel like a cozy cabin tucked in a forest of amber leaves. You’ll hear the soft sigh of the oven as the cookies turn golden, see the perfect leaf‑shaped edges, feel the slight give when you press them together, and taste the perfect balance of sweet and buttery bliss.
Most recipes get this completely wrong. They either drown the cookie in syrup, making it soggy, or they skimp on the maple flavor, leaving you with a bland version that feels like a missed opportunity. This version stands out because it uses a two‑step approach: a buttery, tender cookie base that holds its shape, and a light, airy maple‑kissed frosting that never overwhelms. The secret? A dash of maple extract that amplifies the natural maple syrup, plus a precise ratio of confectioners’ sugar that keeps the filling silky without becoming grainy.
And now the fun part: I’m about to walk you through every single step — from selecting the perfect butter to mastering the leaf‑cutting technique that will make your cookies look like they were plucked straight from a forest floor. By the end, you’ll wonder how you ever made any sandwich cookie any other way. Okay, ready for the game‑changer?
What Makes This Version Stand Out
- Flavor: The combination of pure maple syrup and a hint of maple extract creates a deep, authentic maple taste that’s more nuanced than store‑bought mixes.
- Texture: A crisp, buttery edge that shatters like thin ice meets a soft, melt‑in‑your‑mouth interior, delivering a delightful contrast in every bite.
- Simplicity: Only nine ingredients, all pantry‑friendly, and no fancy equipment—just a rolling pin, cookie cutter, and a little patience.
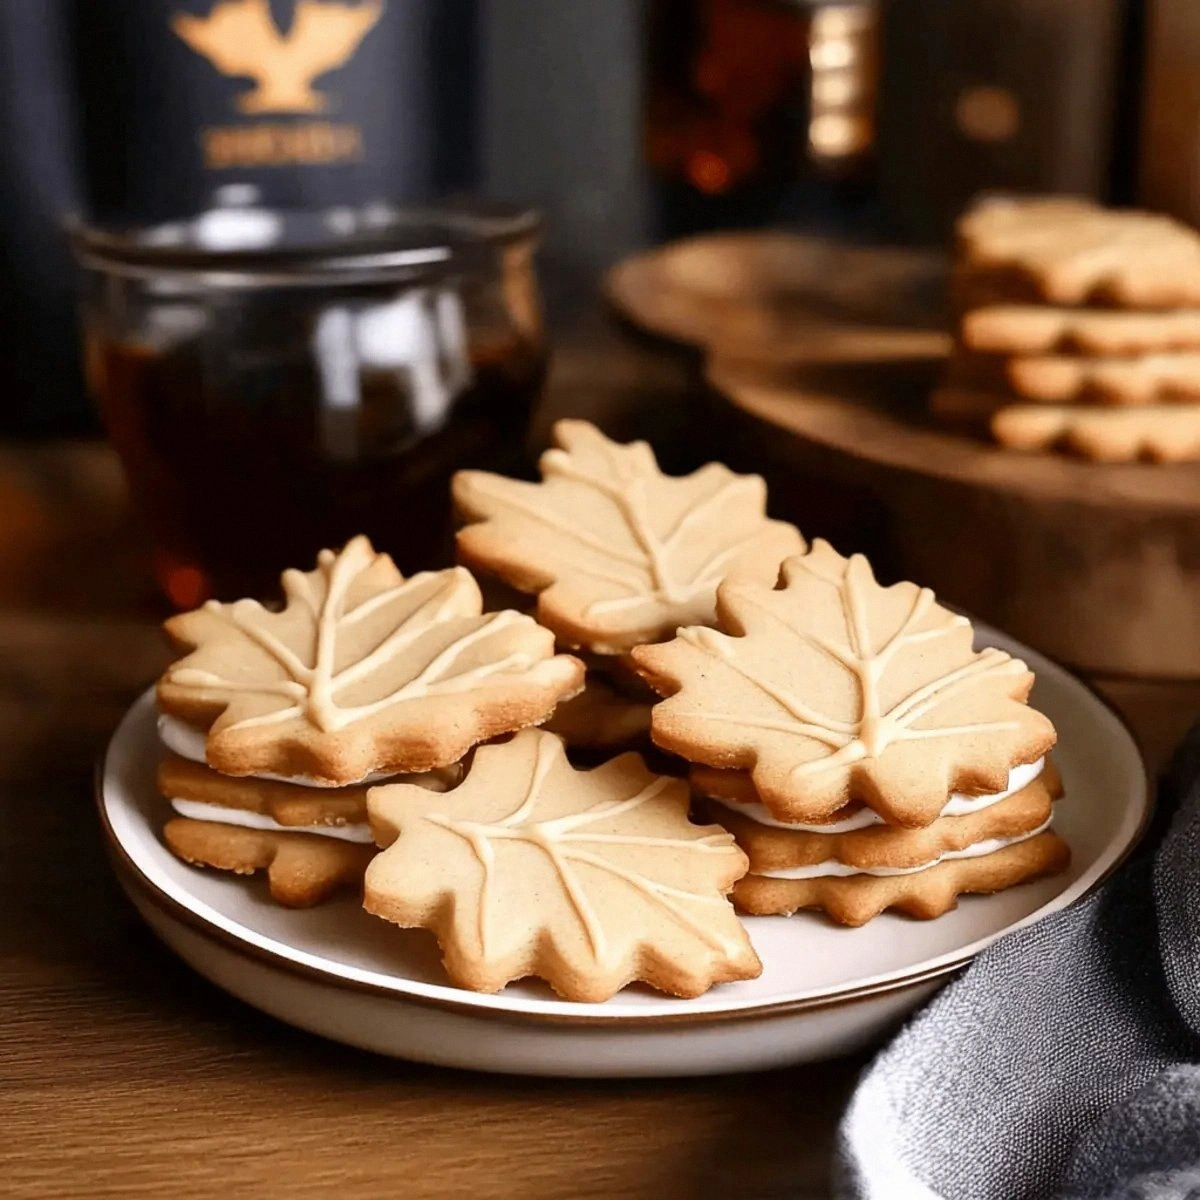
- Uniqueness: Shaped into real maple leaves, these cookies become a centerpiece for autumn gatherings, Instagram‑ready without the effort.
- Crowd Reaction: Guests invariably ask for the recipe, and the “I dare you to taste this and not go back for seconds” challenge becomes a party staple.
- Ingredient Quality: Using unsalted butter and pure maple syrup ensures that each component shines without unnecessary additives.
- Cooking Method: A low‑and‑slow bake preserves the delicate leaf shape while achieving that perfect golden hue.
- Make‑Ahead Potential: Cookies can be baked and stored for up to a week, and the frosting stays fresh in the fridge for ten days—perfect for busy autumn mornings.
Inside the Ingredient List
The Flavor Base
1/2 cup Unsalted Butter: This is the backbone of the cookie dough, providing richness without the interference of salt. Using unsalted butter lets you control the exact salt level later, ensuring a balanced flavor. If you skip it, the dough will lack that melt‑in‑your‑mouth quality and become crumbly.
1/4 cup Pure Maple Syrup: The star of the show, this syrup adds natural sweetness and that unmistakable woody aroma. Opt for Grade A Dark for a deeper flavor profile; a lighter grade can taste too watery. If you substitute honey, you’ll lose the signature maple depth.
1/2 teaspoon Vanilla Extract: A tiny splash of vanilla rounds out the maple, preventing it from feeling one‑dimensional. It’s the silent partner that makes the flavor sing. You can replace it with almond extract for a nutty twist, but keep the amount the same.
The Texture Crew
1 2/3 cups Cake Flour: Cake flour’s low protein content yields a tender crumb, essential for that melt‑away interior. Using all‑purpose flour would make the cookies tougher and less delicate. When shopping, look for “soft” or “low‑gluten” labels.
1/4 teaspoon Salt: Just enough to enhance the sweet and balance the maple. Too much would overpower the subtle flavors; too little leaves the taste flat. If you’re using salted butter, you can omit this entirely.
1/4 cup Softened Butter (for filling): This butter is the canvas for the frosting, giving it a creamy texture that spreads easily. It should be softened, not melted, to avoid a greasy finish. For a dairy‑free version, try coconut oil, but expect a faint coconut note.
The Unexpected Star
9 tablespoons Sifted Confectioners' Sugar: This sugar creates a silky frosting that doesn’t grain. Sifting removes clumps and ensures a smooth finish. If you skip sifting, you might end up with a gritty texture that ruins the elegant mouthfeel.
1 tablespoon Maple Syrup (filling): A second dose of maple in the frosting reinforces the flavor without making it soggy. It also helps the frosting stay pliable as it sets. You could use brown sugar syrup for a caramel twist, but the maple identity would be lost.
1/4 teaspoon Maple Extract: The secret weapon that intensifies the maple aroma, making the cookies smell like a fresh‑cut maple forest. A little goes a long way; over‑extracting can make the taste artificial. If you can’t find it, add an extra 1/2 teaspoon of pure syrup.
Everything's prepped? Good. Let's get into the real action…
The Method — Step by Step
-
Start by creaming the 1/2 cup unsalted butter with the 1/4 cup pure maple syrup in a large mixing bowl. Use a handheld mixer on medium speed until the mixture is light, fluffy, and a pale golden color. This process incorporates air, which is crucial for a tender crumb. Tip: The butter should be at room temperature; if it’s too cold, the mixture will look speckled and won’t blend properly.
Kitchen Hack: Add a splash of milk (about 1 tablespoon) while creaming to help the butter and syrup emulsify more smoothly. -
To the creamed mixture, add the vanilla extract and 1/2 teaspoon vanilla extract, then whisk in the 1 2/3 cups cake flour and 1/4 teaspoon salt. Mix on low until just combined; you’ll notice a soft dough that clings to the sides of the bowl. Watch Out: Over‑mixing develops gluten, turning the cookies tough instead of tender.
-
Divide the dough in half, shape each half into a flat disc, and wrap tightly in plastic wrap. Chill in the refrigerator for at least 30 minutes, or up to 2 hours. This resting period relaxes the gluten and firms the butter, making it easier to roll out without sticking.
Watch Out: If the dough gets too warm while rolling, return it to the fridge for 10 minutes; otherwise the leaves will spread and lose their shape. -
Preheat your oven to 350°F (175°C) and line two baking sheets with parchment paper. Lightly flour a clean surface, then roll out one disc of dough to about 1/8‑inch thickness. Using a maple leaf cookie cutter, press firmly and gently lift the shapes onto the prepared sheets, leaving a little space between each.
-
Bake the cookies for 10‑12 minutes, or until the edges turn a light golden brown and the tops look set. You’ll hear a faint crackle as the butter caramelizes— that sizzle when it hits the pan? Absolute perfection. Rotate the sheets halfway through for even coloring.
Kitchen Hack: Swap the parchment for a silicone baking mat; it gives a slightly crisper bottom and makes cleanup a breeze. -
While the cookies cool on a wire rack, prepare the maple frosting. In a medium bowl, beat the 1/4 cup softened butter until creamy, then gradually add the 9 tablespoons sifted confectioners' sugar, 1 tablespoon maple syrup, and 1/4 teaspoon maple extract. Beat on high for 2‑3 minutes until the frosting is light, fluffy, and holds soft peaks.
-
Once the cookies are completely cooled (they should feel firm to the touch), pair them up by size. Spread a generous dollop of the maple frosting on the flat side of one leaf, then gently press its matching partner on top, creating a sandwich. The frosting should ooze just enough to peek out at the edges, like a delicate veil of autumn sunrise.
Watch Out: Over‑filling will cause the cookies to slide apart; use a small offset spatula to control the amount. -
Let the assembled sandwiches rest for 10 minutes at room temperature. This brief pause lets the frosting set just enough to hold the cookies together without melting. Then, arrange them on a serving platter, dust lightly with powdered sugar for a snow‑kissed look, and admire your handiwork.
-
That’s it — you did it. But hold on, I’ve got a few more tricks that’ll take this to another level. Stay with me here — this is worth it.
Insider Tricks for Flawless Results
The Temperature Rule Nobody Follows
Never bake these cookies straight from a warm kitchen. If the dough is even slightly warm, the butter will melt too quickly, causing the leaves to spread and lose their crisp edges. Keep your oven preheated and the dough chilled; the contrast between cold dough and hot oven creates that perfect “snap” when you bite into the leaf.
Why Your Nose Knows Best
When the cookies are about 8 minutes in, start sniffing. The moment you detect a faint caramel‑nut aroma, you’re at the perfect point to check the edges. If the scent is still buttery, give them another minute; if it’s already smoky, pull them out now to avoid a bitter aftertaste.
The 5‑Minute Rest That Changes Everything
After baking, let the cookies rest on the sheet for exactly five minutes before moving them to a rack. This short pause lets the steam finish the cooking process, preventing the bottoms from becoming soggy while preserving the delicate leaf veins.
Friend’s Fail: Skipping the Chill
A buddy of mine once skipped the chilling step, thinking it would save time. The result? A mushy mess that spread into a giant maple‑shaped pancake. Moral of the story: patience is a virtue, especially when you want crisp leaves that hold their shape.
Frosting Consistency Cheat
If your frosting looks too runny, add a teaspoon of sifted confectioners’ sugar and beat for another minute. If it’s too stiff, a splash of warm milk (just a few drops) will loosen it without compromising the flavor.
Creative Twists and Variations
This recipe is a playground. Here are some of my favorite ways to switch things up:
Spiced Pumpkin Leaf
Replace 2 tablespoons of the cake flour with pumpkin puree, and add a pinch of pumpkin pie spice to the dough. The result is a subtly orange‑hued cookie with warm autumn spices that pairs beautifully with the maple frosting.
Chocolate‑Dipped Delight
After assembling the sandwiches, dip half of each leaf in melted dark chocolate and let it set on parchment. The bitter chocolate contrasts the sweet maple, creating a sophisticated flavor duet.
Nutty Crunch Variation
Stir ¼ cup finely chopped toasted pecans into the frosting. The nuts add a buttery crunch that mimics the sound of leaves underfoot, and they complement the maple’s earthiness.
Gluten‑Free Adaptation
Swap the cake flour for a 1:1 gluten‑free flour blend, and add a teaspoon of xanthan gum to mimic the structure of wheat. The cookies will retain their delicate crumb while being safe for gluten‑intolerant guests.
Maple‑Espresso Fusion
Add 1 teaspoon of instant espresso powder to the frosting for a subtle coffee note. The bitterness of coffee heightens the maple’s sweetness, turning the sandwich into a sophisticated dessert for brunch.
Vegan Version
Replace the unsalted butter with coconut oil (solid, not melted) and use agave syrup instead of maple syrup in the dough. For the frosting, swap butter with vegan margarine and ensure the confectioners’ sugar is vegan‑friendly. The texture changes slightly, but the flavor remains delightfully maple‑forward.
Storing and Bringing It Back to Life
Fridge Storage
Place the assembled cookies in an airtight container lined with parchment paper. Store them in the refrigerator for up to five days. The cool environment keeps the frosting firm and prevents the cookies from becoming soggy.
Freezer Friendly
Separate the cookies with wax paper, then seal them in a freezer‑safe zip‑lock bag. They’ll freeze beautifully for up to three months. To thaw, move them to the fridge overnight, then let them sit at room temperature for 20 minutes before serving.
Best Reheating Method
When you’re ready to enjoy a frozen or refrigerated sandwich, preheat your oven to 300°F (150°C). Place the cookies on a baking sheet and warm for 5‑7 minutes. Add a tiny splash of water (just a few drops) to the baking sheet; the steam revives the frosting’s softness, making each bite feel freshly made.