I still remember the day my air fryer nearly ended up on the curb. There I stood, holding a sad, deflated store-bought hot pocket that had exploded like a cheesy grenade, its molten guts clinging to the basket like some kind of tragic art installation. The smell? A weird cross between burnt cardboard and regret. My roommate walked in, took one look, and said the five words that changed everything: "Why don't you just make them?" Game. Changer.
Picture this instead: golden, flaky pastry that actually shatters when you bite into it, revealing layers of molten cheese that stretch like a food stylist's dream shot. The filling? Not that mysterious paste from a factory, but real ham that tastes like ham, cheese that melts into silky rivers, and a whisper of herbs that makes your kitchen smell like a Parisian bistro. That first bite — when the steam rises and hits your face like a warm hug — that's when you know you've transcended the frozen food aisle forever.
Here's what nobody tells you about homemade hot pockets: they're stupidly easy. We're talking fifteen minutes of actual work, then your air fryer does the heavy lifting while you binge Netflix or dance around to that guilty pleasure playlist. The magic happens when hot circulating air meets butter-laminated dough, creating those crispy edges that shatter like thin ice over a puddle. Inside, the filling gets hot enough to melt cheese perfectly but never so hot that it turns into lava — the eternal struggle of the microwave generation.
But the real kicker? You control everything. Want buffalo chicken with three kinds of cheese? Done. Prefer a breakfast version with sausage, egg, and that fancy aged cheddar? Absolutely. Vegetarian with roasted vegetables and goat cheese? These pockets don't discriminate. Let me walk you through every single step — by the end, you'll wonder how you ever made it any other way.
What Makes This Version Stand Out
Flaky Perfection: We're using a simple homemade dough that puffs and flakes like premium puff pastry, but without the three-day commitment. The air fryer's rapid air circulation creates layers upon layers of crispy, golden pockets that put the store-bought cardboard to shame.
Cheese Pull Goals: Forget the mystery "cheese product" — we're talking real mozzarella that stretches for days, sharp cheddar that brings the flavor, and a touch of cream cheese that keeps everything molten and luxurious. Every bite delivers that Instagram-worthy cheese pull.
Speed Demon: From zero to hot pocket hero in under 45 minutes, including dough resting time. Your air fryer preheats in three minutes flat, and each batch cooks in ten. That's faster than delivery, and definitely faster than driving to the store.
Freezer Friendly: Make a double batch, freeze them raw, and you've got instant gourmet snacks ready to air fry straight from frozen. Game day? Late-night craving? Three-year-old having a meltdown? Problem solved in twelve minutes flat.
Endless Variations: Once you master the base recipe, the flavor combinations are limitless. Pizza pockets with pepperoni and herbs, breakfast pockets with maple sausage, Mediterranean pockets with spinach and feta — your imagination writes the menu.
Kid-Approved, Adult-Adored: These disappear faster than free samples at Costco. I've watched grown adults fight over the last one like it's the last slice of pizza at 2 AM. The combination of familiar comfort food with elevated flavors hits every demographic.
Alright, let's break down exactly what goes into this masterpiece...
Inside the Ingredient List
The Flavor Base
All-purpose flour forms the backbone of our dough, and please don't substitute with whole wheat unless you enjoy disappointment. You need that gluten development for structure, but not so much that it becomes tough. The secret is using just enough water to bring everything together — think of it as a shy dough that barely holds hands with itself. Too wet and you'll have a sticky nightmare, too dry and your pockets will crack like desert earth.
Butter, and lots of it, creates those distinct flaky layers we're chasing. I use European-style butter with 82% fat because it stays pliable when cold, making it easier to work into the dough. The water content in butter turns to steam in the air fryer, creating lift and separation between layers. Skip the cheap stuff here — this is where the magic happens, and margarine will just leave you with sad, greasy pockets that taste like regret.
The Texture Crew
Baking powder might seem redundant in a yeasted dough, but here's the thing: it gives us insurance. While the yeast works on flavor development, baking powder provides that immediate lift in the hot air fryer environment. It's like having a backup singer who can also hit the high notes when the lead needs support. Without it, you might get dense, bread-like pockets instead of light, airy perfection.
Milk powder is my secret weapon for tender, flavorful dough. It adds richness without extra liquid, and the milk proteins brown beautifully in the air fryer, giving you that gorgeous golden color that makes people think you're a professional baker. If you skip it, your pockets will still work, but they'll lack that certain something that makes people close their eyes and say "wow" after the first bite.
The Unexpected Star
Cornstarch in the dough? Trust me on this one. Just a tablespoon mixed with the flour creates a more tender crumb by interfering with gluten development. It's like putting a polite barrier between the gluten strands so they don't get too friendly and create tough dough. The result is pastry that flakes and shatters like a dream, not chewy bread playing dress-up.
The Final Flourish
The filling is where you get to play favorites. Good quality deli ham — none of that water-injected stuff that steams inside your pocket and makes everything soggy. I splurge on Black Forest ham because it has that perfect balance of smoky and sweet, plus it doesn't weep moisture when heated. Cube it into pieces just smaller than your thumb so you get satisfying chunks in every bite without overwhelming the cheese ratio.
Cheese selection matters more than you think. Mozzarella for the stretch, sharp cheddar for the flavor punch, and cream cheese for the melt factor. The cream cheese acts like a binding agent, keeping everything cohesive instead of falling out in a molten avalanche when you bite in. Grate your own cheese — pre-shredded cellulose-coated cheese doesn't melt the same way, and we're not animals here.
Everything's prepped? Good. Let's get into the real action...
The Method — Step by Step
- Start with the dough because it needs a quick nap while you prep everything else. In a large bowl, whisk together 2 cups of flour, 2 teaspoons of baking powder, 1 tablespoon of milk powder, 1 teaspoon of salt, and that sneaky tablespoon of cornstarch. Cut in 6 tablespoons of cold butter using a pastry cutter or your fingertips until it looks like coarse breadcrumbs with some pea-sized pieces remaining. These butter chunks are your ticket to flaky town, so don't overwork it into submission.
- Make a well in the center and pour in 1/2 cup of cold water mixed with 1 teaspoon of instant yeast. Stir with a fork until it forms a shaggy mass that looks like it can't possibly become anything delicious. This is normal — dough always goes through an awkward teenage phase before becoming its best self. Knead it exactly 8 times on a lightly floured counter. Count them out like you're performing a sacred ritual, because over-kneading is the enemy of tenderness.
- Pat the dough into a rough rectangle, wrap it in plastic wrap, and let it rest for 20 minutes. This isn't about rising — the yeast needs time to wake up and the gluten needs to relax so it doesn't fight you when rolling. While it chills, make your filling by stirring together 1 cup diced ham, 1/2 cup shredded mozzarella, 1/2 cup shredded sharp cheddar, 2 tablespoons cream cheese, and a pinch of black pepper. The cream cheese should be soft enough to mix but not melted — room temperature for 30 minutes does the trick.
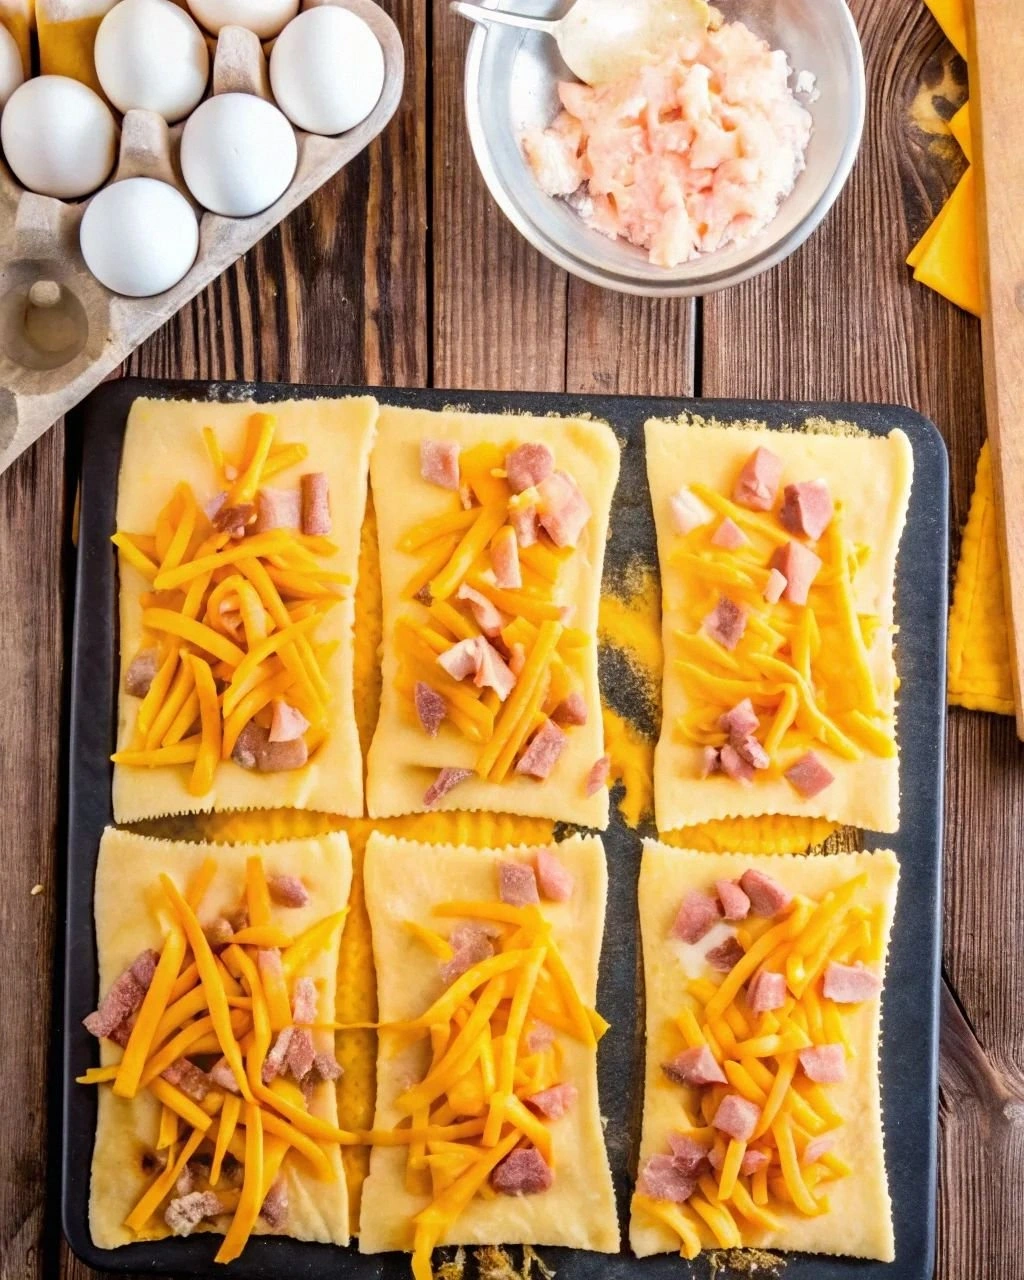
- Divide the dough into 4 equal pieces — a bench scraper makes this satisfyingly precise. Working with one piece at a time, roll it into a 6x8-inch rectangle between parchment paper. The dough should be thin enough to see vague shadows through, but not so thin that it tears when you add filling. Aim for about 1/8-inch thickness — think of it as the Goldilocks zone where structure meets flakiness.
- Place 1/3 cup of filling slightly off-center on each rectangle, leaving a 1/2-inch border. This might seem stingy compared to store versions, but trust the process. Over-stuffing leads to blowouts that'll have you scrubbing cheese out of your air fryer for weeks. Fold the dough over the filling like you're tucking in a beloved child, pressing out any air pockets that could expand and cause chaos.
- Seal the edges with the tines of a fork, pressing firmly enough to create a good seal but not so hard that you cut through the dough. This isn't just for looks — those crimped edges are your insurance policy against filling escape. Pierce the top 2-3 times with a fork to vent steam. These little holes prevent your pockets from becoming pressure bombs, which nobody wants to explain to their dentist.
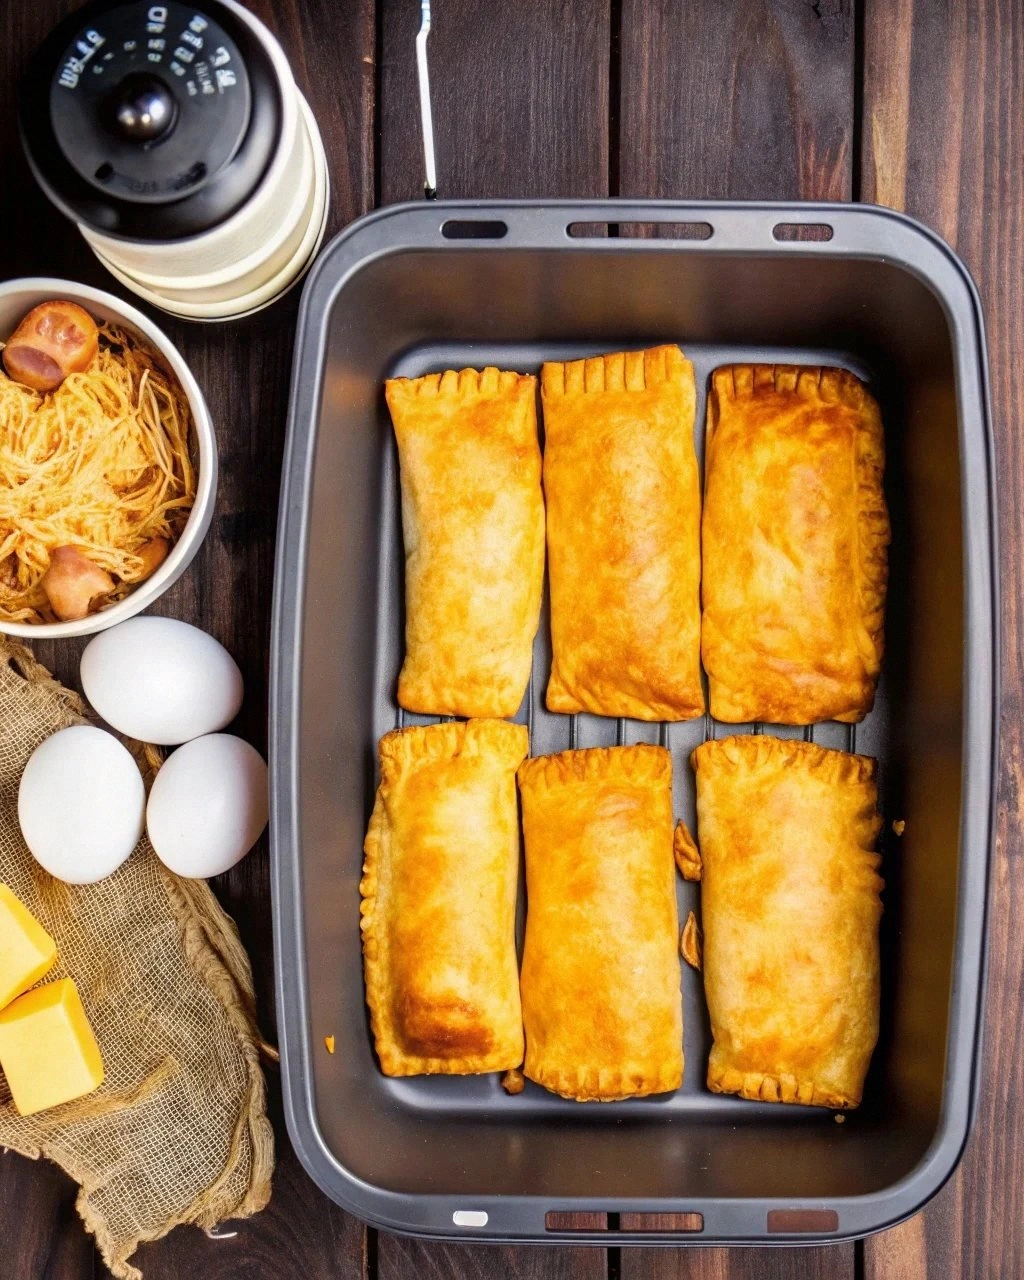
- Preheat your air fryer to 380°F for 3 minutes — this step is non-negotiable for even cooking. Arrange the pockets in a single layer, not touching (work in batches if needed). Spray lightly with oil — this isn't about preventing sticking, it's about encouraging that gorgeous golden-brown color that makes people think you went to culinary school.
- Air fry for 10-12 minutes, flipping halfway through. You're looking for deep golden brown with darker spots where the dough ridges get extra crispy. The filling should be molten and bubbling slightly through the vents. Let them rest for 5 minutes — I know it's torture, but molten cheese burns are nobody's idea of a good time. That rest also lets the cheese set slightly so it doesn't all rush out when you bite in.
That's it — you did it. But hold on, I've got a few more tricks that'll take this to another level...
Insider Tricks for Flawless Results
The Temperature Rule Nobody Follows
Your air fryer runs hot — like, really hot. Most models run 25-50 degrees above the set temperature, which explains why your first batch emerged charred and weeping. Invest in an oven thermometer and test your machine's actual temperature. Once you know the real number, adjust accordingly. My air fryer set to 350°F actually runs at 375°F, so I set it to 335°F for perfect hot pockets every time. This isn't being picky — it's the difference between golden perfection and sad, burnt disappointment.
Why Your Nose Knows Best
Forget timers — your nose is the most reliable kitchen tool you own. When hot pockets are perfectly done, they'll smell like a bakery had a baby with a cheese shop. That aroma means the Maillard reaction is happening, creating hundreds of flavor compounds that make these irresistible. If you smell burning, you're 30 seconds too late. If you smell nothing, give them another 2-3 minutes. Trust me, after your third batch, you'll be able to judge doneness by scent alone like some kind of hot pocket whisperer.
The 5-Minute Rest That Changes Everything
I know you're hungry. I know that cheese is calling your name like a siren song. But waiting five minutes isn't optional — it's transformative. During this rest, the superheated filling redistributes, the cheese sets slightly, and the pastry finishes cooking from residual heat. Cut into one immediately and you'll get cheese lava that burns your tongue and runs down your chin. Wait five minutes and you get perfect, spoonable molten cheese that stays put. Plus, that rest allows the flavors to meld into something greater than the sum of their parts.
The Secret Weapon for Extra Flaky Layers
Here's my favorite trick: freeze your butter, then grate it directly into the flour using the large holes of a box grater. Those thin butter shards distribute evenly through the dough, creating hundreds of tiny layers that puff and separate in the air fryer. It's like having micro-layers of puff pastry without the three-day commitment. Work quickly so the butter stays cold — pop the bowl in the freezer for 5 minutes if your kitchen is warm.
Why Your Filling Should Be Room Temperature
Cold filling straight from the fridge will lower your dough temperature, leading to dense, tough pastry that never quite cooks through. Room temperature filling heats evenly with the dough, ensuring everything finishes at the same time. Take your filling ingredients out 30 minutes before assembly. If you forget (been there), microwave the diced ham for 15 seconds to take the chill off. This tiny step prevents the dreaded cold center that plagues amateur hot pocket makers.
Creative Twists and Variations
This recipe is a playground. Here are some of my favorite ways to switch things up:
The Breakfast Champion
Swap the ham for cooked breakfast sausage, add scrambled eggs, and use pepper jack cheese for a morning kick. A dash of hot sauce in the filling wakes up sleepy taste buds. These make ahead beautifully — wrap them in foil and reheat for 10 minutes while you brew coffee. Weekend mornings just got upgraded from sad cereal to handheld breakfast glory.
The Pizza Pocket Revelation
Pepperoni, mozzarella, and a spoonful of pizza sauce creates the after-school snack of champions. Add Italian herbs and a sprinkle of parmesan on top before air frying. The sauce keeps everything moist without making the dough soggy. Pro tip: use sliced pepperoni instead of chopped — it distributes better and you get perfect pepperoni distribution in every bite.
The Mediterranean Dream
Spinach, feta, sun-dried tomatoes, and a hint of lemon zest transports you straight to a Greek island. Make sure to squeeze excess moisture from the spinach or you'll get soggy bottoms. A touch of oregano and black pepper brings everything together. Vegetarian never tasted so indulgent, and your herbivore friends will think you're a kitchen wizard.
The Buffalo Wing Masterpiece
Shredded chicken tossed in buffalo sauce, blue cheese crumbles, and mozzarella create the ultimate game day snack. Add celery seeds for authentic wing flavor without the crunch. Serve with ranch or blue cheese dressing for dipping. Warning: these disappear faster than your team scores, so make a double batch if you actually want to eat some yourself.
The Thanksgiving Remix
Leftover turkey, stuffing, and cranberry sauce tucked inside makes the best day-after-Thanksgiving lunch. Add a touch of gravy to keep everything moist, and use leftover cheese from the charcuterie board. It's like Thanksgiving dinner wrapped in a flaky hug, and way better than another sad sandwich. My family now makes extra stuffing just for these pockets.
The Dessert Plot Twist
Who says hot pockets have to be savory? Fill with apple pie filling, cinnamon, and a cream cheese glaze for the most incredible handheld dessert. Sprinkle cinnamon sugar on top before air frying. Serve warm with vanilla ice cream for the ultimate comfort food mashup. Just when you thought this recipe couldn't get better, dessert happens.
Storing and Bringing It Back to Life
Fridge Storage
Cooked hot pockets keep for up to 4 days in the refrigerator, wrapped tightly in foil or stored in an airtight container. Don't refrigerate them while still warm — condensation creates soggy bottoms that no amount of reheating can fix. Let them cool completely first, then wrap individually for grab-and-go convenience. To reheat, air fry at 350°F for 5-6 minutes until hot and crispy again. The microwave works in a pinch, but you'll sacrifice that glorious crunch.
Freezer Friendly
These freeze beautifully either before or after cooking. For uncooked pockets, flash freeze them on a baking sheet for 2 hours, then transfer to freezer bags with parchment between layers. They'll keep for 3 months and cook straight from frozen — just add 3-4 extra minutes. Cooked pockets freeze for up to 2 months. Wrap each one in plastic wrap, then foil, and you've got instant gourmet snacks. Thaw overnight in the fridge for best results, or reheat from frozen at a lower temperature for longer.
Best Reheating Method
The air fryer remains the champion for reheating — 350°F for 5-6 minutes restores them to near-original glory. If you're reheating from frozen, start at 325°F for 8 minutes, then increase to 375°F for the final 2-3 minutes to crisp the exterior. A tiny splash of water in the bottom of the air fryer creates steam that helps reheat the filling without drying it out. For oven reheating, wrap in foil with a small ice cube (yes, really) — the steam keeps everything moist while the foil packet heats evenly.