I’m going to be brutally honest: the first time I tried to make a “garlic parmesan chicken” I ended up with a soggy mess that could have passed for a wet towel. I was standing in my kitchen, the timer buzzing like a frantic bee, and I realized I had completely missed the crucial moment when the crust should have turned golden‑brown and crackly. That disaster sparked a midnight dare with my roommate – “I bet you can’t make a chicken crust that shatters like thin ice and tastes like a cheesy dream.” I accepted, and after a few trial runs, a few burnt pieces, and a lot of taste‑testing, I finally nailed the version that makes my friends swear they’ve never tasted anything like it. This is the moment where the kitchen becomes a laboratory and the oven a portal to flavor heaven.
Picture this: the kitchen humming with the low thrum of the oven, the scent of garlic mingling with the nutty perfume of parmesan, and the sizzle of olive oil hitting a hot pan like a tiny fireworks show. You can hear the crust forming – a gentle crackle that promises a satisfying bite. The chicken itself is tender, moist, and almost buttery, while the crust is a crunchy, aromatic armor that refuses to wilt under a fork. When you finally cut into it, the steam rises, carrying the aroma of fresh parsley and a whisper of paprika that teases the nose before the first bite lands.
Why does this version stand out? Because it respects the simplicity of the ingredients while amplifying every single one with technique. Most recipes get the coating wrong – they either drown the chicken in a soggy breadcrumb swamp or leave it under‑seasoned, resulting in a bland, limp bite. I’ve discovered that a quick sear in a hot skillet locks in juices, and finishing the chicken in the oven lets the crust crisp to perfection without burning. The secret weapon? A splash of olive oil in the coating mixture that creates a glossy, golden finish, and a dash of paprika that adds a subtle heat without overpowering the garlic‑parmesan duet.
Okay, ready for the game‑changer? I’m about to walk you through every single step – from selecting the perfect chicken breast to the final garnish that makes this dish Instagram‑ready. By the end, you’ll wonder how you ever settled for a bland, ordinary chicken dinner. I dare you to taste this and not go back for seconds. Let’s dive in and create the best garlic parmesan crusted chicken you’ll ever make at home.
What Makes This Version Stand Out
- Flavor Explosion: The marriage of fresh garlic, sharp parmesan, and a hint of paprika creates a layered taste that evolves with every bite, making the palate dance.
- Texture Triumph: A crunchy, buttery crust that shatters like thin ice, while the interior stays juicy and tender – a contrast that keeps you hooked.
- Simplicity Meets Sophistication: Only nine ingredients, yet each plays a starring role; you won’t need a pantry full of exotic spices.
- Universal Appeal: Kids love the cheesy crunch, adults appreciate the depth of garlic and paprika – it’s a crowd‑pleaser for any occasion.
- Ingredient Quality: Using freshly grated parmesan and real garlic (not powder) makes a world of difference; the flavors are brighter and more authentic.
- Cooking Method Magic: The two‑step sear‑then‑bake technique guarantees a perfect crust without drying out the meat.
- Make‑Ahead Friendly: You can prep the coating and chicken ahead of time, store them separately, and finish the dish when you’re ready to eat.
- Versatile Base: The crust can be adapted for fish, pork, or even a hearty vegetable medley – it’s a culinary foundation.
Alright, let's break down exactly what goes into this masterpiece...
Inside the Ingredient List
The Flavor Base
Garlic is the hero here – three cloves, minced fine, release allicin that adds a pungent, aromatic backbone. If you ever skip the garlic, you’ll notice the crust feels flat, like a song missing its chorus. Freshly grated parmesan is another non‑negotiable; its sharp, nutty profile melts into the breadcrumbs, creating a cohesive, savory blanket. I recommend buying a small wedge and grating it yourself; pre‑grated cheese often contains anti‑caking agents that can interfere with the crust’s crispness.
The Texture Crew
Seasoned breadcrumbs provide the crunch, but the secret is to toast them lightly in a dry pan before mixing – this adds a subtle toasty depth that elevates the entire dish. The olive oil in the coating does more than add flavor; it creates a thin film that helps the breadcrumbs adhere and browns evenly, giving that golden‑brown finish you crave. If you’re out of olive oil, a neutral oil like canola works, but you’ll lose a bit of the fruity note that complements the garlic.
The Unexpected Star
Paprika is the surprise guest that adds a whisper of smoky warmth without overwhelming the palate. It’s optional, but trust me, that faint reddish hue and subtle heat make the dish feel more sophisticated. Fresh parsley isn’t just a garnish; its bright, herbaceous flavor cuts through the richness of the cheese and oil, balancing the dish. If parsley isn’t your thing, try fresh basil or even a pinch of dried oregano for a different Mediterranean twist.
The Final Flourish
Salt and pepper to taste are the final conductors of this flavor orchestra. They’re the invisible hands that bring everything together, so don’t be shy – season each side of the chicken before coating. The chicken breasts themselves are the canvas; choosing boneless, skinless pieces of about 1.5 lbs ensures even cooking and a tender bite. If the breasts are particularly thick, consider butter‑flying them to a uniform thickness of about ½ inch for consistent results.
Everything's prepped? Good. Let's get into the real action...
The Method — Step by Step
Preheat your oven to 400°F (200°C). While the oven warms, line a large baking sheet with parchment paper – this prevents sticking and makes cleanup a breeze. I like to set a timer for 5 minutes; that way I’m not constantly checking the oven, and the heat builds up evenly.
Pat the chicken breasts dry with paper towels. This may sound trivial, but moisture is the enemy of a crisp crust. Lightly season each side with a generous pinch of salt and freshly cracked black pepper. Power transition: Okay, ready for the game‑changer? This is where the flavor base meets the texture crew.
In a shallow dish, combine the seasoned breadcrumbs, grated parmesan, minced garlic, paprika, and chopped parsley. Toss everything together until the mixture is uniformly speckled with green and orange flecks. The aroma at this point is already intoxicating – you’re basically creating a dry rub that will become a crunchy masterpiece.
In another shallow bowl, pour the olive oil. Dip each chicken breast first into the oil, ensuring both sides are lightly coated – think of it as a quick shower for the meat. Then, press the chicken into the breadcrumb mixture, turning it over until a thick, even crust forms. The coating should cling like a second skin; if it slides off, give it another quick dip in the oil.
Heat a large skillet over medium‑high heat and add a drizzle of olive oil – just enough to coat the bottom. When the oil shimmers (you’ll see a faint ripple), carefully place the coated chicken breasts in the pan. Sear each side for 2‑3 minutes until the crust turns a deep golden‑brown, the kind of color that makes you want to shout “yes!” without waking the neighbors.
Transfer the seared chicken to the prepared baking sheet. Slide the sheet into the preheated oven and bake for 15‑20 minutes, or until the internal temperature reaches 165°F (74°C). The oven’s gentle heat finishes cooking the meat while the crust stays crisp – a perfect balance that most recipes miss.
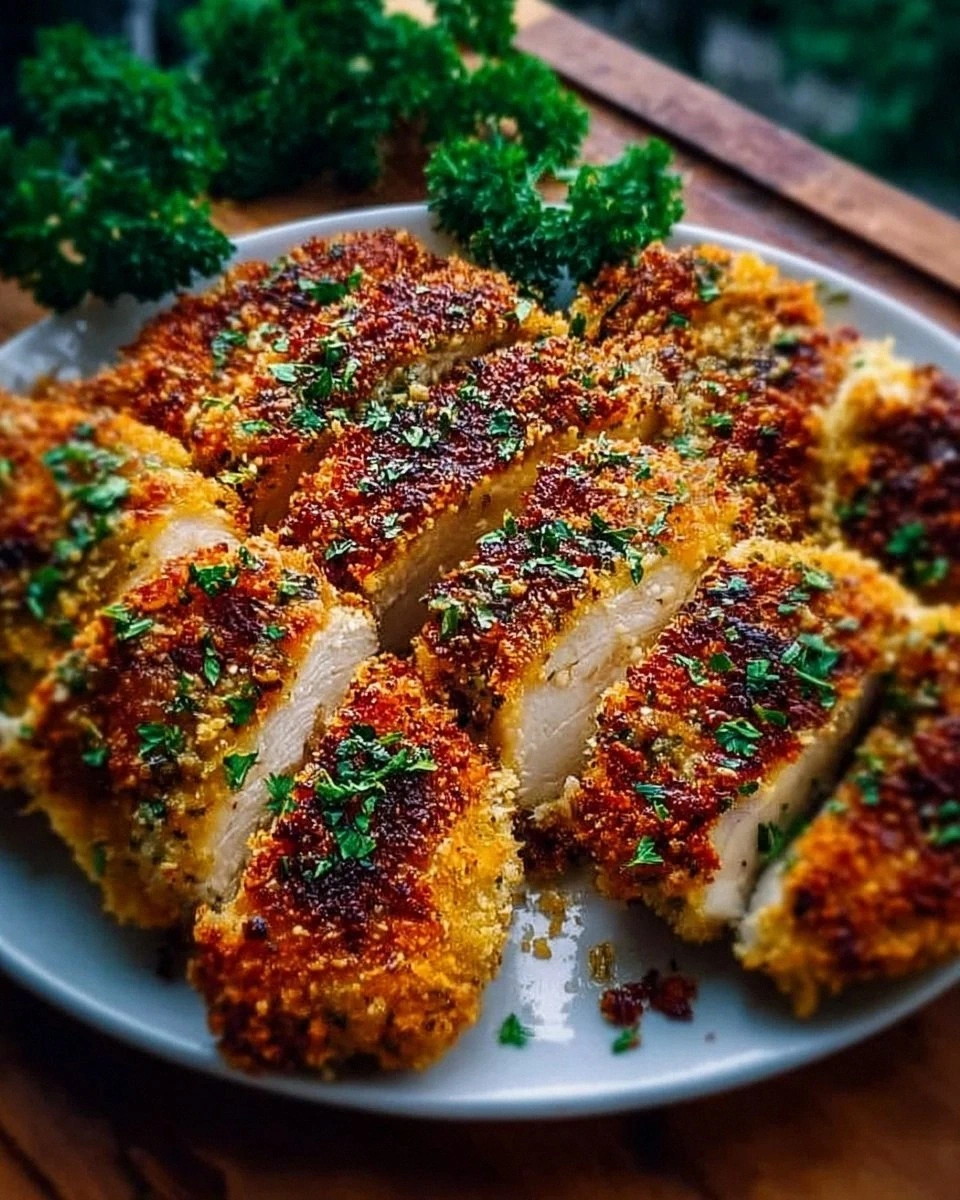
While the chicken rests, give the pan a quick deglaze with a splash of white wine or chicken broth, scraping up any browned bits – this creates a mini pan‑sauce that you can drizzle over the finished plates. Finally, slice the chicken, garnish with a sprinkle of fresh parsley, and serve hot. Picture yourself pulling this out of the oven, the whole kitchen smelling incredible, and the first bite delivering that satisfying crunch followed by juicy tenderness. This is hands down the best version you'll ever make at home.
That's it — you did it. But hold on, I've got a few more tricks that'll take this to another level...
Insider Tricks for Flawless Results
The Temperature Rule Nobody Follows
Never start with a cold pan. Let your skillet heat up for at least two minutes before adding oil. The oil should shimmer, not smoke – this ensures an immediate sizzle that locks the crust in place. I once tried to speed things up by adding the chicken to a lukewarm pan; the result was a pale, soggy coating that never crisped. Trust the heat, and the crust will reward you with that golden snap.
Why Your Nose Knows Best
The moment the crust starts to smell nutty and slightly toasty is your cue to flip. It’s a sensory checkpoint that’s more reliable than a timer. If you rely solely on the clock, you’ll either under‑cook (still pale) or over‑cook (bitter). Trust that aromatic cue – it’s like your kitchen’s built‑in alarm system.
The 5‑Minute Rest That Changes Everything
After the oven, let the chicken sit uncovered for five minutes. This short rest lets the crust firm up as steam escapes, preventing it from getting soggy. A friend tried to skip this step once and ended up with a crust that fell apart when sliced – a culinary tragedy. The rest also allows the juices to settle, making each bite juicier.
Breadcrumb Toasting Trick
Before mixing breadcrumbs with cheese and herbs, toast them lightly in a dry skillet for 3‑4 minutes. This adds a subtle caramelization that deepens the flavor profile. The toasted crumbs also stay crunchier after baking because they’ve already lost some moisture. It’s a tiny extra step that makes a massive difference in texture.
The “Double Dip” Secret
For an ultra‑crisp crust, dip the chicken in the oil, coat, then dip again quickly before the final breadcrumb press. This creates a thin adhesive layer that locks the crumbs in place, especially useful if you’re using a coarser breadcrumb. The result is a crust that stays intact even when you slice it thick.
Seasoning the Chicken Directly
Don’t rely on the crust alone for seasoning. Lightly salt the chicken before coating; this penetrates the meat and seasons it from the inside out. If you skip this, the outer crust may be perfectly seasoned while the interior tastes bland – a mismatch that ruins the overall experience.
Creative Twists and Variations
This recipe is a playground. Here are some of my favorite ways to switch things up:
Spicy Chili Garlic
Swap the paprika for ½ teaspoon of chili flakes and add a minced jalapeño to the breadcrumb mix. The heat pairs beautifully with the cheese, giving the dish a bold kick that’s perfect for a game‑day spread.
Herbaceous Basil Bliss
Replace parsley with fresh basil leaves, finely chopped, and add a teaspoon of lemon zest to the coating. The citrus‑herb combo brightens the flavor, making it ideal for spring evenings.
Italian Pan‑Seared
Add ¼ cup of finely grated pecorino romano and a pinch of dried oregano to the breadcrumb blend. Serve with a side of marinara for a quick chicken parm‑style dinner without the extra cheese melt.
Mediterranean Veggie Swap
Instead of chicken, use thick slices of eggplant or portobello mushrooms. The same crust works wonders, delivering a vegetarian main that’s hearty and satisfying.
Garlic‑Lemon Zing
Add the zest of one lemon and a tablespoon of lemon juice to the olive oil before dipping. The citrus lifts the garlic, creating a fresh, tangy profile that’s perfect for summer picnics.
Storing and Bringing It Back to Life
Fridge Storage
Place cooled chicken in an airtight container and store in the refrigerator for up to 3 days. To retain crispness, keep a paper towel on top of the chicken to absorb excess moisture.
Freezer Friendly
Wrap each piece tightly in plastic wrap, then place them in a zip‑top freezer bag. They’ll keep for up to 2 months. When you’re ready to eat, thaw overnight in the fridge and reheat using the method below.
Best Reheating Method
Preheat a skillet over medium heat, add a splash of water (just a teaspoon) and cover for 2 minutes to steam gently. Then uncover and let the crust re‑crisp for another 2‑3 minutes. The tiny splash of water creates steam that revives the interior moisture while the uncovered time restores the crunch.