I remember the night I tried to bake a “simple” red velvet cupcake for a midnight snack, only to end up with a batch that looked more like a soggy, colorless sludge than the luscious, glossy treat I’d seen on Pinterest. The batter was a thick, grayish paste that clung to the whisk like a stubborn ex. I laughed, blamed the flour, and decided to turn that disaster into a culinary triumph. That single failed attempt sparked a mission: to create a version so flawless it would make every other recipe look like a rookie’s homework.
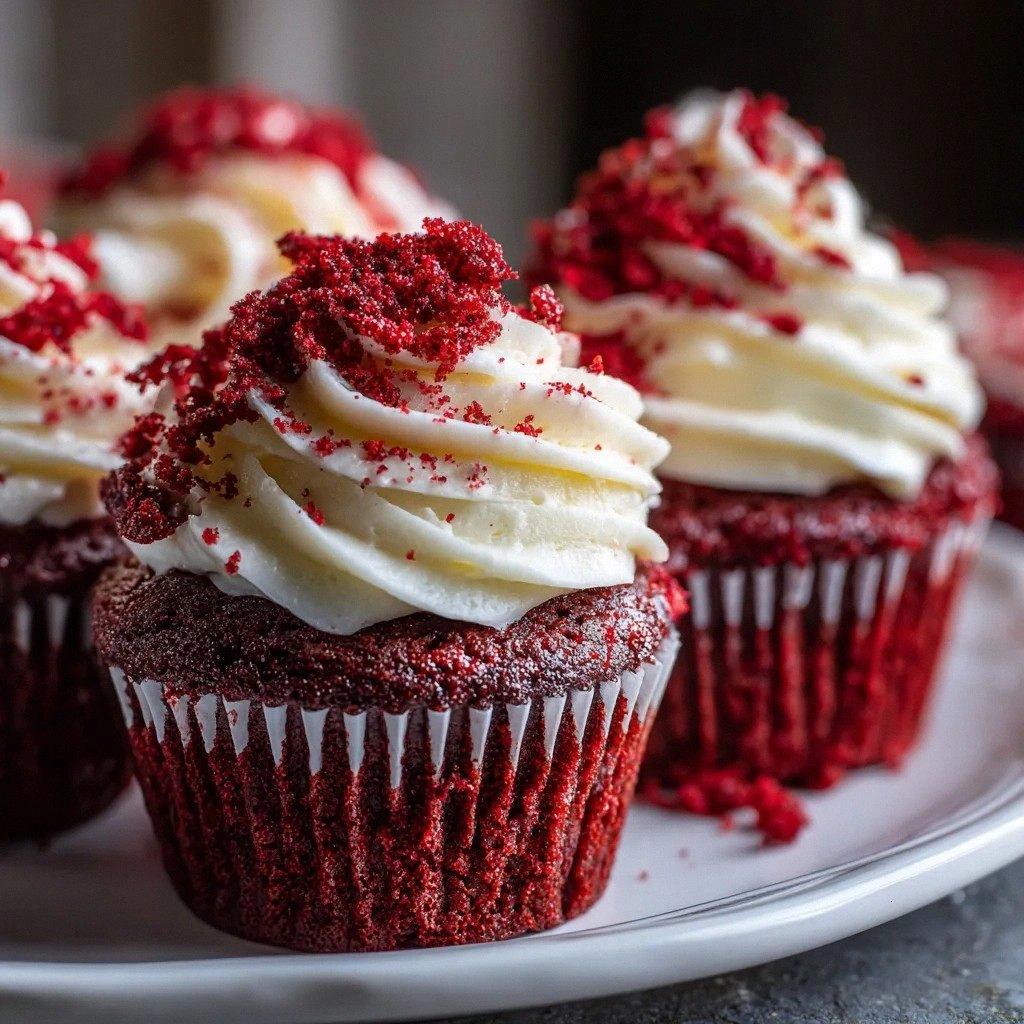
Picture this: the kitchen lights dim, the timer ticks, and the air fills with the sweet, buttery scent of vanilla mingling with a hint of cocoa. The batter glistens under the oven lamp, its crimson hue deepening as it bakes, and a faint crackle can be heard from the oven door as the cupcakes rise. When you lift the first one, its surface is smooth, almost glassy, with a faint sheen that invites a fork. The moment you bite, the crumb is airy, the flavor is a perfect balance of chocolate and tang, and the frosting melts into a silky, creamy finish that leaves you craving more.
What sets this version apart is not just the color or the frosting—though the bloody red is undeniably striking—but the meticulous balance of ingredients, the clever use of vinegar to activate the baking soda, and the subtle addition of buttermilk for that signature velvety texture. The recipe also eliminates common pitfalls like overmixing or underbaking, ensuring each cupcake rises evenly and stays moist. The result is a cupcake that feels like a piece of cake, yet delivers the depth of flavor that makes people line up for seconds. I dare you to taste this and not go back for seconds.
And there’s a twist you won’t expect: a splash of white vinegar that reacts with the baking soda to create tiny bubbles, giving the cupcakes a lightness that feels almost airy. This trick is the secret behind the perfect rise and the soft, pillowy interior that melts in your mouth. It’s a small detail, but it turns a good cupcake into an unforgettable treat. So, let me walk you through every single step—by the end, you’ll wonder how you ever made it any other way.
What Makes This Version Stand Out
- Flavor: The combination of unsweetened cocoa and buttermilk creates a deep chocolate base that’s balanced by a subtle tang, making each bite both rich and refreshing.
- Texture: The batter’s smooth consistency, achieved by whisking in the oil and buttermilk before adding dry ingredients, results in cupcakes that are tender, airy, and never dense.
- Visual Appeal: The vivid crimson color is achieved with natural red food coloring, and a splash of red gel on top gives a dramatic, almost macabre finish that’s perfect for Halloween or any themed party.
- Ease of Use: The recipe requires no special equipment—just a stand mixer or hand whisk—and every step is straightforward, even for beginners.
- Make‑Ahead Friendly: The cupcakes can be baked and frozen individually, then thawed and frosted just before serving, making them ideal for large gatherings.
- Ingredient Quality: Using high‑quality unsweetened cocoa and full‑fat cream cheese ensures a depth of flavor that cheap substitutes simply can’t match.
Inside the Ingredient List
The Flavor Base
All-purpose flour is the backbone of your cupcakes, giving them structure and a soft crumb. It’s the foundation that holds everything together, so choose a good-quality brand with a medium protein content for best results. If you prefer a gluten-free version, substitute with a 1:1 blend of gluten-free all-purpose flour and xanthan gum. Skipping the flour will leave your cupcakes flat and lifeless, lacking that satisfying rise.
The Texture Crew
Granulated sugar sweetens the batter while helping to create a tender crumb through the creaming method. Unsweetened cocoa powder adds a rich chocolate flavor that makes the red velvet truly special. Baking soda, paired with white vinegar, reacts to produce carbon dioxide, giving the cupcakes their fluffy rise. Salt, just a pinch, enhances all the flavors and balances the sweetness.
The Unexpected Star
Vegetable oil keeps the cupcakes moist and tender, unlike butter which can dry them out over time. Buttermilk adds a tangy flavor and helps create that velvety texture we love. Large eggs bind everything together, adding richness and structure to the batter. Red food coloring is the star of the show—it gives these cupcakes their signature bloody hue.
The Final Flourish
Vanilla extract adds warmth and depth to the flavor profile, complementing the cocoa and buttermilk. White vinegar is essential for the rise; it reacts with the baking soda to help the cupcakes expand. Cream cheese frosting is the perfect topping; its tanginess complements the sweetness of the cupcakes. Red gel food coloring gives that dramatic bloody effect on top, making your cupcakes extra spooky!
Everything's prepped? Good. Let's get into the real action...
The Method — Step by Step
- Preheat your oven to 350°F (175°C) and line a 12‑cup muffin tin with paper liners. This step is crucial to prevent sticking and to ensure even baking. Place the tin on the middle rack so the cupcakes have room to rise. The oven should be fully preheated before you slide the tin in—otherwise you risk a soggy bottom. As the oven warms, you’ll notice the air inside begins to hum with anticipation.
- In a large bowl, whisk together 2 cups of all-purpose flour, 1.5 cups of granulated sugar, 3/4 cup unsweetened cocoa powder, 1 teaspoon baking soda, and ½ teaspoon salt. Sift the dry ingredients to remove lumps and ensure a smooth batter. This dry mix is the foundation of your cupcakes; any unevenness will show in the final product. While you whisk, imagine the batter as a canvas waiting for its masterpiece.
- In a separate bowl, combine 1 cup vegetable oil, 1 cup buttermilk, 2 large eggs, 2 tablespoons red food coloring, 1 teaspoon vanilla extract, and 1 teaspoon white vinegar. Whisk until the mixture is glossy and the color is a deep crimson. The vinegar here is the secret agent that will trigger the rise. At this point, you can also add a splash of red gel food coloring for an extra dramatic splash—just a few drops.
- Slowly pour the wet mixture into the dry ingredients, mixing on low speed until just combined. Overmixing can develop gluten and result in dense cupcakes. Keep the batter smooth and glossy; it should look like a thick, silky liquid. This is the moment of truth—if you can’t see the batter’s sheen, you’re on the right track. Feel the batter’s weight; it should be light enough to fold into the flour without clumping.
- Fill each paper liner about two-thirds full with batter. The cupcakes should rise to the top without overflowing. As they bake, the edges will start pulling away from the liners, indicating they’re near done. Watch the timer closely; at 25 minutes, the cupcakes should be set but still slightly soft in the center. This is where precision matters—too early and they’re underbaked, too late and they’re dry.
- After 25 minutes, insert a toothpick into the center of a cupcake. If it comes out clean or with just a few moist crumbs, they’re done. Remove the tin from the oven and let the cupcakes cool in the tin for 5 minutes before transferring them to a wire rack to cool completely. Cooling is essential before frosting; otherwise the frosting will melt and run. While they cool, the cupcakes will set, giving that perfect crumb structure.
- While the cupcakes cool, prepare the cream cheese frosting: beat 8 oz cream cheese, 1/2 cup butter, 4 cups powdered sugar, 1 teaspoon vanilla, ½ teaspoon salt, and 2 tablespoons red gel food coloring until smooth and fluffy. The frosting should be light and airy, with a vibrant pink hue. Once the cupcakes are cool, pipe the frosting onto each cupcake using a piping bag or a plastic bag with a corner snipped. The contrast between the dark cupcakes and the bright frosting is the visual highlight of this dessert.
- Finally, drizzle a few drops of red gel food coloring over the frosting to create a bloody effect. This finishing touch turns the cupcakes into a spooky masterpiece that’s perfect for Halloween or any themed event. Let the frosting set for a few minutes before serving. Your cupcakes are now ready to impress—taste them and feel the magic.
That's it — you did it. But hold on, I've got a few more tricks that'll take this to another level...
Insider Tricks for Flawless Results
The Temperature Rule Nobody Follows
Many bakers bake cupcakes at 375°F, but this recipe calls for 350°F to prevent the edges from burning before the centers set. The lower temperature allows the cupcakes to rise evenly and develop a moist crumb. If you’re in a hurry, you can increase the temperature by 25°F, but you’ll need to reduce the baking time by 3–4 minutes. I once tried the higher temperature and the cupcakes came out with a dry top—lesson learned.
Why Your Nose Knows Best
As the cupcakes bake, you’ll smell a subtle, buttery aroma that signals the batter is set. This scent is a better indicator than the timer alone. If the smell is faint, give them a couple more minutes. Trusting your senses will save you from underbaking or overbaking.
The 5‑Minute Rest That Changes Everything
After removing the cupcakes from the oven, let them rest in the tin for exactly five minutes before moving them to the wire rack. This pause allows the steam to redistribute, preventing the cupcakes from collapsing. Skipping this step can lead to a sunken center. I’ve seen cupcakes that look perfect on the tin but collapse once they hit the rack.
Frosting the Right Way
Use a piping bag with a round tip to create a classic swirl. If you prefer a more rustic look, a plastic bag with a small corner cut works well. Keep the frosting chilled until you’re ready to pipe to maintain its consistency. A warm frosting will spread and lose its shape.
Avoiding Clumpy Batter
Sift the dry ingredients before combining them with the wet mixture. This removes any lumps of cocoa or flour that could make the batter uneven. I once poured the batter directly into the tin and the cupcakes had a gritty texture—never again. A smooth batter is essential for that silky crumb.
Storing Tips for Freshness
If you need to store cupcakes, keep them in an airtight container at room temperature for up to 3 days. For longer storage, freeze them in a freezer-safe bag, and thaw at room temperature before frosting. Adding a splash of water before reheating restores moisture and keeps the cupcakes from drying out.
Creative Twists and Variations
This recipe is a playground. Here are some of my favorite ways to switch things up:
Cranberry‑Spiced Red Velvet
Add 1 cup of dried cranberries to the batter and a pinch of ground cinnamon for a tart, autumnal twist. The cranberries add a burst of flavor and a pop of color. This variation is perfect for Thanksgiving or a cozy fall gathering.
Chocolate‑Covered Blood‑Red
Dip the frosted cupcakes in melted dark chocolate and drizzle with a thin line of red food coloring for a decadent look. The chocolate coating adds a glossy sheen and a rich, bittersweet flavor. Great for a chocolate lover’s Halloween party.
Vegan Blood‑Red
Replace the butter in the frosting with coconut oil and use a dairy‑free cream cheese alternative. Swap the eggs for flaxseed eggs or a commercial egg replacer. This vegan version retains the same moistness and color while being plant‑based.
Red Velvet Cupcakes with Espresso
Add 2 tablespoons of instant espresso powder to the dry mix for a subtle coffee undertone that pairs beautifully with the chocolate. The espresso intensifies the cocoa flavor without making the cupcakes taste like coffee. Ideal for coffee lovers who want a twist on the classic.
Miniature Blood‑Red Cake Pops
Turn the cupcakes into cake pops by crushing them, mixing with frosting, and shaping into balls. Dip them in white chocolate and drizzle with red gel food coloring. These cake pops are fun, portable, and perfect for parties.
Red Velvet with a Mint Twist
Add 1 teaspoon of peppermint extract to the frosting for a cooling, minty finish. The mint contrasts with the rich chocolate, creating a refreshing palate cleanser. This variation is especially nice for summer gatherings.
Storing and Bringing It Back to Life
Fridge Storage
Keep the cupcakes in an airtight container at room temperature for up to 3 days. If you plan to serve them later, store them in the refrigerator for up to 5 days, but bring them to room temperature before frosting to avoid a soggy crumb. This method preserves freshness without compromising texture.
Freezer Friendly
Wrap each cupcake tightly in plastic wrap, then place them in a freezer‑safe bag. They can be frozen for up to 2 months. When ready to serve, thaw at room temperature for 30 minutes. This process keeps the cupcakes moist and ready for a last‑minute batch.
Best Reheating Method
If you need to warm the cupcakes, place them on a baking sheet and heat at 300°F (150°C) for 5 minutes. Add a tiny splash of water before reheating to create steam and keep the cupcakes from drying out. This technique restores the original moisture and texture, making them feel freshly baked.