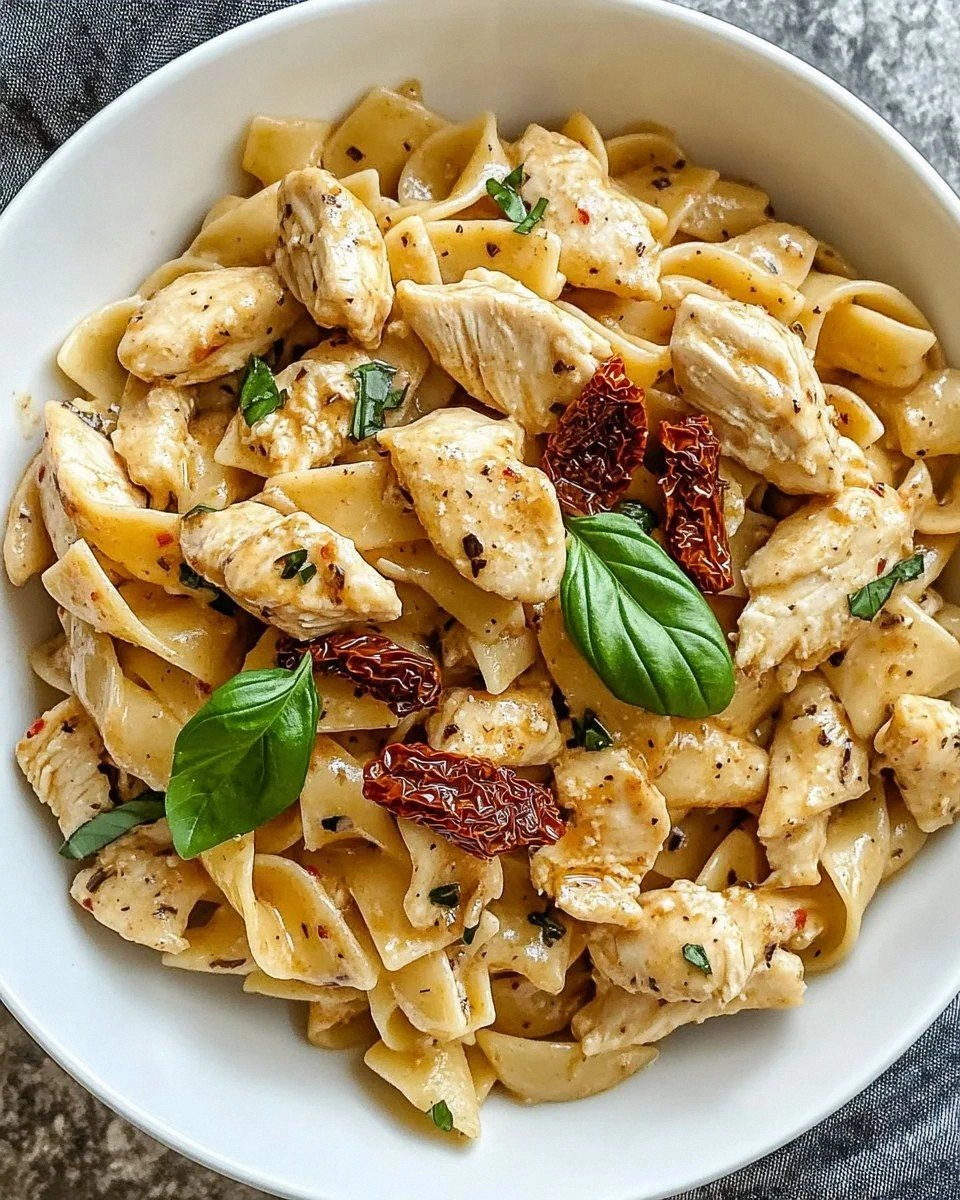
I still remember the night I tried to make a cheesecake that would make my friends gasp louder than a popcorn machine at a movie theater. The kitchen was a battlefield: melted butter splattered across the counter, a half‑sliced apple rolled like a rogue snowball, and the oven timer chimed at a frantic 30 minutes. My friends begged me to add something more, something that would turn the ordinary into a headline-worthy dessert. I swore I’d find that extra spark, that one ingredient or technique that would make this apple‑infused cheesecake a legend. And I did.
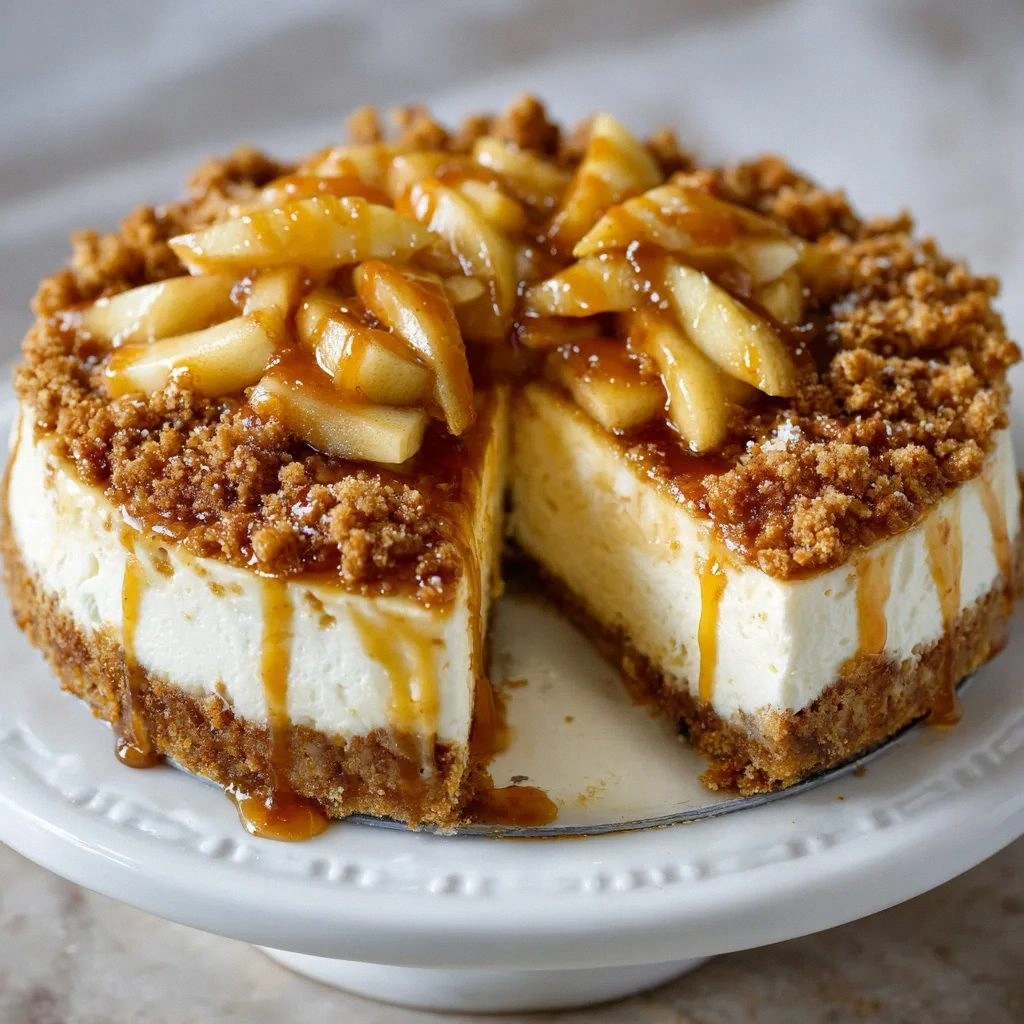
Picture this: the first bite is a velvety, tangy cream cheese base, the second is a burst of sweet, caramelized apples, and the third is a crunch that sings like a choir of toasted oats. The aroma that fills the kitchen is a warm, buttery scent with a hint of cinnamon, like a cozy blanket wrapped around your senses. The sound? That satisfying sizzle when the apples hit the pan, a gentle crackle of the oat topping as it browns to perfection. The texture is a harmonious blend of smooth, creamy filling and a crisp, caramelized layer that crackles when you bite into it. It’s a sensory symphony that makes you forget the chaos of the kitchen.
What sets this version apart is not just the ingredients; it’s the method. I used a graham cracker crust that’s buttery and crunchy, a filling that’s thick yet airy, and an apple layer that’s sweet, spiced, and caramelized. The secret is in the timing: letting the apples caramelize in a pan before folding them into the batter, and then baking the cheesecake at a low temperature to keep that silky texture. The result is a dessert that feels like a hug in a slice, a comforting yet indulgent treat that’s perfect for any occasion. I dare you to taste this and not go back for seconds.
I’ve experimented with countless cheesecake variations, but most recipes get this completely wrong. They either overcook the filling, under‑season the apples, or use a crust that’s either too bland or too sweet. I’ve learned that the key lies in balance: a crust that supports but doesn’t overpower, a filling that’s creamy but not too dense, and an apple layer that’s sweet but not mushy. The result is a dessert that’s both comforting and exciting, a dessert that’s hands down the best version you’ll ever make at home. If you’ve ever struggled with a cheesecake that turns out too dense or too watery, you’re not alone — and I’ve got the fix.
This recipe is a playground, a place where you can experiment with variations, add your own twist, or just enjoy it as is. Picture yourself pulling this out of the oven, the whole kitchen smelling incredible, and the first slice melting on your tongue like a warm caramel drizzle. The anticipation is palpable, the excitement electric. The moment you cut into it, the apple crisp topping gives way to a creamy interior that feels like a cloud. This is the dessert that turns a simple gathering into a memorable celebration.
Okay, ready for the game‑changer? Let me walk you through every single step — by the end, you’ll wonder how you ever made it any other way. The journey starts with the crust, moves through the filling, then the apple layer, and culminates in a baked masterpiece that’s as stunning to look at as it is to taste. Stay with me here — this is worth it.
What Makes This Version Stand Out
- Flavor: The combination of tangy cream cheese, sweet apples, and a buttery crust creates a flavor profile that feels like autumn in every bite.
- Texture: Smooth, airy filling meets a caramelized apple layer and a crunchy oat topping, delivering a multi‑sensory experience.
- Ease: The method is straightforward, with no complicated steps or advanced techniques, making it accessible for both beginners and seasoned bakers.
- Versatility: The base can be customized with nuts, different spices, or even a splash of bourbon for a grown‑up twist.
- Make‑ahead: This cheesecake can be assembled and refrigerated for up to 48 hours, letting flavors meld while you’re busy with other tasks.
- Presentation: The golden, caramelized topping makes it Instagram‑ready, while the creamy interior feels like a cozy hug.
- Ingredient Quality: Using high‑quality cream cheese and fresh apples ensures that each bite is rich and flavorful.
- Time Efficiency: With a prep time of 15 minutes and a bake time of 30 minutes, you get a decadent dessert without a long wait.
Alright, let's break down exactly what goes into this masterpiece…
Inside the Ingredient List
The Flavor Base
The graham cracker crumbs form the backbone of this cheesecake. They give a subtle sweetness and a crunchy texture that anchors the creamy filling. If you skip them, you’ll lose that essential contrast between the soft interior and the firm foundation. For the best results, toast the crumbs lightly before mixing them with butter; this brings out a deeper, nutty flavor that pairs beautifully with apples.
The unsalted butter is the binding agent that turns loose crumbs into a cohesive crust. It adds richness and a buttery aroma that lingers in every bite. Using melted butter allows for even distribution, preventing the crust from becoming dry or crumbly. If you prefer a dairy‑free version, try coconut oil; just keep an eye on the texture, as it behaves slightly differently when cooled.
The Texture Crew
Cream cheese is the star of the show, providing that silky, tangy base that defines any great cheesecake. It’s crucial to let the cream cheese reach room temperature before mixing, ensuring a smooth batter free of lumps. If you use a lower fat cream cheese, the cheesecake may turn out denser, but the flavor will remain bright and fresh.
Granulated sugar balances the tanginess of the cream cheese and caramelizes slightly on the top, adding a subtle crunch. Granulated sugar also helps the filling set properly by reducing excess moisture. If you prefer a sweeter dessert, add an extra tablespoon, but be careful not to overdo it or the cheesecake will become too sweet.
The Unexpected Star
Apples are the unexpected star that transforms this cheesecake into a seasonal delight. Choose a firm variety like Honeycrisp or Granny Smith for a tartness that cuts through the richness. Slice them thinly to ensure even caramelization and to avoid a soggy topping. If you’re in a pinch, frozen apples work fine—just thaw and drain them before adding.
Brown sugar adds depth to the apple layer, giving it a caramel flavor that complements the vanilla and cinnamon. It also helps the apples achieve that golden, crisp edge. If you’re watching calories, you can reduce the brown sugar to half a cup and add a splash of maple syrup for sweetness.
The Final Flourish
Rolled oats and all‑purpose flour create the crunchy topping that’s the cherry on top of this dessert. The oats provide chewiness while the flour binds the mixture, preventing it from falling apart. If you’re gluten‑free, substitute oat flour for the all‑purpose flour, but keep in mind the texture will be slightly different.
Chopped nuts, such as walnuts or pecans, add an extra layer of crunch and a nutty flavor that pairs wonderfully with apples. They’re optional, but they elevate the dessert, especially for guests who love a bit of texture. If you’re avoiding nuts, a sprinkle of toasted coconut flakes works beautifully as a nut‑free alternative.
Everything's prepped? Good. Let's get into the real action…
The Method — Step by Step
- Preheat the oven and prepare the crust. Heat your oven to 325°F (165°C). In a medium bowl, combine 1 ½ cups graham cracker crumbs with ½ cup melted butter. Press the mixture firmly into a 9‑inch springform pan, ensuring even coverage. Chill for 10 minutes while you prepare the filling. This step is crucial for a sturdy base that won’t crumble.
- Mix the cream cheese batter. In a large bowl, beat 3 cups (24 oz) of room‑temperature cream cheese until smooth. Add 1 cup granulated sugar and 2 teaspoons vanilla extract, then continue beating until the mixture is silky. Crack in 4 large eggs, one at a time, letting each incorporate fully before adding the next. The result should be a thick, glossy batter that’s ready to fold in the apples.
- Caramelize the apples. While the batter chills, heat a skillet over medium heat. Add 3 cups sliced apples, ½ cup brown sugar, 1 teaspoon cinnamon, and a splash of water. Sauté for 5–7 minutes until the apples soften and the sugar dissolves into a glossy glaze. The aroma of caramelized fruit will fill your kitchen, and that scent is pure magic.
- Combine apples with the batter. Gently fold the caramelized apple mixture into the cream cheese batter, ensuring even distribution. The apples should be fully coated, but be careful not to overmix, as this can cause the batter to become too loose. This step is where the flavors truly unite.
- Prepare the topping. In a separate bowl, combine 1 cup rolled oats, ¼ cup all‑purpose flour, ½ cup brown sugar, ½ cup melted butter, 1 teaspoon cinnamon, and ½ cup chopped nuts (optional). Mix until the mixture resembles coarse crumbs. This topping will crisp up beautifully during baking, adding a delightful crunch.
- Assemble the cheesecake. Pour the apple‑cream mixture over the chilled crust, smoothing the top with a spatula. Sprinkle the oat topping evenly across the surface. Press the topping down lightly to ensure it sticks. The batter should be slightly above the crust level, creating a layered effect.
- Bake with precision. Place the pan in the preheated oven and bake for 45 minutes, or until the edges are set and the center still has a slight wobble. Avoid overbaking, as this will make the filling dry. The watch-out moment: keep an eye on the top; if it browns too quickly, tent it with foil.
- Cool and chill. Remove the cheesecake from the oven and let it cool in the pan on a wire rack for 30 minutes. Once cooled, cover with plastic wrap and refrigerate for at least 4 hours, preferably overnight. This resting period allows the flavors to meld and the texture to set.
- Serve with flair. Release the cheesecake from the springform pan, slice with a clean, warm knife, and serve. A drizzle of caramel sauce or a dusting of powdered sugar adds a finishing touch. The first bite should be silky, followed by a burst of caramelized apples, and ending with a crunchy oat topping.
- Enjoy the moment. As you savor each slice, remember the journey that led to this dessert. The careful timing, the balanced flavors, and the humble ingredients all combine to create a masterpiece that feels like a warm hug in a slice.
That's it — you did it. But hold on, I've got a few more tricks that'll take this to another level…
Insider Tricks for Flawless Results
The Temperature Rule Nobody Follows
Many bakers bake cheesecakes at 350°F, but this recipe thrives at 325°F. The lower temperature ensures a gentle rise, preventing cracks and preserving that silky texture. If you’re using a convection oven, reduce the temperature by 25°F and keep an eye on the center; it should still have a slight wobble before setting.
Why Your Nose Knows Best
Before you open the oven, pause and inhale the aroma of the caramelized apples. A sweet, buttery scent signals that the apples are perfectly cooked and ready to fold. If the smell is too sugary, let the apples cook a bit longer; if it’s too tart, add a touch more brown sugar.
The 5‑Minute Rest That Changes Everything
Once the cheesecake is out of the oven, let it sit for 5 minutes before covering it. This brief rest allows the heat to distribute evenly, preventing the surface from becoming too hot and causing cracks. It also gives you a moment to admire the golden crust before you chill it.
The Crumb‑Topping Trick
If you want a crunchier topping, sprinkle a tablespoon of extra brown sugar over the oat mixture before baking. The sugar caramelizes, giving the topping a delightful crunch and a caramelized flavor that complements the apples.
The Chill‑and‑Slice Method
When you’re ready to serve, let the cheesecake sit at room temperature for 10 minutes before slicing. This small step ensures the knife glides through the batter smoothly, giving clean, crisp slices. It also prevents the cheesecake from sticking to the knife.
The No‑Crack Secret
If you’re prone to cracks, add a tablespoon of cornstarch to the batter. It helps stabilize the filling, giving you a flawless surface. This trick is especially useful in humid climates where moisture can affect the cheesecake’s texture.
Creative Twists and Variations
This recipe is a playground. Here are some of my favorite ways to switch things up:
Apple Pie Cheesecake
Add a dash of nutmeg and a splash of apple cider to the apple mixture. This gives the dessert a deeper pie‑like flavor that’s reminiscent of a classic apple pie.
Caramel Apple Cheesecake
Fold in a tablespoon of caramel sauce into the batter before baking. The caramel infuses the cheesecake with a sweet, buttery taste that pairs beautifully with the apples.
Nutty Crunch Cheesecake
Replace the optional nuts with a mixture of toasted almonds and pistachios. The nutty crunch adds a new layer of texture and a subtle, buttery flavor.
Boozy Apple Cheesecake
Add 2 tablespoons of bourbon or apple brandy to the batter. The alcohol adds warmth and complexity, making this dessert perfect for a fall gathering.
Vegan Apple Cheesecake
Use a vegan cream cheese substitute and coconut oil for the butter. The texture will be slightly different, but the flavor remains indulgent and comforting.
Spiced Apple Cheesecake
Introduce a pinch of cloves and allspice to the apple mixture. The spices add depth and a warm, aromatic profile that makes the dessert feel cozy and inviting.
Storing and Bringing It Back to Life
Fridge Storage
Wrap the cheesecake tightly in plastic wrap and store it in the refrigerator for up to 4 days. The cool temperature keeps the filling firm and the topping crisp. When ready to serve, let it sit at room temperature for 10 minutes to soften slightly.
Freezer Friendly
To freeze, wrap the cheesecake in multiple layers of plastic wrap followed by aluminum foil. It can be stored in the freezer for up to 2 months. Thaw overnight in the refrigerator before serving.
Best Reheating Method
For a warm slice, preheat the oven to 300°F (150°C) and bake the cheesecake for 10 minutes. If you’re reheating a whole slice, wrap it in foil to prevent the crust from becoming soggy. Add a tiny splash of water before reheating; it steams back to perfection, restoring moisture to the filling.