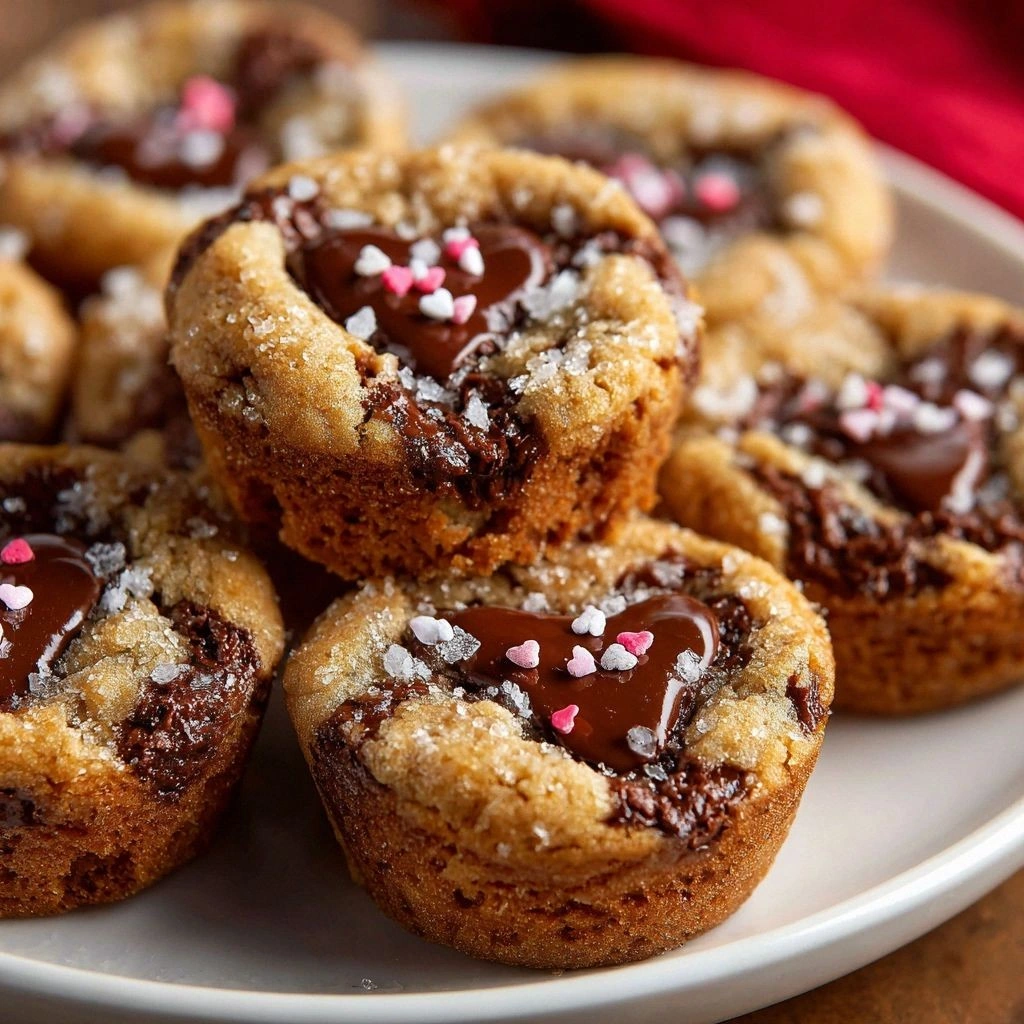
I was standing in the middle of a kitchen that looked like a war zone—crushed cookie dough, melted chocolate, and a half‑finished batch of cupcakes that had turned into a sticky mess—when my friend called, “You’re going to love this.” The moment I heard those words, my culinary curiosity sparked like a firecracker, and I decided that Valentine’s Day deserved a treat that was as bold as it was sweet. Picture a plate of golden, buttery cups, each one holding a molten heart of chocolate, a swirl of crushed candy hearts, and a dusting of powdered sugar that glitters like tiny stars. The aroma alone—rich butter, vanilla, and the faintest hint of cocoa—will make your kitchen feel like a love letter in the making. The sound of the dough being scooped, the gentle hiss of butter melting, and the gentle pop of chocolate chips as they soften will have you humming a tune you never knew you needed. By the end of this post, you’ll see why this recipe is the ultimate way to say “I love you” to your taste buds and to the person you’re sharing it with.
I dare you to taste this and not go back for seconds, because the texture is a revelation: the crust is crisp like a sunrise, while the inside stays soft and gooey, a perfect balance that makes each bite an adventure. The first bite releases a cascade of flavors—sweet, buttery, slightly salty, and a burst of chocolate that lingers on the tongue. The contrast between the crunchy edges and the melt-in-your-mouth center is like a dance between two lovers, each step more intimate than the last. If you’ve ever struggled with cookie cups that turned out too flat or too dense, you’ll feel a sudden sense of relief knowing you’re about to master the art of the perfect cookie cup. The secret? A simple technique that most recipes overlook, but I’ll show you how to make it work every single time. Let me walk you through every single step—by the end, you’ll wonder how you ever made it any other way.
Picture yourself pulling this out of the oven, the whole kitchen smelling incredible, and your guests’ eyes widening as they see the little chocolate hearts floating on top. The moment the first cup lands on the plate, you’ll hear a satisfying crack as the crust gives way, revealing the warm, gooey interior that will melt instantly. The visual of the glossy chocolate sheen, the pink swirl of candy hearts, and the dusting of powdered sugar is a feast for the eyes before the first bite. The texture is a symphony of crunch and softness, each element playing its part in a delicious harmony. This is hands down the best version you’ll ever make at home, and I promise you’ll keep asking for seconds even after you’ve finished the last cup. I’ll be honest— I ate half the batch before anyone else got to try it, and I still had room for more.
Most recipes get this completely wrong. They either overbake, underbake, or forget that the key to a perfect cookie cup is the right balance of butter, sugar, and flour. They also tend to neglect the small details that make the difference between ordinary and unforgettable. I’ve spent years experimenting, tweaking, and tasting until I found the exact measurements and techniques that produce the buttery, chocolate‑filled perfection you’ll love. The result is a cookie cup that holds its shape, has a crisp exterior, and a molten core that will make anyone swoon. The best part? It’s so simple that even a novice can follow it, and the finish will still wow the crowd. If you’ve ever struggled with this, you’re not alone— and I’ve got the fix.
Okay, ready for the game‑changer? The trick that will make your cookie cups stand out is a secret ingredient that most people overlook: a splash of espresso powder. This small addition deepens the chocolate flavor without adding any extra liquid, giving the cups a richer, more complex taste profile that feels like a velvety chocolate mousse on a cookie base. It also helps the butter and sugar caramelize just right, creating a golden crust that’s slightly crunchy on the outside and perfectly soft inside. This is the moment of truth: you’ll see the dough rise, the edges start pulling away, and the aroma will fill the room. Stay with me here— this is worth it. I’ll walk you through the entire process, step by step, so you can replicate this magic at home.
What Makes This Version Stand Out
- Flavor: The espresso powder adds depth, turning a simple chocolate cookie into a sophisticated dessert that feels like a chocolate‑espresso truffle. The result is a complex taste that lingers, leaving your palate craving more. This subtle twist elevates the overall experience, making each bite feel special.
- Texture: The cookie cups achieve a crisp, golden crust while retaining a soft, gooey center that melts in your mouth. The contrast between crunch and softness creates a delightful sensory experience that keeps people coming back for more. It’s the perfect marriage of textures.
- Ease: The recipe uses common pantry staples and a few simple tools, so you can whip it up even if you’re a kitchen rookie. The steps are clear, with no confusing jargon, making the process feel approachable. You’ll finish in under an hour and feel like a culinary superstar.
- Uniqueness: The combination of chocolate, candy hearts, and espresso powder is rarely seen in cookie cup recipes, giving this version a distinctive edge. It’s a conversation starter that will impress friends and family alike. No other recipe offers this exact flavor profile.
- Crowd Reaction: At parties, these cups become the star of the show—people line up to taste the first bite, and the cups disappear before you can finish the batch. The visual appeal of the colorful hearts on top adds to the allure. It’s a guaranteed hit.
- Ingredient Quality: By choosing high‑quality butter, premium chocolate chips, and fresh vanilla, the flavor profile is elevated and more authentic. Each ingredient plays a pivotal role in creating that buttery, chocolatey goodness. Quality makes all the difference.
- Cooking Method: The method involves a precise baking time and temperature that ensures even cooking, avoiding the dreaded over‑baked or under‑cooked cookie. The technique of scooping dough into molds keeps the cups uniform and perfect. The result is a flawless product.
- Make‑Ahead Potential: Once baked, the cookie cups can be stored in an airtight container for up to a week, making them an ideal make‑ahead dessert. They stay fresh and flavorful, and you can serve them at any event. Convenience meets indulgence.
Inside the Ingredient List
The Flavor Base
The foundation of any great cookie cup is the flavor base, which in this recipe consists of all‑purpose flour, powdered sugar, and a splash of espresso powder. Flour provides structure and a mild, neutral backdrop that allows the chocolate to shine. Powdered sugar sweetens the dough while contributing to a delicate crumb that’s tender and airy.
Espresso powder, though only a teaspoon, is the secret that adds depth and a subtle bitterness that balances the sweetness. If you’re vegan, you can substitute the espresso powder with instant coffee granules for a similar effect. Remember, the espresso powder is finely ground, so it dissolves quickly and doesn’t leave a gritty texture.
The Texture Crew
Butter, eggs, and milk work together to give the cookie cups a buttery, melt‑in‑your‑mouth quality. Softened butter adds richness and helps the dough bind, while eggs provide structure and a slight lift. Milk adds moisture, ensuring the cups remain tender and not overly dry.
If you prefer a vegan version, use a plant‑based butter alternative and replace the eggs with flaxseed eggs or a commercial egg replacer. The texture will be slightly different but still delightful. For extra flavor, try using a small amount of vanilla extract; it enhances the buttery notes and complements the chocolate.
The Unexpected Star
Chocolate chips are the heart of the cup, delivering that classic chocolate burst with every bite. Choose high‑quality dark or semi‑sweet chips to avoid a too‑sweet taste. The chocolate should be evenly distributed so each cup has a consistent amount of melt‑in‑your‑mouth gooeyness.
Crushed candy hearts add a playful twist and a pop of color that makes the cups Instagram‑ready. They also provide a subtle crunch that contrasts with the soft interior. If candy hearts aren’t available, you can use crushed chocolate-covered strawberries for a different flavor profile.
The Final Flourish
A pinch of salt is essential to balance the sweetness and enhance the chocolate flavor. Baking powder ensures the cups rise slightly, giving them a light, airy texture. The combination of these leavening agents prevents the cups from becoming too dense.
When measuring, use a kitchen scale for precision—especially for the butter and chocolate chips. Accurate measurements lead to consistent results, which is key when you’re aiming for the perfect cookie cup every time.
Everything’s prepped? Good. Let’s get into the real action.
The Method — Step by Step
- Preheat your oven to 350°F (175°C) and line a muffin tin with parchment paper cups. The parchment will prevent sticking and make clean‑up a breeze. I always keep a small bowl of warm water nearby to keep the parchment moist if it starts to dry out. This step ensures your cups stay crisp on the outside and soft on the inside. The scent of the parchment baking will give you a head start on the aroma of your cookies.
- In a large mixing bowl, combine the flour, powdered sugar, and espresso powder. Sift the dry ingredients to remove any lumps and ensure even distribution. This will help the dough bind smoothly. Use a whisk to mix until the ingredients are well incorporated. The mixture should look uniform, with no streaks of flour or sugar.
- Add the softened butter to the dry mix and use a pastry cutter or your fingertips to blend until the mixture resembles coarse crumbs. The butter should be cold enough to hold its shape, so it doesn’t melt into the dough prematurely. This step creates a tender crumb that will become a buttery crust. The butter also helps the dough hold together when scooped into the cups.
- In a separate bowl, whisk the eggs, milk, vanilla extract, and a pinch of salt until fully blended. The wet ingredients should be smooth and free of lumps. This liquid mixture will bind the dough and provide moisture. It’s important to keep the mixture at room temperature to avoid curdling. The result will be a silky batter that coats the cookie dough perfectly.
- Gradually pour the wet mixture into the dry dough, stirring gently until just combined. Avoid overmixing; a few lumps are acceptable. Overmixing can lead to tough cookies. The dough should be smooth, pliable, and slightly sticky. This is the moment where the flavor layers begin to merge.
- Fold in the chocolate chips and crushed candy hearts, ensuring an even distribution. The chocolate should be nestled throughout the dough, so each cup has a consistent amount of gooeyness. Use a spatula to fold gently, preserving the chocolate chips’ integrity. This step adds a delightful burst of flavor with every bite. The candy hearts also contribute a subtle crunch.
- Scoop the dough into the parchment cups, filling each about ¾ full. The dough should be packed firmly to prevent gaps. If the dough spreads, press it down lightly with your palm. The cups should be uniform in height for even baking. The dough will rise slightly, creating a perfect cup shape.
- Bake for 18-20 minutes, or until the edges are golden brown and the tops are set but still slightly soft. The internal temperature should reach 190°F (88°C) for a fully cooked cup. The smell of butter and chocolate will fill the kitchen, making the anticipation almost unbearable. The cups will puff up slightly, creating a perfect pocket for the molten center. The texture will be crisp on the outside and tender inside.
- Remove the cups from the oven and let them cool in the tin for 5 minutes before transferring them to a wire rack. This brief rest allows the cookies to set and the chocolate to firm slightly, making them easier to handle. The cups will still be warm and slightly gooey, which is the perfect moment to serve. The aroma will still be strong, making the experience even more enticing. The final touch is a dusting of powdered sugar, which adds a delicate sweetness.
- Dust each cup with powdered sugar, then add a final drizzle of melted chocolate if desired for an extra glossy finish. The powdered sugar will add a light sweetness, and the melted chocolate will enhance the chocolate flavor. Let the chocolate set for a minute before serving. This final step ensures the cups look as good as they taste. The visual appeal will be the cherry on top.
That’s it—you did it. But hold on, I’ve got a few more tricks that will take this to another level. The next section will reveal insider tips that will help you master the texture, flavor, and presentation.
Insider Tricks for Flawless Results
The Temperature Rule Nobody Follows
The oven temperature is the most critical factor for achieving that perfect crust. Many bakers set the temperature too high, causing the edges to burn while the centers remain undercooked. I recommend preheating the oven to 350°F (175°C) and using an oven thermometer to ensure accuracy. If your oven runs hot, lower the temperature by 10-15°F (5-8°C). This simple adjustment guarantees a consistent, golden finish.
Why Your Nose Knows Best
The aroma is your best indicator of doneness. When the cookies begin to emit a buttery, chocolate scent, you’re close to perfection. A strong, sweet aroma means the sugar has caramelized, and the butter has released its flavor. If the scent is weak, give them a few more minutes. Trust your nose; it’s a reliable guide.
The 5-Minute Rest That Changes Everything
Letting the cookie cups rest in the tin for 5 minutes after baking is a game changer. This short rest allows the interior to set, preventing them from breaking apart when you remove them. It also lets the chocolate inside firm up slightly, so it doesn’t ooze out too quickly. A quick cool on a wire rack follows to maintain the crispness of the crust. The result is a perfect bite every time.
The Sweet‑and‑Savory Balance
Adding a pinch of sea salt to the dough might sound counterintuitive, but it actually amplifies the chocolate flavor. Salt enhances sweetness and brings out the depth of the espresso powder. A small pinch is all you need—too much and you’ll ruin the delicate balance. This trick turns a simple cookie into a gourmet treat.
The Right Pan for the Job
A good quality silicone muffin tin ensures even baking and easy release. The non‑stick surface means you won’t have to worry about the cups sticking. If you’re using a metal tin, line it with parchment paper to avoid uneven heat distribution. The choice of pan can affect the final texture, so pick wisely.
The Final Touch: Powdered Sugar Dust
Dusting the finished cups with powdered sugar is more than decoration—it adds a subtle sweetness that balances the chocolate. Use a fine-mesh sieve to sprinkle the sugar evenly, preventing clumps. The sugar also provides a slight crunch that contrasts with the soft interior. It’s a simple finishing touch that elevates the presentation.
These insider tricks will help you nail the texture, flavor, and appearance of your cookie cups. Practice makes perfect, so don’t be discouraged if the first batch isn’t flawless. Each attempt will bring you closer to mastering this delightful dessert.
Creative Twists and Variations
This recipe is a playground. Here are some of my favorite ways to switch things up:
Nutty Crunch
Add chopped toasted almonds or pecans to the dough for a nutty crunch. The nuts bring a subtle earthy flavor that pairs well with the chocolate. They also add a delightful texture contrast. This variation is perfect for those who love a bit of extra bite.
Citrus Zest
Incorporate a tablespoon of orange or lemon zest to add a bright, citrusy note. The zest cuts through the richness and adds a fresh, aromatic layer. It’s a refreshing twist that feels lighter. This version is ideal for spring or summer gatherings.
Caramel Swirl
Swirl caramel sauce into the dough before baking for a sweet, gooey center. The caramel adds a silky texture and a deep buttery flavor. It also enhances the visual appeal with a beautiful swirl pattern. This variation is a decadent treat for caramel lovers.
Minty Fresh
Add a teaspoon of peppermint extract to the dough for a minty kick. The mint pairs wonderfully with chocolate, creating a classic flavor combination. The fresh aroma will leave a lingering coolness in the air. This is a great option for holiday celebrations.
Spiced Chocolate
Stir in a pinch of cinnamon, nutmeg, or cayenne pepper for a warm, spicy undertone. The spices add depth and complexity to the chocolate. They also create a comforting, cozy flavor profile. This variation is perfect for autumn or winter events.
Almond Joy
Replace the candy hearts with shredded coconut and add a splash of almond extract. The coconut adds a tropical vibe, while the almond extract enhances the nutty flavor. The result is a cookie cup that feels like a dessert from a tropical paradise. This version is ideal for beachside parties.
Feel free to experiment and mix and match these variations to suit your taste. The beauty of cookie cups is that they’re highly customizable, so you can create a signature treat that’s uniquely yours.
Storing and Bringing It Back to Life
Fridge Storage
Store the baked cookie cups in an airtight container in the refrigerator for up to 5 days. The cool environment preserves the buttery texture and prevents the chocolate from melting. When ready to serve, let the cups sit at room temperature for 5 minutes to soften slightly. This step ensures the cups aren’t too cold when you bite into them. The chocolate will also be more flavorful after a brief room‑temperature rest.
Freezer Friendly
For longer storage, place the cookie cups in a freezer‑safe container or zip‑lock bag, separated by parchment paper to prevent sticking. They’ll keep well for up to 3 months. When you’re ready to enjoy them, thaw in the refrigerator overnight. This method retains the flavor and texture better than quick thawing at room temperature. The cups will still taste fresh and delicious.
Best Reheating Method
Reheat the cookie cups in a preheated oven at 300°F (150°C) for 5 minutes. A tiny splash of water in the bottom of the tin helps create steam, keeping the interior moist. After reheating, let them cool for a minute before serving. This simple trick brings the cups back to their original buttery, gooey glory. The aroma will be even more enticing after reheating.