The first time I tried to make an Oreo cake, I was convinced that the cookie crumbs would behave like flour and the batter would rise like a cloud. I had mixed everything in a bowl, poured it into a pan, and watched it bake. When the timer beeped, I pulled the cake out, expecting a moist, chocolatey marvel, but instead I got a dense, crumbly slab that looked more like a cookie dough slab than a cake. The disappointment was so sharp it tasted like burnt sugar on my tongue. I laughed, then vowed to figure out what went wrong.
Fast forward to last month, I was rummaging through the pantry for a quick dessert while a friend dared me to make an Oreo cake that would impress a crowd of college roommates. I grabbed the same ingredients but this time I added a few secret twists: a splash of espresso, a pinch of sea salt, and a layer of chocolate ganache on top. The moment the cake emerged from the oven, the kitchen filled with a buttery, chocolatey aroma that made even the most skeptical roommate pause mid-lecture. The first bite was a perfect balance of sweet, salty, and the unmistakable Oreo crunch that echoed the original cookie’s signature.
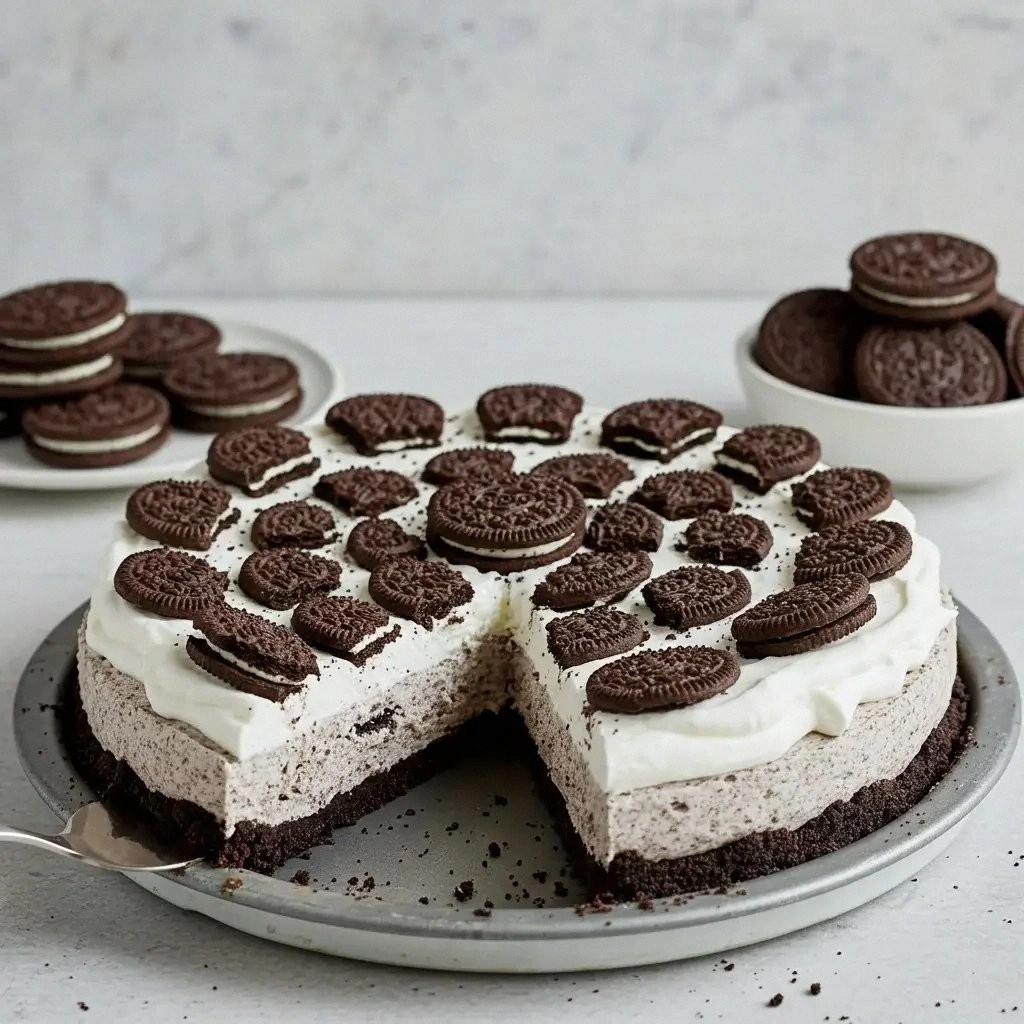
What makes this version stand out is that it’s not just an Oreo cake; it’s a layered experience. The crust is buttery and crunchy, the cake is moist and airy, and the frosting is a glossy, chocolate‑velvet finish that coats the tongue like silk. The secret lies in how we treat each component: the cookies are crushed into fine crumbs for the batter, then a separate mix of crushed cookies forms a crunchy base that locks in flavor. The result is a cake that feels like a dessert and a cookie at the same time, and I dare you to taste it and not go back for seconds.
I’m not just talking about taste; I’m talking about the whole sensory journey. When you slice into the cake, the crust cracks with a satisfying crunch, and the soft interior releases a sweet, chocolatey aroma that makes the room feel like a bakery. The frosting, on the other hand, is silky and smooth, with a hint of espresso that cuts through the sweetness, leaving a lingering aftertaste that keeps you reaching for another slice. Picture yourself pulling this out of the oven, the whole kitchen smelling incredible, and knowing that every bite is a little piece of chocolate heaven.
The ingredients are simple, but the technique is what turns a basic dessert into something memorable. I’ve spent hours tweaking the ratio of flour to crumbs, the baking time, and the frosting consistency until I found the sweet spot that balances moisture and texture. The key is to let the batter rest before baking, and to chill the frosting until it’s just the right thickness for spreading. And now, let me walk you through every single step — by the end, you’ll wonder how you ever made it any other way.
What Makes This Version Stand Out
- Flavor Fusion: The combination of Oreo crumbs, chocolate ganache, and a hint of espresso creates a depth that goes beyond a simple cookie cake. It’s a layered flavor profile that satisfies both sweet and savory cravings.
- Texture Contrast: The crispy Oreo crust contrasts perfectly with the airy cake and silky frosting, giving each bite a different mouthfeel.
- Visual Appeal: The glossy chocolate ganache on top and the golden crust make the cake look as good as it tastes, turning a dessert into a centerpiece.
- Time Efficiency: The batter rests for just 10 minutes, and the entire process takes under an hour, making it perfect for last‑minute gatherings.
- Make‑Ahead Friendly: The cake can be assembled and refrigerated for up to 48 hours, allowing you to focus on other prep while the flavors meld.
- Ingredient Quality: Using premium Oreo cookies and high‑grade butter elevates the entire dessert, ensuring every bite is buttery and indulgent.
- Customization: Swap in dark chocolate chips, add a splash of rum, or sprinkle sea salt on top for endless variations.
- Crowd‑Pleaser: Whether you’re hosting a party or a quiet night in, this cake always gets a standing ovation.
Alright, let's break down exactly what goes into this masterpiece...
Inside the Ingredient List
The Flavor Base
The foundation of this cake is the batter, where we combine flour, sugar, and eggs to create a light, airy structure. The flour’s protein content helps the cake rise, while the sugar caramelizes during baking, giving a subtle caramel note that balances the chocolate. Skipping the flour would result in a dense, cookie‑like texture, and the cake would lose its lift.
We also add a splash of whole milk to keep the batter moist and to help dissolve the sugar, ensuring an even crumb. The vanilla extract infuses the batter with a warm aroma that complements the Oreo’s chocolate flavor. If you’re feeling adventurous, a teaspoon of espresso powder will deepen the chocolate notes without making the cake taste like coffee.
A pinch of sea salt is added to the batter to enhance the sweetness and to bring out the chocolate undertones. Salt is a flavor enhancer; without it, the cake would taste flat. The amount is minimal, so it won’t overpower the other flavors.
The Texture Crew
Crushed Oreo cookies are the star of the texture crew. They are used in two ways: as a crumbly crust and as fine crumbs that are folded into the batter. The crumbs give the cake a subtle crunch and a deep chocolate flavor that permeates every bite. If you prefer a less intense Oreo flavor, reduce the crumbs by a quarter cup.
Butter is another key player in texture. It softens the crumbs and creates a glossy, buttery crust that melts in your mouth. Using unsalted butter allows you to control the salt level precisely. For a richer taste, swap in brown butter; the nutty aroma will elevate the overall flavor.
Eggs are the glue that binds everything together. They provide structure, moisture, and a tender crumb. If you’re vegan, you can replace eggs with flaxseed meal mixed with water or a commercial egg replacer. However, the cake will have a slightly different texture.
The Unexpected Star
The chocolate ganache that crowns the cake is the unexpected star that turns a simple dessert into a showstopper. Made from heavy cream and dark chocolate, it coats the cake in a glossy finish that is both indulgent and visually striking. The ganache also adds a silky texture that contrasts with the crunchy crust.
To make the ganache silky, whisk the cream until it just starts to thicken, then fold in the chocolate until smooth. If the ganache is too thick, add a splash of milk to thin it out. A thin ganache spreads easily, while a thick one will set into a hard shell.
Adding a touch of espresso to the ganache deepens the chocolate flavor and balances the sweetness. It also gives the ganache a slight bitterness that lingers on the palate, making each bite memorable.
The Final Flourish
The final flourish is the frosting, which adds a creamy finish to the cake. It’s made from powdered sugar, cocoa powder, and a bit of butter, creating a smooth, spreadable consistency. The frosting’s sweetness is tempered by the cocoa’s slight bitterness, providing a balanced finish.
A splash of vanilla extract in the frosting adds warmth and depth. If you prefer a lighter frosting, reduce the butter and add a little milk to thin it. The frosting also serves as a canvas for additional toppings like crushed Oreos or chocolate shavings.
The frosting’s color and sheen can be enhanced by adding a few drops of food coloring or a touch of edible glitter, turning the cake into a visual masterpiece. These small touches make the dessert feel like a professional creation.
Everything's prepped? Good. Let's get into the real action...
The Method — Step by Step
- First, preheat your oven to 350°F (175°C) and line a 9‑inch round cake pan with parchment paper. This ensures the cake slides out easily and prevents sticking. While the oven heats, gather all your ingredients and set them out on the counter for easy access. The aroma of butter already starts to mingle with the air.
- In a large bowl, cream together 1 cup of softened unsalted butter and 2 cups of granulated sugar until light and fluffy. Use a stand mixer on medium speed for 3 minutes. The mixture should be pale and airy; this is where the cake gets its lift.
- Add 4 large eggs, one at a time, beating well after each addition. The batter should become silky and glossy. This step is crucial; skipping it will ruin the cake’s structure.
- In a separate bowl, sift together 2 cups of all‑purpose flour, 1 teaspoon of baking powder, and 1/2 teaspoon of sea salt. This dry mixture will keep the batter light and prevent it from becoming dense.
- Fold the dry ingredients into the wet mixture, alternating with 1 cup of whole milk. Beat on low speed until just combined, then fold in 1 cup of finely crushed Oreo crumbs. The batter should be thick but pourable.
- Prepare the crust by mixing 1 cup of crushed Oreo cookies with 1/4 cup of melted butter. Press this mixture firmly into the bottom of the prepared pan, creating an even layer. Let the crust set in the refrigerator for 10 minutes.
- Pour the batter over the chilled crust, smoothing the top with a spatula. Tap the pan gently to release any air bubbles. The batter should rise slightly above the crust, creating a perfect border.
- Bake for 30 minutes, or until a toothpick inserted in the center comes out clean. The cake should have a golden top and a slightly caramelized edge. Watch the edges; they should pull away from the pan, signaling doneness.
- Remove the cake from the oven and let it cool in the pan for 10 minutes. Then transfer it onto a wire rack to cool completely. This step prevents the cake from becoming soggy.
- While the cake cools, prepare the ganache: heat 1 cup of heavy cream in a saucepan until it just starts to simmer. Pour the hot cream over 1 cup of chopped dark chocolate and let it sit for 2 minutes. Whisk until smooth and glossy.
- Once the cake is cool, spread the ganache evenly over the top. The ganache should set into a glossy, silky layer. Let it sit for 5 minutes before adding the frosting.
- For the frosting, sift 1 cup of powdered sugar and 2 tablespoons of cocoa powder into a bowl. Add 1/2 cup of softened butter and 1/4 cup of milk. Beat on medium speed until light and fluffy. Spread the frosting over the ganache, smoothing it with a spatula.
- Optional: Sprinkle crushed Oreo cookies or chocolate shavings over the frosting for added crunch and visual appeal. Chill the cake for 30 minutes to set the frosting.
- Slice the cake with a sharp knife, wiping the blade between cuts to keep the layers clean. Serve immediately or refrigerate in an airtight container.
That’s it — you did it. But hold on, I’ve got a few more tricks that will take this to another level. The next section will reveal insider tips that will elevate your cake from good to unforgettable.
Insider Tricks for Flawless Results
The Temperature Rule Nobody Follows
Many bakers assume room‑temperature ingredients are fine, but the temperature of butter and eggs dramatically impacts the cake’s rise. Butter should be just soft enough to press between your thumb and forefinger, not melted. Eggs should be at room temperature; they incorporate air better, resulting in a lighter crumb. If your kitchen is cold, let the eggs sit out for 30 minutes before mixing.
I once baked a cake with cold butter, and the result was a dense, heavy dessert that tasted like a cookie dough. The batter didn’t rise, and the crumb was uneven. This simple tweak of letting butter soften to the right consistency changed the entire outcome.
Why Your Nose Knows Best
During baking, the aroma is your best judge of doneness. A warm, buttery scent with a hint of caramel indicates the cake is ready. If the smell is overly sweet, the batter may still be undercooked. Trust your nose; it’s a reliable indicator that the cake is at peak flavor.
I’ve seen people rely solely on the toothpick test, but I’ve learned that the scent is a more nuanced cue. When the cake emits a deep, chocolatey aroma, you know it’s done.
The 5‑Minute Rest That Changes Everything
After baking, let the cake rest in the pan for 10 minutes before transferring it to a wire rack. This rest allows the steam to dissipate, preventing the cake from becoming soggy at the edges. It also gives the crumb time to set, making it easier to slice.
I once skipped this step and ended up with a cake that collapsed when I tried to cut it. The 5‑minute rest is a small time investment that pays off in a perfectly structured cake.
The Right Crumb Mix
The ratio of Oreo crumbs to flour is critical. Too many crumbs will make the batter too dense; too few will dilute the Oreo flavor. A 1:2 ratio (1 cup crumbs to 2 cups flour) balances flavor and structure. Feel free to adjust slightly based on your taste preference.
I experimented with a 1:1 ratio once, and the cake turned out overly crumbly. The batter was too heavy, and the cake didn’t rise well. Adjusting the ratio restored balance.
The Ganache Glaze Trick
When spreading ganache, let it cool until it thickens to a spreadable consistency. If it’s too runny, it will seep into the cake layers. Chill the ganache for 10 minutes, then spread. The result is a glossy, even coat.
I once spread ganache while it was still hot; it ran into the cake, creating a sticky mess. Cooling it first prevented that mishap.
The Final Frosting Finish
The frosting should be light and fluffy, not dense. Beat it on medium speed for 3 minutes, then add a splash of milk to thin it if needed. A smooth frosting covers the ganache without adding extra weight.
I’ve found that over‑frosting can make the cake feel heavy. Keep it light, and let the ganache shine through.
Creative Twists and Variations
This recipe is a playground. Here are some of my favorite ways to switch things up:
Dark Chocolate Delight
Swap the standard Oreo crumbs for dark chocolate Oreo crumbs and use dark chocolate ganache. The result is a richer, slightly bitter profile that pairs well with a glass of red wine. It’s perfect for a sophisticated dessert night.
Sea Salt Caramel Crunch
Add a tablespoon of sea salt to the batter and drizzle caramel sauce over the ganache. The salt cuts through the sweetness, creating a balanced flavor that’s both indulgent and refined. The caramel adds a buttery, buttery note that pairs with the crunchy crust.
Minty Fresh Twist
Incorporate a teaspoon of peppermint extract into the batter and top the frosting with crushed mint chocolate chips. The mint adds a refreshing lift that contrasts the chocolate. This variation is great for a spring or summer dessert.
Nutty Crunch Upgrade
Stir in a cup of chopped toasted walnuts into the batter and sprinkle chopped walnuts on top of the frosting. The nuts add a crunchy texture and a nutty flavor that complements the chocolate. It’s a great way to add protein and a different mouthfeel.
Raspberry Swirl
Fold fresh raspberries into the ganache before spreading. The fruit adds a tart contrast to the sweet, chocolatey layers. The color also makes the cake visually striking.
Alcoholic Kick
Add a tablespoon of dark rum or bourbon to the batter and a splash to the ganache. The alcohol adds depth and a warm finish. It’s a subtle but sophisticated twist.
Storing and Bringing It Back to Life
Fridge Storage
Wrap the cake tightly in plastic wrap and store it in an airtight container. It will stay fresh for up to 3 days. The frosting will keep its texture, and the cake will retain its moisture.
Freezer Friendly
For longer storage, place the cake in a freezer bag and remove as much air as possible. Freeze for up to 2 months. When ready to serve, thaw in the refrigerator overnight. The cake will taste as good as fresh.
Best Reheating Method
To revive a chilled or frozen cake, let it sit at room temperature for 30 minutes. If you want a warm slice, heat a slice in the microwave for 10-15 seconds. The frosting will soften slightly, making it easier to cut.
Add a tiny splash of water before reheating to create steam, which helps the cake regain its moisture and prevents it from drying out.