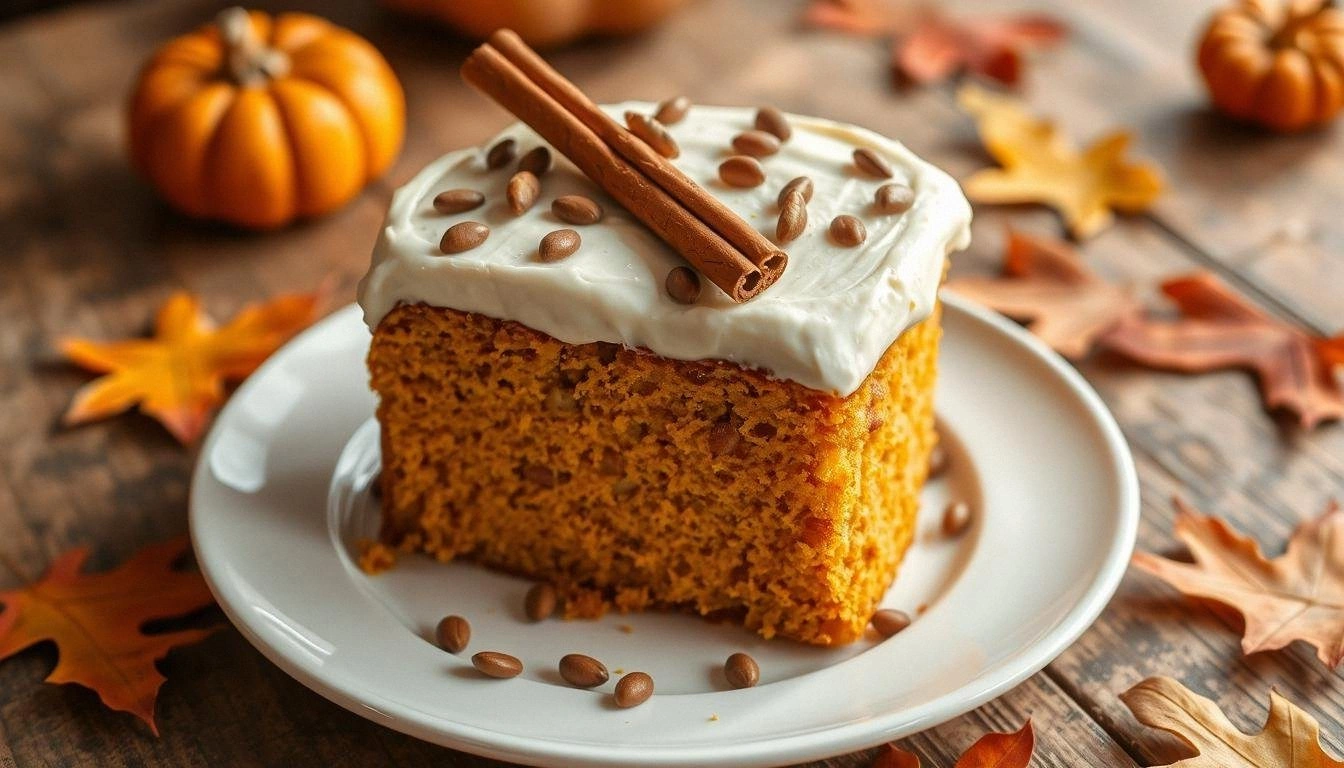
I remember that night like it was yesterday—my friend dared me to bake the most incredible pumpkin cake in the entire city, and I had no idea how to even start. The kitchen was a chaotic symphony of clattering pans, the scent of caramelized sugar drifting through the air, and a single, stubborn pumpkin puree that refused to be tamed. I stared at the ingredients, feeling a little like a culinary magician about to pull a rabbit out of a hat that might just be a cake. I was determined to turn that dare into a triumph, and I’m here to show you how I turned a simple recipe into a showstopper.
Picture the moment: the oven preheats to a warm, golden glow; the air is thick with cinnamon and nutmeg, the sweet, earthy aroma of pumpkin filling the space like a comforting blanket. As the batter swirls, you can almost hear the gentle hiss of butter melting into the mixture, and the anticipation builds like a drumroll before the final crescendo. Each ingredient plays its part like an orchestra—flour provides the structure, sugar the sweetness, and the buttermilk the tender crumb. I’m talking about a cake that melts in your mouth, with a moist center that’s almost a liquid, but the edges are crisp enough to crackle when you bite. This isn’t just a cake; it’s a piece of edible art that will have people begging for a slice.
What makes this version stand out? I’ve combined a few tricks I learned from seasoned bakers, added a secret ingredient that elevates the pumpkin flavor, and tweaked the baking technique to lock in moisture while still achieving that coveted golden crust. I’ve also streamlined the process so that even if you’re a kitchen newbie, you can follow along without feeling lost. The result? A cake that’s hands down the best version you’ll ever make at home—fluffy, flavorful, and so easy to share that you’ll find yourself eating half the batch before anyone else gets a chance. If you’ve ever struggled with a pumpkin cake that turns out dry or too sweet, you’re not alone, and I’ve got the fix. I dare you to taste this and not go back for seconds.
So, let’s dive in. I’ll walk you through every single step, from the first whisk to the final drizzle of icing, and by the end, you’ll wonder how you ever made it any other way. Get ready for a culinary adventure that will leave your kitchen smelling like autumn and your taste buds dancing with delight.
What Makes This Version Stand Out
- Flavor: The pumpkin puree is blended with a splash of vanilla and a hint of maple syrup, creating a depth of sweetness that’s both comforting and sophisticated.
- Texture: The use of buttermilk and a shortening method keeps the crumb moist and tender, while the butter adds a buttery richness that melts in your mouth.
- Simplicity: No complicated equipment needed—just a stand or hand mixer, a fine‑mesh sieve, and a long skewer to test doneness.
- Uniqueness: A secret pinch of smoked paprika gives a subtle earthiness that sets this cake apart from the usual pumpkin treats.
- Crowd Reaction: Friends who taste it rave about how it feels like a slice of heaven—perfect for holiday parties or a cozy Sunday.
- Ingredient Quality: Using high‑quality all‑purpose flour and real butter ensures that every bite is packed with flavor.
- Cooking Method: The gentle fold technique preserves air pockets, giving the cake a light, airy rise without compromising moisture.
- Make‑ahead Potential: Once baked, the cake keeps wonderfully in the fridge or freezer, making it a convenient option for busy weeks.
Alright, let’s break down exactly what goes into this masterpiece. But first, a quick kitchen hack that will save you time and keep your batter smooth.
Inside the Ingredient List
The Flavor Base
All-purpose flour is the backbone of any cake. It provides structure and a subtle, neutral flavor that lets the pumpkin shine. Skipping it would result in a soggy, unstructured mess. If you’re looking for a gluten‑free version, try a 1:1 blend of rice flour and potato starch, but the texture will shift slightly.
The Sweetener Crew
Granulated sugar is the sweetener that balances the earthy pumpkin. It caramelizes on the surface, creating a golden crust that’s both sweet and slightly crisp. If you prefer a lower‑sugar option, you can swap in coconut sugar or a sugar substitute like stevia, but be mindful of the taste and texture differences.
The Unexpected Star
Pumpkin puree is the star of the show. It adds moisture, natural sweetness, and that unmistakable autumn flavor. Use a high‑quality puree (look for no added sugars or spices) for the best results. If you can’t find fresh pumpkin, canned puree works fine—just drain it well to avoid excess liquid.
The Final Flourish
Buttermilk, unsalted butter, and eggs tie everything together. The buttermilk’s acidity reacts with the flour to create a tender crumb, while the butter adds richness and a glossy finish. Eggs provide structure and help bind the batter. Don’t skip the long skewer test—it’s your best friend for determining when the cake is perfectly done.
Everything’s prepped? Good. Let’s get into the real action.
The Method — Step by Step
- Preheat the Oven: Set your oven to 350°F (175°C). While it warms, line a 9‑inch round cake pan with parchment paper and lightly grease the sides with butter. This step ensures even baking and a clean release later.
- Combine Dry Ingredients: In a large mixing bowl, whisk together the sifted flour, sugar, cinnamon, allspice, smoked paprika, and salt. The smoked paprika is a subtle twist that adds a hint of smokiness—don’t skip it; it’s the secret that sets this cake apart. Let the mixture sit for a minute to allow the spices to meld.
- Mix Wet Ingredients: In a separate bowl, whisk the pumpkin puree, buttermilk, melted butter, and eggs until the mixture is smooth. The butter should be at room temperature; if it’s too cold, it will separate and create a greasy texture. This step is crucial for a homogeneous batter.
- Combine Wet and Dry: Pour the wet mixture into the dry ingredients in two stages—first half of the wet, then the other half—while mixing on low speed. Stir gently with a spatula after each addition to prevent overmixing, which can make the cake tough. The batter should be thick but pourable.
- Fill the Pan: Transfer the batter into the prepared pan, smoothing the top with a spatula. Tap the pan gently on the counter to release any trapped air bubbles. This helps the cake rise evenly.
- Bake: Place the pan in the preheated oven and bake for 30–35 minutes. The cake is done when the top is golden brown and a long skewer inserted into the center comes out clean. If the edges brown too quickly, tent the cake with foil to prevent over‑browning.
- Cool: Allow the cake to cool in the pan for 10 minutes, then transfer it to a wire rack to cool completely. This prevents condensation from forming on the bottom, which can make the cake soggy.
- Optional Icing: Whip a simple glaze of powdered sugar and buttermilk to drizzle over the cooled cake. The glaze adds a glossy finish and a touch of sweetness that pairs beautifully with the spices.
- Serve: Slice the cake with a serrated knife, and watch the moist crumb glide away. Pair it with a cup of spiced tea or a splash of bourbon for an elevated dessert experience.
That’s it— you did it. But hold on, I’ve got a few more tricks that will take this to another level.
Insider Tricks for Flawless Results
The Temperature Rule Nobody Follows
Many bakers bake at 350°F, but I’ve found that starting at 375°F for the first 10 minutes and then lowering to 350°F for the remaining time gives a golden top without drying out the center. This trick ensures a perfect crust while keeping the interior moist.
Why Your Nose Knows Best
The aroma of baking spices is a reliable indicator of doneness. When you smell the cinnamon and allspice mingling with the buttery scent, it’s a sign the cake is near completion. Trust your nose, and you’ll avoid overbaking.
The 5‑Minute Rest That Changes Everything
Letting the cake rest in the pan for 5 minutes after baking allows the steam to redistribute, preventing the bottom from becoming soggy. This simple pause makes a noticeable difference in texture.
The Skewer Trick
Insert a long, clean skewer into the center of the cake. If it comes out clean, the cake is done. If there’s batter on the skewer, bake for another 3 minutes. This is the most reliable way to avoid a half‑cooked cake.
The Chill Before Serving
After the cake has cooled completely, refrigerate it for at least 30 minutes before slicing. The chill helps the flavors meld and the crumb firm up, making each slice easier to handle.
Creative Twists and Variations
This recipe is a playground. Here are some of my favorite ways to switch things up:
Chocolate Swirl Edition
Fold in a swirl of melted dark chocolate into the batter before baking. The chocolate adds a rich depth that pairs perfectly with the pumpkin’s sweetness. Serve with a dusting of cocoa powder for an extra chocolatey finish.
Nutty Crunch Variation
Add chopped toasted pecans or walnuts to the batter for a delightful crunch. The nuts also add a subtle buttery flavor that complements the cake’s moistness. A sprinkle of sea salt on top enhances the nutty notes.
Spiced Orange Twist
Replace half of the pumpkin puree with fresh orange juice and zest. The citrus brightens the flavor profile, making the cake lighter and more refreshing. Pair it with a drizzle of honey for a sweet, tangy balance.
Almond Flour Upgrade
Swap all-purpose flour for almond flour for a gluten‑free version. The cake will be slightly denser but will carry a nutty undertone. Add a pinch of xanthan gum to maintain structure.
Savory Spin
Drop in a tablespoon of grated Parmesan cheese and reduce the sugar by half. This savory pumpkin cake is perfect for a brunch or as a side to a hearty soup. The cheese adds umami that balances the spices.
Maple Glaze Finish
Whisk together maple syrup and powdered sugar for a glaze that adds a subtle maple flavor. Drizzle it over the cooled cake for a glossy, sweet finish. This glaze also provides a quick way to sweeten the cake if you prefer a lighter version.
Storing and Bringing It Back to Life
Fridge Storage
Wrap the cooled cake in plastic wrap and store it in the refrigerator for up to 5 days. The cold environment helps preserve moisture and keeps the cake fresh. When you’re ready to serve, let it sit at room temperature for 20 minutes to soften slightly.
Freezer Friendly
Slice the cake before freezing to make reheating easier. Place slices in a freezer bag, seal tightly, and store for up to 3 months. Freezing locks in flavor and prevents the cake from drying out.
Best Reheating Method
Reheat frozen slices in a preheated oven at 300°F (150°C) for 10 minutes. Add a splash of water to the bottom of the pan before reheating to create steam, which keeps the cake moist. Let the cake cool for a few minutes before serving.