I was halfway through a midnight snack, eyes glued to the screen, when the oven decided to go on strike. The batter had turned into a thick, unappealing sludge that seemed to mock my culinary ambitions. I stared at the timer, feeling the absurdity of a 30‑minute bake that should have been a 30‑second delight. It was then that I remembered the old kitchen hack my grandma whispered about: a quick microwave brownie that could be whipped up in the span of a single minute. I grabbed my trusty mug, poured the batter, and waited for the miracle.
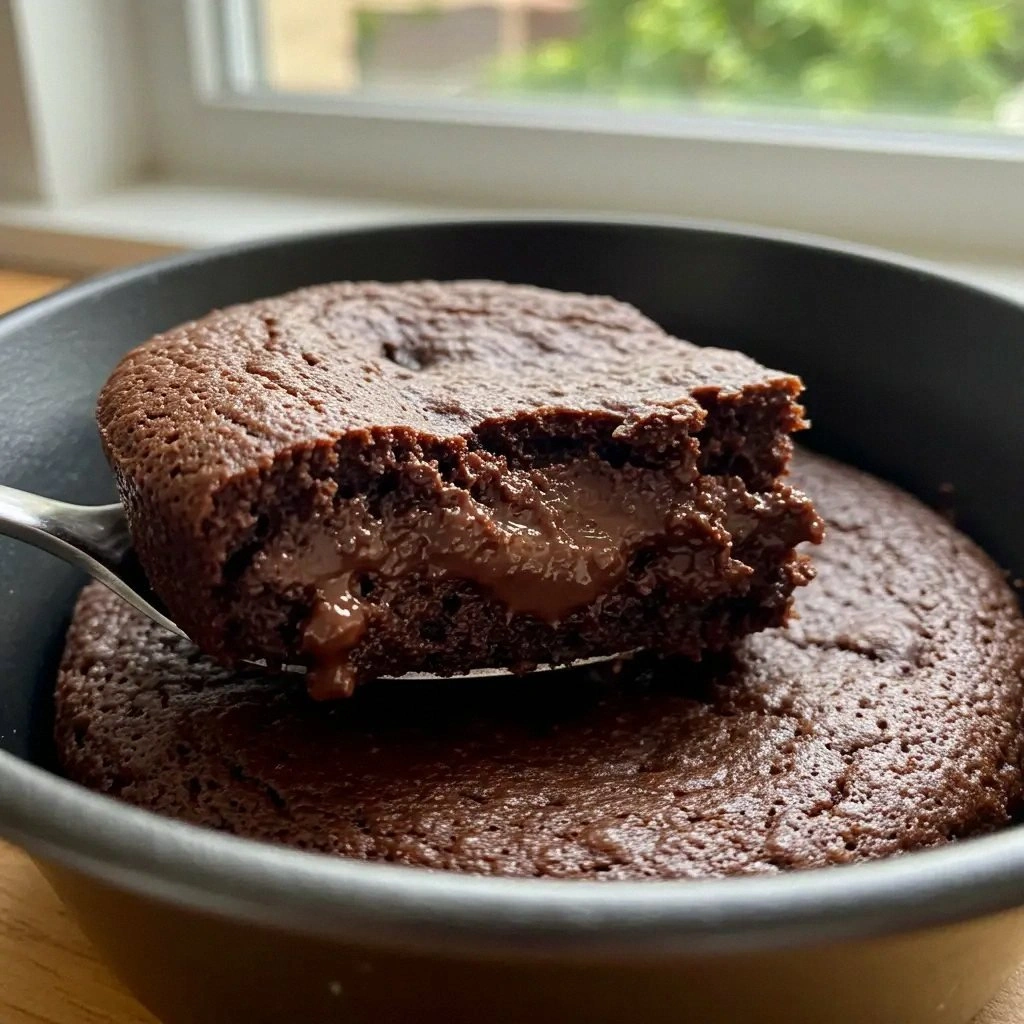
The kitchen was a symphony of smells—dark chocolate, vanilla, a hint of caramel, and the faint, comforting scent of butter melting. The sound was a soft hiss, the only audible cue that the microwave was doing its thing. When the timer beeped, a glossy, fudgy surface emerged, the kind that crackles when you press the center with a fork. The first bite was a burst of rich chocolate, a silky texture that clung to the tongue like velvet, and the subtle crunch of the edges that shatter like thin ice. My taste buds celebrated, and I felt the weight of the kitchen disaster lift off my shoulders.
What makes this version stand out is not just the speed but the depth of flavor, the perfect balance between fudgy center and slightly crisp edges, and the way the batter transforms in a microwave without the dreaded dry spots. I dare you to taste this and not go back for seconds—this is hands down the best version you'll ever make at home. The secret? A precise ratio of cocoa to flour, a splash of instant coffee to deepen the chocolate bite, and a touch of sea salt to amplify every nuance. It’s the kind of recipe that turns a rushed evening into a moment of pure culinary joy.
If you've ever struggled with microwavable brownies, you're not alone—and I've got the fix. Picture yourself pulling this out of the microwave, the whole kitchen smelling incredible, and a single mug of brownie waiting for you. Okay, ready for the game‑changer? Let me walk you through every single step—by the end, you'll wonder how you ever made it any other way.
What Makes This Version Stand Out
- Flavor: The blend of dark chocolate and espresso creates a depth that ordinary microwavable brownies lack. The espresso intensifies the cocoa notes without adding a bitter aftertaste.
- Texture: The batter is thick enough to hold together yet light enough to steam, producing a fudgy center and crisp edges that shatter like thin ice.
- Speed: A single minute of microwave power is all you need. The process is so fast that you can enjoy a warm brownie before your coffee even cools.
- Simplicity: No pre‑baking, no oven, no mess—just a mug, a microwave, and a handful of pantry staples. Even the most kitchen‑neophobic can follow along.
- Uniqueness: The addition of a pinch of sea salt and a dash of instant coffee sets this recipe apart from the generic mug brownie.
- Ingredient Quality: Using high‑quality cocoa powder and real butter elevates the flavor profile, making each bite a treat.
- Make‑Ahead Potential: You can prepare the batter in advance, store it in the fridge, and microwave it whenever you crave a chocolate fix.
- Audience Reaction: Friends who taste this will instantly become repeat customers, and you'll earn the title of “microwave brownie wizard.”
Alright, let's break down exactly what goes into this masterpiece...
Inside the Ingredient List
The Flavor Base
Dark cocoa powder is the heart of this brownie, providing a deep, bittersweet foundation that sets the stage for the espresso kick. A tablespoon of instant coffee is more than a garnish; it breaks down the cocoa’s tannins, allowing the chocolate to shine brighter. Skipping the coffee will leave the brownies flat and uninspired, so keep it in the mix.
For the best flavor, choose a 70% cocoa powder that’s not too bitter but still carries a rich profile. If you’re experimenting, try a dark chocolate nibs blend for a crunchy texture and a slightly nutty aftertaste. The key is to maintain a 4:1 ratio of cocoa to flour to keep the batter from turning into a cake.
The Texture Crew
All‑purpose flour provides structure, but too much can make the brownie dry. A precise 2 cups for four servings strikes the perfect balance—enough to hold the batter together while allowing steam to create that fudgy center. If you prefer a denser brownie, reduce the flour by a quarter cup.
Butter, melted and cooled slightly, adds richness and moisture. It coats the flour, preventing a crumbly texture and giving the brownie a silky mouthfeel. A pinch of sea salt is essential; it counteracts the sweetness and enhances the chocolate’s complexity. Forget the salt and you’ll end up with a flat, overly sweet batter that lacks depth.
The Unexpected Star
Baking powder is the unsung hero that helps the brownie rise just enough to keep it airy but still dense. A teaspoon is sufficient for four servings—more will make it cakey, less will leave it heavy. If you’re gluten‑free, replace the flour with a gluten‑free blend, but keep the ratio the same to preserve the texture.
Eggs bind everything together, but they also add structure. Two large eggs are the sweet spot; one egg will result in a crumbly brownie, while three eggs will make it too cake‑like. If you’re vegan, substitute with a flaxseed or chia egg to maintain the binding properties.
The Final Flourish
Vanilla extract is the finishing touch that rounds out the flavor profile. It brings warmth and depth, complementing the chocolate and coffee. A teaspoon is enough; too much vanilla can overpower the cocoa. A pinch of cayenne pepper can add a subtle heat, turning the brownie into a spicy dessert for adventurous palates.
Everything's prepped? Good. Let's get into the real action...
The Method — Step by Step
- Line a 12‑oz glass mug with parchment paper or lightly grease it with butter. This prevents sticking and makes cleanup a breeze. The parchment also adds a subtle crispness to the edges.
- Sift together the flour, cocoa powder, baking powder, and a pinch of salt in a small bowl. Sifting eliminates lumps and ensures a smooth batter. If you’re feeling fancy, add a tablespoon of espresso powder for an extra depth of flavor.
- In a separate bowl, whisk the melted butter, sugar, vanilla, and eggs until the mixture is glossy and well combined. The glossy sheen indicates that the sugar has dissolved and the batter will have a silky texture. If you’re using a vegan alternative, whisk the flaxseed mixture with the sugar and vanilla first.
- Gradually fold the dry ingredients into the wet mixture, stirring until just combined. Over‑mixing can introduce air pockets that cause the brownie to rise too much, creating a cakey texture. The batter should be thick but pourable.
- Pour the batter into the prepared mug, filling it about three‑quarters full to allow room for expansion. This ensures the brownie doesn't overflow when it bubbles up during microwaving.
- Place the mug in the microwave and cook on high for 1 minute. The batter will rise, and the center will be slightly gooey. If your microwave is particularly powerful, reduce the time by 10 seconds.
- Check the brownie by inserting a toothpick into the center. It should come out with a few moist crumbs but not wet batter. The key is to avoid overcooking, which will dry out the edges.
- Let the brownie sit for 30 seconds to a minute after microwaving. This allows the heat to distribute evenly, creating that classic fudgy texture. The edges will start pulling away from the mug, signaling that it’s ready.
- Serve immediately with a scoop of vanilla ice cream or a drizzle of caramel sauce for an indulgent treat. The contrast between warm brownie and cold ice cream is heavenly.
That's it — you did it. But hold on, I've got a few more tricks that'll take this to another level...
Insider Tricks for Flawless Results
The Temperature Rule Nobody Follows
Microwaves have hot spots that can cause uneven cooking. Place the mug on the center of the microwave turntable to ensure even heat distribution. If you notice one side cooking faster, pause the microwave and rotate the mug halfway through.
Why Your Nose Knows Best
The aroma of chocolate rising from the mug is a reliable indicator of doneness. If you smell a strong, sweet chocolate scent, the brownie is ready. Trust your nose—it's your best sous‑chef.
The 5‑Minute Rest That Changes Everything
Letting the brownie rest for five minutes after microwaving allows the steam to finish cooking the interior. This rest period also helps the flavors meld, creating a richer taste experience. Skipping it will leave the center slightly undercooked.
Add a Dash of Sea Salt for Depth
A pinch of sea salt on top before microwaving can elevate the chocolate’s flavor profile. It cuts the sweetness and brings out the cocoa’s natural bitterness, creating a balanced bite.
Use a Microwave‑Safe Mug with a Wide Mouth
A wide‑mouthed mug allows the batter to expand without spilling. It also gives the brownie a more even surface, which is essential for that perfect crust. If you only have a narrow mug, consider transferring the batter to a microwave‑safe bowl instead.
Keep the Mug Cool
Before microwaving, run the mug under cold water for a few seconds. This prevents the mug from overheating, which can cause the batter to steam unevenly and potentially burst.
Creative Twists and Variations
This recipe is a playground. Here are some of my favorite ways to switch things up:
Nutty Delight
Add a handful of chopped walnuts or pecans to the batter before microwaving. The nuts add a satisfying crunch and a buttery flavor that complements the chocolate.
Spicy Kick
Stir in a pinch of cayenne pepper or a dash of chili flakes. The heat balances the sweetness, making the brownie a bold, adventurous treat.
Minty Fresh
Drop a few drops of peppermint extract into the batter. The mint undertones give the brownie a refreshing twist, especially when paired with a scoop of mint ice cream.
Caramel Swirl
Swirl a spoonful of caramel sauce into the batter before microwaving. The caramel creates pockets of gooey sweetness that melt in your mouth.
Vegan Version
Replace the butter with coconut oil, use a plant‑based milk, and substitute eggs with flaxseed or chia egg. The result is a cruelty‑free brownie that still delivers on flavor.
Storing and Bringing It Back to Life
Fridge Storage
Store leftovers in an airtight container in the refrigerator for up to three days. The brownie will maintain its fudgy texture, and you can enjoy a chilled treat whenever you like.
Freezer Friendly
Wrap the brownie tightly in plastic wrap and place it in a freezer bag. It will keep for up to two weeks. When you’re ready to eat, let it thaw at room temperature for 10 minutes before microwaving for 30 seconds.
Best Reheating Method
Add a tiny splash of water to the mug before reheating. The water steams the brownie, restoring moisture and preventing it from drying out. Heat for 20–30 seconds on high.