Last night, I was scrambling to whip up a dessert for a surprise visit from my roommate, and the kitchen turned into a chaotic mess of melted butter and half‑cooked batter. I stared at the stubborn brownie base, feeling the heat rise like a furnace, and thought, “I need a recipe that doesn’t require a PhD in pastry.” That moment sparked a mission: to discover a brownie that is so rich, so forgiving, that even a kitchen disaster becomes an opportunity for triumph. I was determined to find a version that would make my roommate’s eyes widen and my taste buds sing, all without a single misstep.
Picture this: the air is thick with the scent of toasted cocoa and butter, the sound of the oven timer ticking down, a glossy sheen forming on the top of the brownies as they bake. When you lift the pan, the aroma is almost impossible to resist—deep, chocolatey, with a hint of vanilla that lingers like a secret whisper. The first bite is a silky, fudgy explosion that melts on the tongue, while the edges crackle just enough to give a satisfying snap. The texture is a harmonious blend of chewy center and slightly crisp top, a symphony of flavors that dance together like a well‑orchestrated duet. The result? A brownie that feels like a warm hug in a chocolate wrapper.
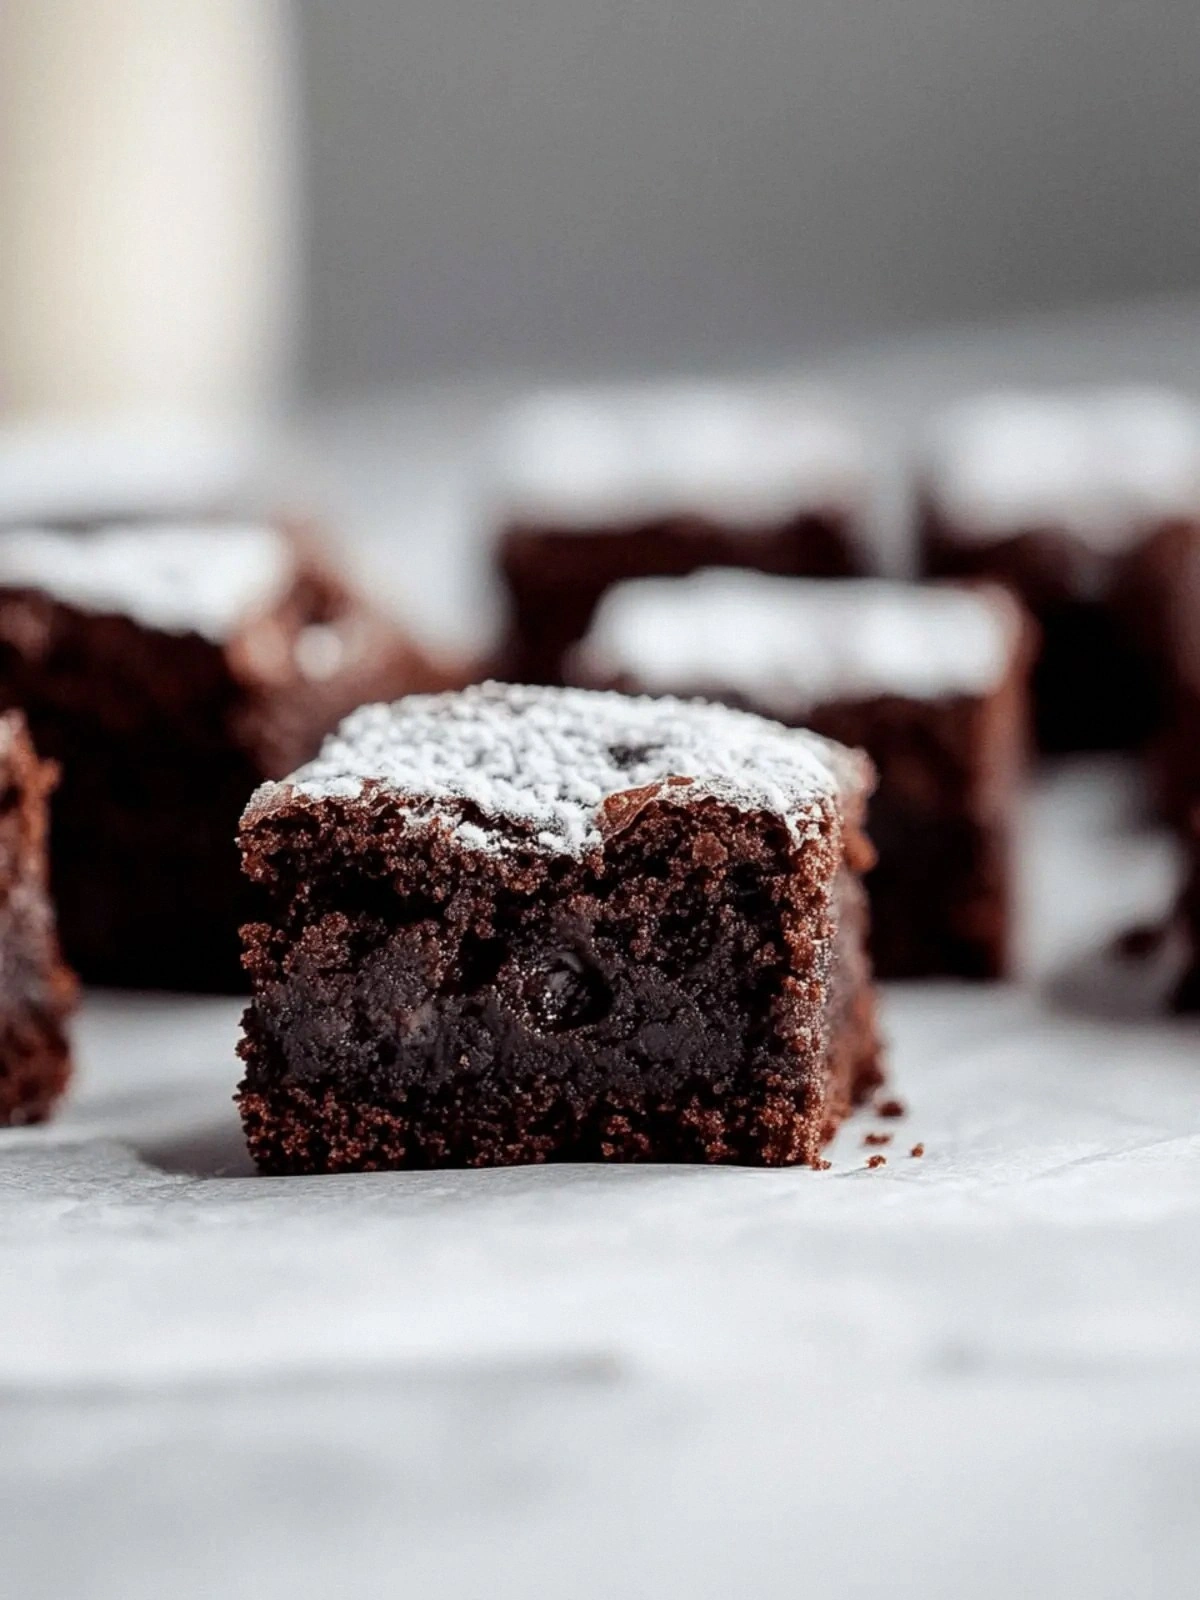
What sets this version apart isn’t just the intensity of the chocolate; it’s the balance of ingredients that creates a flawless crumb and a mouth‑watering finish. The use of unsweetened cocoa powder elevates the cocoa flavor without adding unwanted bitterness, while the dark chocolate chips bring a luxurious melt‑in‑your‑mouth texture. The butter, melted to a golden consistency, infuses every bite with a buttery richness that cuts through the sweetness. And the final dusting of powdered sugar gives a delicate, sweet finish that doesn’t overpower the deep chocolate notes. Together, these elements form a brownie that is indulgent yet refined, a treat that feels both decadent and comforting.
And there’s a secret twist that will blow your mind: I added a splash of espresso powder to the batter. It might sound like a coffee shop trick, but it actually intensifies the chocolate flavor without adding any liquid, creating a deeper, more complex taste profile. This small adjustment takes the brownies from good to unforgettable, turning every bite into a revelation. If you’re ready to elevate your dessert game, let me walk you through every single step—by the end, you’ll wonder how you ever made it any other way.
What Makes This Version Stand Out
Flavor: The combination of unsweetened cocoa, dark chocolate chips, and a dash of espresso powder creates a layered, deep chocolate experience that’s hard to match. The espresso subtly heightens the cocoa’s richness without adding a coffee taste.
Texture: The batter’s high butter content ensures a moist, fudgy center while the cocoa keeps it from becoming too dense. The result is a brownie that’s chewy yet slightly crisp on top.
Ease: No fancy equipment or complicated techniques required—just melt, whisk, bake, and enjoy. Even beginners can achieve professional results.
Versatility: This recipe can be tweaked to fit dietary preferences: use almond flour for a gluten‑free version, or replace butter with coconut oil for a vegan adaptation.
Crowd‑pleaser: Friends and family will rave about the intense chocolate flavor, and the buttery finish makes it a hit at parties or casual gatherings.
Ingredient Quality: Using high‑quality dark chocolate chips and premium cocoa powder elevates the overall taste and ensures consistency across batches.
Make‑ahead Potential: The brownies keep well in the fridge for up to a week and freeze beautifully, allowing you to enjoy them at your leisure.
Alright, let’s break down exactly what goes into this masterpiece…
Inside the Ingredient List
The Flavor Base
Unsalted butter is the cornerstone of this brownie’s richness. When melted, it creates a silky foundation that carries the chocolate flavors through every bite. Skipping butter would result in a dry, crumbly texture that fails to deliver the buttery mouthfeel that makes these brownies unforgettable.
Dark chocolate chips are the star of the show, providing pockets of molten chocolate that burst with each bite. The chips also add a slight crunch and a glossy sheen to the top, giving the brownies a professional finish. If you prefer a smoother texture, you can melt the chips with the butter, but the chunky bits are a must‑have for the classic brownie experience.
The Texture Crew
Unsweetened cocoa powder is the secret sauce that deepens the chocolate flavor without adding extra sweetness. It also helps bind the batter together, giving the brownies a dense yet tender crumb. Using regular cocoa powder would introduce a bitter aftertaste that clashes with the sugar.
Sugar is the sweet counterpoint to the cocoa’s bitterness, creating a balanced flavor profile that satisfies the sweet tooth without overwhelming the chocolate. If you’re watching your sugar intake, you can reduce the amount by a quarter, but be prepared for a slightly drier result.
The Unexpected Star
Espresso powder is the game‑changer that intensifies the chocolate notes. It works on a molecular level to deepen the flavor profile, making the brownies feel richer and more complex. Even if you don’t have espresso powder on hand, a splash of strong brewed coffee can mimic the effect.
Vanilla extract adds a subtle warmth that rounds out the chocolate’s intensity, creating a harmonious flavor balance. A pinch of sea salt can further enhance the chocolate’s depth, but it’s optional and can be omitted if you prefer a purely sweet brownie.
The Final Flourish
Powdered sugar is the final touch that gives the brownies a delicate, sweet finish. It also helps the tops set into a slightly crisp, caramelized crust that contrasts beautifully with the fudgy interior. Skipping powdered sugar would leave the tops a bit dull, but the brownies would still be delicious.
Everything’s prepped? Good. Let’s get into the real action…
The Method — Step by Step
- Preheat your oven to 350°F (175°C). Line a 9‑inch square baking pan with parchment paper, leaving an overhang on two sides for easy lift‑out. This simple step ensures a perfect release and a clean edge. I always keep a spare sheet of parchment handy for emergencies.
- In a medium saucepan, melt the butter over low heat until it turns a light golden hue. The butter’s color signals it’s ready—no more bubbling, just a calm, fragrant melt. Once melted, remove from heat and let it cool slightly; this prevents the eggs from scrambling when added.
- Whisk the eggs, sugar, vanilla, and espresso powder together in a large bowl until the mixture is smooth and pale. The whisking aerates the eggs, giving the brownies a light, airy crumb. If you’re in a hurry, a handheld mixer can speed this up, but a whisk works just fine.
- Fold the melted butter into the egg mixture, stirring until fully incorporated. The batter should look glossy and silky, with no lumps. This step is crucial—any separation can lead to uneven baking.
- Sift the cocoa powder and flour over the wet mixture, then gently fold until just combined. Avoid over‑mixing; a few streaks of flour are fine. Over‑stirring can develop gluten, making the brownies tough.
- Fold in the dark chocolate chips, ensuring they’re evenly distributed. The chips will melt slightly in the oven, creating pockets of molten chocolate throughout. This is the moment the aroma turns from buttery to chocolatey.
- Pour the batter into the prepared pan, smoothing the top with a spatula. The batter should spread evenly, filling every corner. This ensures uniform baking and a consistent texture.
- Bake for 30–35 minutes, or until the edges pull away from the pan and a toothpick inserted in the center comes out with a few moist crumbs. The top should have a slight crackle, indicating the perfect balance between gooey and crisp.
- Remove from the oven and let the brownies cool in the pan for 10 minutes. This rest period allows the flavors to settle and the brownies to firm up slightly, making them easier to cut.
- Transfer the brownies to a wire rack to cool completely. Once cooled, dust the tops with powdered sugar for a glossy finish. Slice into squares and serve, or store in an airtight container for later indulgence.
That's it — you did it. But hold on, I've got a few more tricks that'll take this to another level…
Insider Tricks for Flawless Results
The Temperature Rule Nobody Follows
Many bakers bake brownies at a high temperature for a short time, but I swear by a lower heat and longer bake. This slow approach allows the chocolate to melt evenly, preventing a greasy top and ensuring a uniformly fudgy interior. I’ve seen people skip this step and end up with a rubbery texture.
Why Your Nose Knows Best
Trust your nose: when the brownies smell like toasted chocolate and butter, you’re in the sweet spot. If the aroma is too sweet or too bitter, adjust the sugar or cocoa accordingly. A good rule of thumb is to pause the oven for a minute and inhale; if the scent feels off, tweak the batter.
The 5‑Minute Rest That Changes Everything
After removing the brownies from the oven, let them sit for exactly five minutes before cutting. This short rest allows the center to set, preventing a sticky mess when slicing. It also lets the flavors meld, giving each bite a harmonious balance.
Use a Silicone Mat for Perfect Release
Even the best parchment paper can sometimes cling to the brownies. A silicone mat ensures a smooth release and keeps the edges intact. I always keep a spare mat on hand for those extra‑tight pans.
Dust with Powdered Sugar for the Final Touch
Powdered sugar not only adds a sweet finish but also creates a subtle glaze that catches the light. Sprinkle it while the brownies are still warm for a glossy sheen. If you prefer a darker finish, simply skip the dusting.
Keep It Cool, Keep It Fresh
Store brownies in an airtight container at room temperature for up to three days. For longer storage, freeze them in a zip‑lock bag; thaw at room temperature for a few minutes before serving. Adding a splash of water before reheating helps them regain moisture.
Creative Twists and Variations
Salted Caramel Swirl
Swirl a spoonful of salted caramel sauce into the batter before baking. The caramel adds a sweet‑salty contrast that elevates the chocolate flavor. This version is perfect for dessert parties or a decadent midnight snack.
Nutty Crunch
Fold in chopped walnuts or pecans for a nutty crunch. The nuts add texture and a buttery flavor that complements the chocolate. Serve with a drizzle of honey for a sweet‑savory combo.
Minty Chocolate Delight
Add a teaspoon of peppermint extract and a handful of crushed chocolate mint candies to the batter. The mint gives a refreshing aftertaste, while the mint candies add a fun crunch. Ideal for spring or summer gatherings.
Almond Flour Alternative
Replace all-purpose flour with almond flour for a gluten‑free, low‑carb version. The almond flour gives a slightly nutty taste and a denser crumb. This variation is great for those watching their carbohydrate intake.
Espresso‑Infused Brownies
Increase the espresso powder to one tablespoon for a bold coffee flavor. The espresso deepens the chocolate notes and adds a subtle bitterness that balances the sweetness. Pair with a glass of stout for a sophisticated dessert.
Chocolate‑Covered Brownie Bites
Cut the brownies into small squares and dip them in melted dark chocolate. Let the chocolate set on a parchment paper sheet. These bite‑size treats are perfect for potlucks or as a party favor.
Storing and Bringing It Back to Life
Fridge Storage
Place the cooled brownies in a sealed container and store them in the refrigerator for up to five days. The cool environment prevents the chocolate from blooming and keeps the brownies moist. Let them sit at room temperature for 10 minutes before serving to restore their fudgy texture.
Freezer Friendly
Wrap the brownies tightly in plastic wrap and then in foil before freezing. They’ll stay fresh for up to three months. When you’re ready, thaw at room temperature for 20 minutes, then warm in the microwave for 10‑15 seconds.
Best Reheating Method
Reheat brownies in a preheated oven at 300°F (150°C) for 5 minutes, or in a microwave on medium power for 15‑20 seconds. Add a tiny splash of water before reheating; it steams the brownies back to a moist, silky crumb. Finish with a dusting of powdered sugar for that fresh finish.