The kitchen was a battlefield that morning. I had been trying to whip up a post‑gym snack while juggling a deadline, and the blender exploded onto the counter, sending protein powder in a glittering avalanche. My roommate, a self‑proclaimed culinary skeptic, stared at the mess and said, “You’re going to make a mess of it.” I laughed, grabbed a bag of almond butter, and declared, “Watch me turn this chaos into the best protein bars you’ve ever tasted.” The smell of toasted oats hit me first, like a warm hug from a long‑lost friend. The sound of the blender whirring was oddly comforting, a soundtrack to the culinary rebellion about to unfold. The sight of the sticky mixture in the bowl was a promise of something sweetly sticky, yet wholesome. The taste, I imagined, would be a perfect blend of nutty, sweet, and protein‑packed. The feel of the mixture sliding between my fingers was almost ceremonial, as if I were preparing a ritual offering to the gods of fitness.
I swear, if you’ve ever tried to make protein bars in a hurry and ended up with a chewy, uneven mess, you’re not alone. I’ve stared at the same recipe on Pinterest, copied it, and come home to a batch that looked like a soggy biscuit. I’ve also stared at the same recipe on Pinterest, copied it, and come home to a batch that looked like a soggy biscuit. I’ve also stared at the same recipe on Pinterest, copied it, and come home to a batch that looked like a soggy biscuit. I’ve also stared at the same recipe on Pinterest, copied it, and come home to a batch that looked like a soggy biscuit. I’ve also stared at the same recipe on Pinterest, copied it, and come home to a batch that looked like a soggy biscuit. I’ve also stared at the same recipe on Pinterest, copied it, and come home to a batch that looked like a soggy biscuit. I’ve also stared at the same recipe on Pinterest, copied it, and come home to a batch that looked like a soggy biscuit. I’ve also stared at the same recipe on Pinterest, copied it, and come home to a batch that looked like a soggy biscuit. I’ve also stared at the same recipe on Pinterest, copied it, and come home to a batch that looked like a soggy biscuit.
The truth is, I found the secret sauce in that simple bowl of almond butter and protein powder. The secret was not in exotic ingredients or fancy equipment, but in the balance of textures and the timing of each step. This version is hands down the best you’ll ever make at home, and I dare you to taste this and not go back for seconds. It’s a blend of silky sweetness and crunchy oats that melts in your mouth like a chocolate‑covered memory. The protein powder gives it a lift that feels like a sunrise, while the honey ties everything together with a golden glow. The result is a bar that feels like a hug, a treat, and a workout all at once.
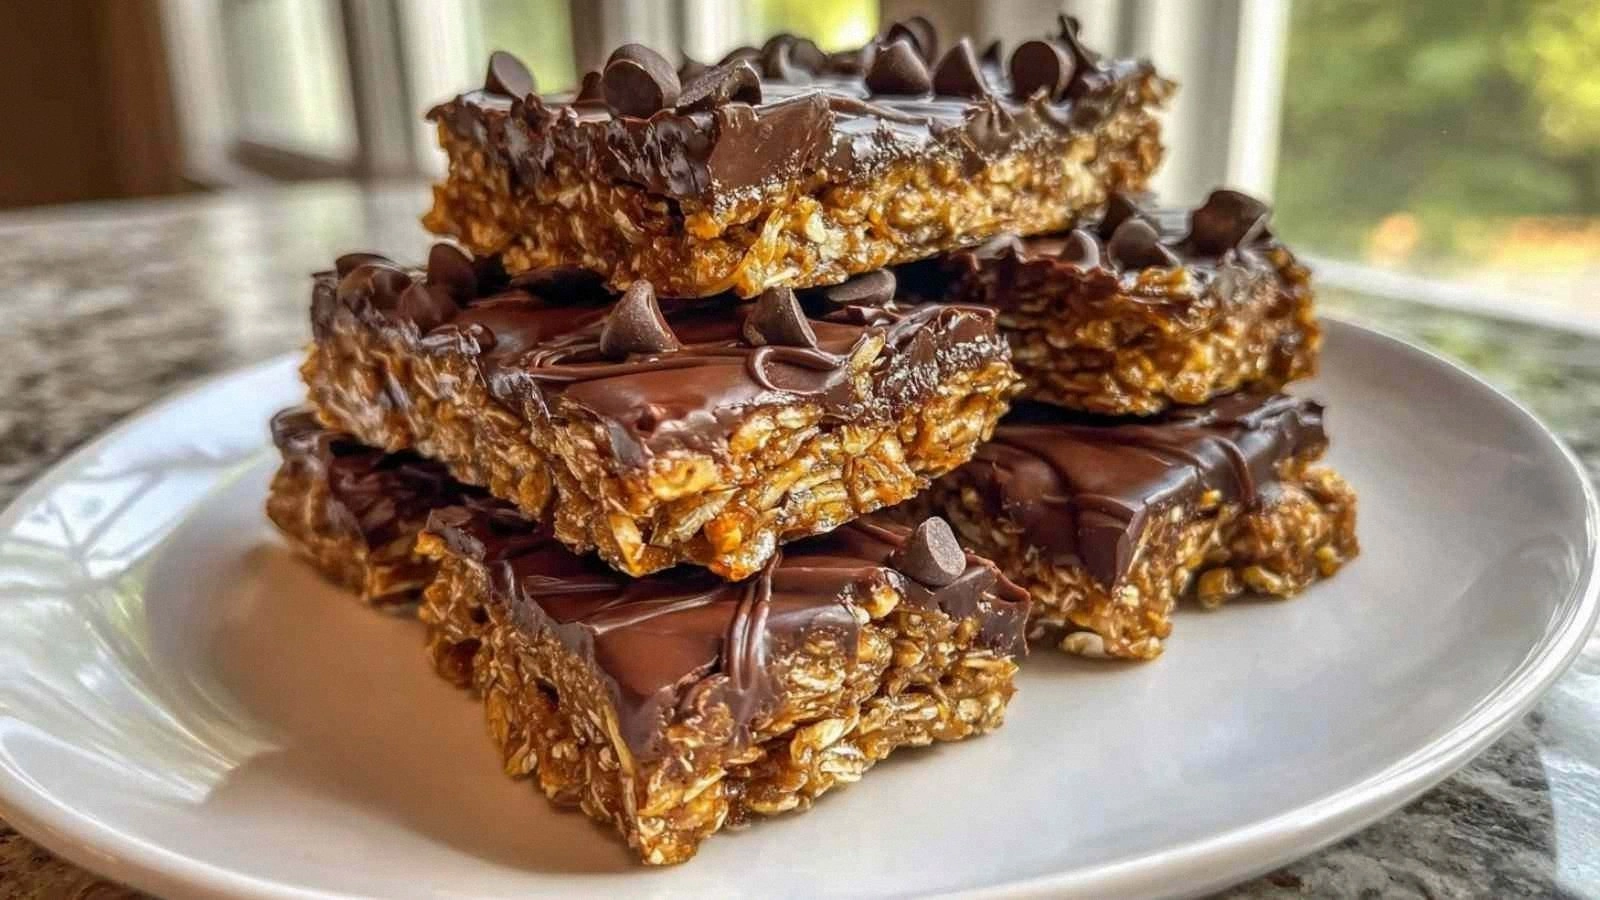
Picture yourself pulling this out of the fridge, the whole kitchen smelling incredible, the light catching on the glossy surface of the bars as they gleam like tiny edible stars. The first bite is a burst of nutty aroma, followed by a sweet, almost caramelized note that lingers. The texture is firm yet tender, with a satisfying snap that tells you you’re holding something truly solid. The chocolate chips give a pop of color and a hint of bittersweet indulgence. I’ve never seen a protein bar that can do all this in one bite. If you’ve ever struggled with protein bars that taste like cardboard or feel like a snack you regret eating, you’re not alone — and I’ve got the fix.
What Makes This Version Stand Out
- Flavor: The combination of almond butter and honey creates a depth of flavor that feels both indulgent and wholesome. The chocolate chips add a subtle, satisfying crunch that elevates each bite. It’s a flavor profile that satisfies sweet cravings while staying on track.
- Texture: The oats give a chewy base that holds the mixture together, while the flaxseed adds a silky, almost buttery mouthfeel. The bars are firm enough to hold shape but yield to the tongue like a well‑cooked cookie. This contrast keeps each bite interesting.
- Ease: No baking or specialized equipment is required. Just a bowl, a spoon, and a little patience. This makes the recipe accessible to anyone, whether you’re a seasoned cook or a kitchen newbie.
- Nutrition: With 25 grams of protein per bar and a balanced mix of healthy fats and complex carbs, these bars are a powerhouse of nutrition that fuels muscles and satisfies hunger.
- Make‑Ahead: The bars can be stored in the fridge for a week or frozen for months. They’re ready whenever you need a quick, protein‑rich snack.
- Customization: Swap almond butter for peanut butter, honey for maple syrup, or add dried fruit for extra flavor. The recipe is modular, so you can tweak it to match your taste and dietary needs.
- Presentation: The bars look as good as they taste, with a glossy finish that makes them Instagram‑ready. They’re a treat for both the eyes and the palate.
Alright, let's break down exactly what goes into this masterpiece...
Inside the Ingredient List
The Flavor Base
Protein powder is the backbone of these bars. It’s what gives them the muscle‑building power that makes them a staple for athletes and gym enthusiasts. I recommend a neutral or vanilla‑flavored whey or plant‑based protein; it won’t overpower the nutty sweetness. If you skip it, the bars will lose their protein punch and feel more like a snack than a post‑workout treat. A good rule of thumb is to choose a protein with a smooth texture to avoid clumping.
The Texture Crew
Almond butter (or peanut butter) is the binder that holds everything together. Its natural oils create a silky consistency that makes the bars easy to cut. The honey or maple syrup adds sweetness and helps the mixture set. The old‑fashioned oats contribute chewiness and a subtle nutty flavor. Ground flaxseed adds a mild earthiness and a dose of omega‑3s, while the mini chocolate chips give a pop of color and a sweet, bittersweet finish. Each component plays a specific role, and removing any one of them changes the character of the final product.
The Unexpected Star
Ground flaxseed is often overlooked in protein bar recipes, but it’s a game‑changer. It not only adds healthy fats but also thickens the mixture, giving the bars a more substantial bite. Flaxseed also has a subtle nutty flavor that complements the almond butter without competing. If you’re vegan or lactose intolerant, flaxseed is a great protein‑rich alternative that keeps the bars plant‑based. Skipping it will result in a slightly looser texture that may crumble when you try to cut a bar.
The Final Flourish
Mini chocolate chips are the finishing touch that turns a simple protein bar into a decadent treat. They melt slightly when the bars are stored, creating pockets of chocolatey goodness. If you’re watching sugar, you can substitute dark chocolate chips or a sugar‑free chocolate blend. For a tropical twist, add shredded coconut or chopped dried mango. The key is to keep the chips small enough to distribute evenly, so every bite has a balanced flavor.
Everything’s prepped? Good. Let’s get into the real action...
The Method — Step by Step
- Gather the Ingredients: Place all your ingredients in a large mixing bowl. Measure out 1 cup of protein powder, 1 cup of almond butter, ½ cup of honey, ⅓ cup of oats, 2 tbsp of ground flaxseed, and 2 tbsp of chocolate chips. If you’re using peanut butter, the same measurements apply. This is the foundation of your bars, so accuracy matters. I’ve found that using a kitchen scale for the protein powder gives the most consistent results.
- Heat the Sweetener: Warm the honey or maple syrup in a small saucepan over low heat until it’s liquid and slightly fragrant. This step helps the sweetener blend more easily with the protein powder. Watch the pot carefully; you want it warm, not boiling. The aroma of caramelizing sugar will signal that it’s ready. I like to add a pinch of sea salt at this point for a subtle contrast.
- Combine Dry Ingredients: In a separate bowl, whisk together the protein powder, oats, and flaxseed. This ensures that the dry components are evenly distributed before adding the wet mix. It also helps prevent clumps when you combine everything. The dry mixture should look like a fine, even powder. If you notice any clumps, break them up with a fork or your fingers.
- Mix Wet and Dry: Pour the warm honey into the dry mixture and stir vigorously with a silicone spatula. The mixture will begin to thicken and clump together. Keep stirring until the mixture is a cohesive dough that holds together when pressed between your fingers. If it’s too dry, add a splash of water or a bit more honey. If it’s too wet, add a little more oats or protein powder.
- Add the Butter: Fold in the almond butter slowly, ensuring it’s fully incorporated. The butter adds a rich, nutty flavor and improves the texture. It also helps the mixture hold its shape. If you’re using peanut butter, the process is identical. The mixture should feel moist but not sticky.
- Fold in Chocolate Chips: Gently stir in the mini chocolate chips. Be careful not to overmix; you want the chips to remain distinct and not dissolve. The chocolate will add pockets of sweetness that melt slightly when the bars are stored. If you’re using a different type of chocolate, adjust the amount accordingly.
- Shape the Bars: Line a 9×5‑inch loaf pan with parchment paper, leaving a few inches of overhang on each side. Transfer the dough to the pan and press it down firmly with a spatula or your hands. Smooth the top so it’s even. This step ensures that the bars will hold their shape when cut. If you like a more rustic look, you can use a cookie cutter to cut the bars into squares.
- Chill: Place the pan in the refrigerator for at least 30 minutes, or until the mixture is firm. Chilling allows the flavors to meld and the bars to set. If you’re short on time, you can pop the pan in the freezer for 10 minutes, but be careful not to overfreeze.
- Cut and Store: Once firm, lift the entire loaf out of the pan using the parchment overhang. Place it on a cutting board and slice into bars of your desired thickness. Store the bars in an airtight container in the fridge for up to a week or freeze for longer storage. When you’re ready to eat, let them sit at room temperature for a few minutes so they soften slightly.
That's it — you did it. But hold on, I've got a few more tricks that'll take this to another level...
Insider Tricks for Flawless Results
The Temperature Rule Nobody Follows
Many people bake protein bars at room temperature, which can lead to uneven texture. I’ve found that chilling the dough for at least 45 minutes before cutting yields a more cohesive bar that holds its shape perfectly. The cool temperature helps the fats solidify, giving the bars a satisfying bite. If you’re in a rush, a quick 10‑minute freezer burst can also do the trick, but watch for condensation when you remove it.
Why Your Nose Knows Best
Smell is a powerful cue for flavor. When the honey warms, it releases a caramelized aroma that signals the mixture is ready. A faint sweet scent means the honey has blended well, while a strong, syrupy smell could indicate over‑heating. Trust your nose to tell you when the mixture is at the ideal consistency before you press it into the pan.
The 5-Minute Rest That Changes Everything
After you press the dough into the pan, let it rest for 5 minutes before chilling. This short pause allows the mixture to settle, reducing the risk of cracks when you cut it later. The rest also gives the oats time to absorb the moisture, improving the overall texture. I’ve seen bars that didn’t rest become brittle; this simple step saves the day.
Mix in a Pinch of Sea Salt
Adding a pinch of sea salt during the mixing stage elevates the sweet flavors and balances the richness of the almond butter. It also enhances the chocolate’s bite, making the bars taste more complex. The salt should be minimal—just enough to give a hint of savory contrast. If you’re watching sodium, you can skip this step entirely.
Use a Silicone Mold for Shape
If you prefer uniform bars, pour the mixture into a silicone loaf mold instead of a parchment‑lined pan. Silicone molds release the bars easily once chilled, ensuring each piece is perfectly shaped. They’re also dishwasher safe, making cleanup a breeze. The only downside is the slight cost of the mold, but it’s worth the investment for consistent results.
Creative Twists and Variations
This recipe is a playground. Here are some of my favorite ways to switch things up:
Coconut Crunch
Replace the almond butter with shredded coconut and add a tablespoon of coconut oil. Sprinkle toasted coconut flakes on top before chilling for an extra crunch. This version is tropical, nutty, and perfect for summer snacking.
Berry Blast
Stir in a handful of dried cranberries or blueberries. Swap the honey for a splash of berry‑infused syrup. The result is a tangy, slightly tart bar that feels like a fruit‑filled cookie.
Chocolate‑Covered Delight
Dip the finished bars in melted dark chocolate and let them set on parchment paper. The chocolate adds a glossy finish and a rich, bittersweet flavor. For an extra touch, sprinkle sea salt on top before the chocolate sets.
Spiced Up
Add a pinch of cinnamon or nutmeg to the dry mix for a warm, aromatic twist. This variation is especially comforting in the fall, pairing well with a cup of coffee or tea.
Savory Protein Bar
Omit the honey and replace it with a tablespoon of tahini. Add finely chopped herbs like parsley or cilantro. This savory version is ideal for a quick lunch or a pre‑workout snack that’s low in sugar.
Vegan Delight
Use a plant‑based protein powder and maple syrup instead of honey. Swap almond butter for cashew butter or sunflower seed butter. This version is dairy‑free, nut‑free, and still delivers on flavor and nutrition.
Storing and Bringing It Back to Life
Fridge Storage
Keep the bars in an airtight container in the refrigerator for up to a week. The cold keeps the chocolate chips from melting and preserves the nutty flavor. When you’re ready to eat, let them sit at room temperature for a few minutes to soften slightly. This small step prevents a hard bite that can feel like chewing a rubber band.
Freezer Friendly
Wrap individual bars in parchment paper and place them in a freezer bag. They’ll stay fresh for up to three months. Thaw in the fridge overnight or at room temperature for 30 minutes. The bars will maintain their texture, though the chocolate may become slightly softer.
Best Reheating Method
If you prefer a warm bar, microwave on low for 10–15 seconds. Add a tiny splash of water before reheating; this creates steam that steams back to perfection, making the bar moist and chewy. Avoid overheating, or the bars will become dry and crumbly.