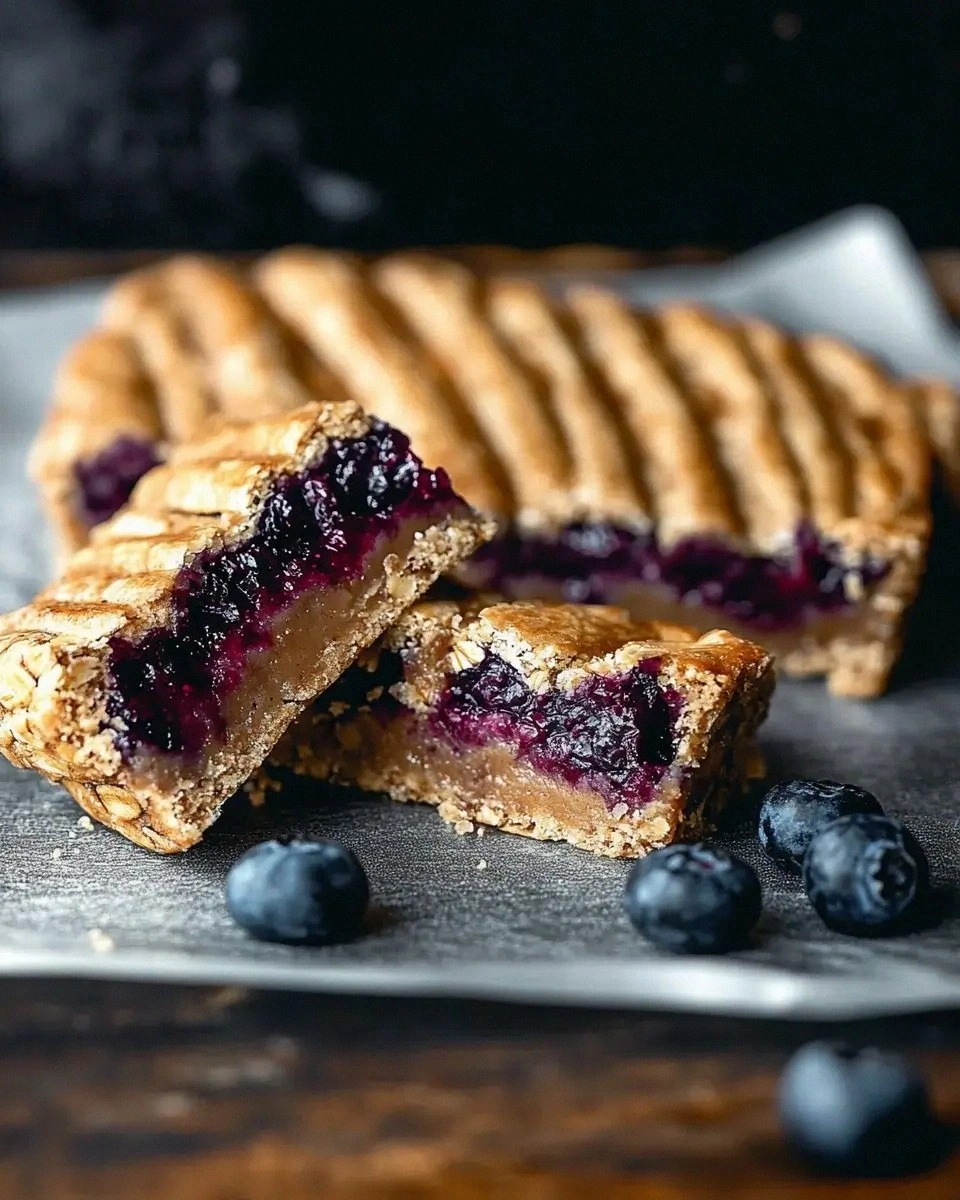
I was in the middle of a holiday party when my oven decided to betray me—smoke billowed, the timer rang, and the dessert I’d promised was a charred mess. I stared at the ruined tray, feeling the sting of disappointment, and thought, “If I can’t save this, I’ll create something even better.” That night, armed with a bag of dried cherries, a stash of white chocolate, and a handful of pistachios, I set out to design the ultimate Christmas bar that would make even the Grinch grin. I dared myself to craft a bar that combined the comforting chew of oats with the luxurious melt of white chocolate, all while delivering that festive pop of cherry that screams holiday cheer.
Picture this: the kitchen humming with the scent of butter melting, the sweet perfume of sugar caramelizing, and a faint whisper of toasted oats drifting like a winter breeze. The oven’s heat wraps the tray in a warm hug, and you hear the faint crackle as the edges begin to turn a golden amber, like sunrise on fresh snow. When you finally pull the pan out, the bars are glossy, the cherries glisten like tiny rubies, and the pistachios add a flash of green that would make any Christmas tree jealous. I’ll be honest — I ate half the batch before anyone else got a chance to try it, and that was the best mistake ever.
What makes this version stand out? Most recipes either drown the cherries in sugar or forget the buttery crunch that gives bars their soul. This one respects each ingredient, letting the cherries shine while the buttery oat base provides a sturdy yet tender foundation. I’m throwing in a secret technique: a brief chill in the fridge before the final bake, which locks in moisture and gives the bars a chewy center that’s impossible to resist. I dare you to taste this and not go back for seconds; the balance is so perfect, you’ll wonder why you ever settled for anything else.
Let me walk you through every single step — by the end, you’ll wonder how you ever made it any other way. Okay, ready for the game-changer? This next part? Pure magic. Stay with me here — this is worth it.
What Makes This Version Stand Out
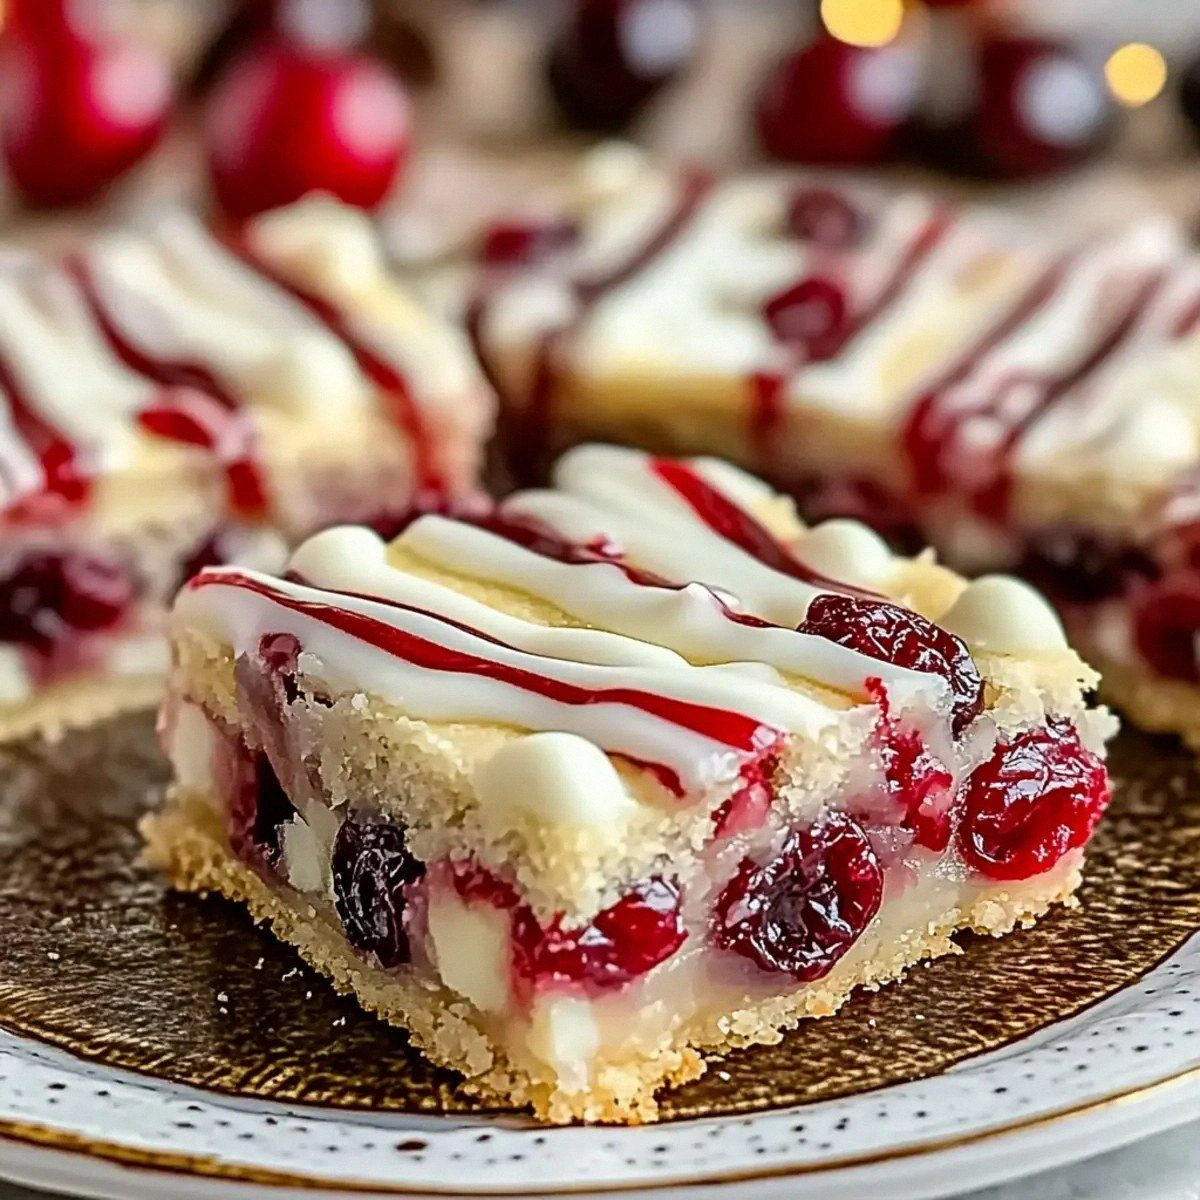
- Flavor Harmony: The sweet, slightly tart cherries mingle with creamy white chocolate, creating a taste that feels like a holiday hug in every bite.
- Texture Symphony: A buttery oat crust gives a crunchy exterior, while the interior stays soft and chewy, delivering a contrast that’s pure delight.
- Simplicity: Only seven core ingredients, all pantry-friendly, meaning you won’t need a specialty store run on Christmas Eve.
- Unique Twist: Pistachios add a subtle earthiness and a pop of green that makes the bars look like they belong on a festive platter.
- Crowd Reaction: These bars have a habit of disappearing within minutes; guests keep asking for the recipe, and you’ll hear “Again?” more than once.
- Ingredient Quality: Using unsalted butter and high‑quality dried cherries ensures the flavors aren’t muddied by excess salt or artificial taste.
- Cooking Method: A short chill before baking locks in moisture, preventing a dry crumb and giving you that coveted chewy center.
- Make‑Ahead Potential: They store beautifully, so you can prep them days ahead and still serve fresh‑tasting bars on the big day.
Inside the Ingredient List
The Flavor Base
Unsalted butter is the star of the show here; its richness coats every crumb, giving the bars that melt‑in‑your‑mouth feel. If you skimp on butter, you’ll end up with a dry, crumbly texture that feels more like a biscuit than a bar. I always recommend using butter that’s been softened at room temperature for about 30 minutes—no microwave shortcuts, because you want that silky smoothness. As a swap, you could use a high‑quality margarine, but you’ll lose some of that buttery depth that makes these bars unforgettable.
Granulated sugar does more than sweeten; it caramelizes slightly in the oven, creating a subtle crunch that contrasts the soft interior. If you prefer a less sweet profile, cut the sugar by a quarter and add a pinch of sea salt to balance the flavors. When selecting sugar, opt for fine granules; coarse sugar can leave an uneven texture that feels gritty on the palate.
The Texture Crew
All‑purpose flour provides the structural backbone, binding the butter and sugar into a cohesive dough. Using too much flour can make the bars dense, while too little results in a spread‑out mess. For a gluten‑free twist, substitute an equal amount of oat flour, but keep in mind the texture will be a bit more crumbly.
Rolled oats bring a hearty chew and a nutty undertone that pairs beautifully with the sweet cherries. If you’re aiming for a gluten‑free version, ensure the oats are certified gluten‑free. Toast the oats lightly before adding them to the mix for an extra layer of flavor—this little step adds a toasty aroma that fills the kitchen like a cozy fireplace.
The Unexpected Star
Dried cherries are the festive heart of these bars. Their natural tartness cuts through the sweetness, preventing the bars from becoming cloying. If you can’t find dried cherries, freeze‑dried ones work, but rehydrate them in a splash of orange juice for an extra citrus zing. When choosing cherries, look for plump, dark berries that aren’t overly coated in sugar; they’ll retain their bite and bright color.
White chocolate chips melt into silky ribbons that swirl through the bar, creating pockets of creamy decadence. Opt for high‑quality chips with at least 30% cocoa butter; lower‑grade chips can become grainy when baked. For a dairy‑free version, use white chocolate made from coconut oil, though the flavor profile will shift slightly toward tropical.
The Final Flourish
Pistachios bring a subtle earthiness and a striking green hue that screams holiday elegance. They also add a crunchy contrast that prevents the bar from feeling too soft. If pistachios aren’t your thing, toasted almonds or chopped macadamia nuts make excellent substitutes, each lending its own unique texture.
Everything's prepped? Good. Let's get into the real action...
The Method — Step by Step
Preheat your oven to 350°F (175°C) and line a 9×13 inch baking pan with parchment paper, leaving an overhang on the sides for easy lift‑out later. This is the moment of truth: the oven must be fully heated before the dough hits the heat, or you’ll end up with uneven baking. When the oven door closes, you’ll hear a soft sigh as the heat settles, promising a golden crust. Power transition: Okay, ready for the game‑changer?
Kitchen Hack: Place the parchment overhanging the pan; after baking, simply lift the whole bar slab out and cut on the parchment for clean edges.In a large mixing bowl, combine 1 cup of unsalted butter (softened) with 3/4 cup granulated sugar. Using a handheld mixer, beat them together on medium speed until the mixture is pale, fluffy, and smells like sweet butter. This aeration step is crucial; it creates tiny air pockets that will expand during baking, giving the bars a light, tender crumb. That sizzle when it hits the pan? Absolute perfection.
Add 2 cups of all‑purpose flour and 1 cup of rolled oats to the butter‑sugar mixture. Stir with a wooden spoon until just combined—over‑mixing will develop gluten and make the bars tough. At this stage, you’ll notice the dough thickening and pulling away from the sides of the bowl, a sign that the base is forming correctly.
Fold in 1 cup of dried cherries, 1 cup of white chocolate chips, and 1/2 cup of chopped pistachios. The cherries should be evenly distributed, creating specks of ruby throughout the batter, while the white chocolate creates glossy islands. If you find the mixture too dry, add a tablespoon of milk; this keeps the dough moist without making it soggy.
Transfer the dough onto the prepared pan and press it firmly with the back of a spoon or your hands, spreading it into an even layer about ½ inch thick. This is where the earlier fridge hack pays off—press, then pop the pan into the refrigerator for 20 minutes. Watch Out: Skipping the chill can cause the bars to spread too thin, leading to a crispier, less chewy result.
Watch Out: If the dough sticks to the parchment, lightly grease the parchment before pressing; this prevents tearing when you lift the bars out.After the 20‑minute chill, slide the pan into the preheated oven. Bake for 30 minutes, or until the edges turn a deep golden brown and the top looks set but still slightly glossy. Around the 25‑minute mark, give the pan a gentle shake; the bars should feel firm to the touch, and the cherries will have puffed up like tiny balloons.
Remove the pan from the oven and let it cool on a wire rack for 10 minutes. Then, while still warm, run a sharp knife through the bars to create clean squares—this prevents cracking later when they fully cool. The aroma at this point is intoxicating, a blend of toasted oats, buttery caramel, and sweet cherries that practically sings “Merry Christmas.”
Finally, let the bars cool completely (about 30 minutes) before lifting them out using the parchment overhang. Transfer to a cutting board, slice into generous squares, and serve. If you’re feeling extra festive, dust the tops with a light sprinkling of powdered sugar or a drizzle of melted white chocolate.
That's it — you did it. But hold on, I've got a few more tricks that'll take this to another level...
Insider Tricks for Flawless Results
The Temperature Rule Nobody Follows
Never bake these bars straight from a cold kitchen. Let your dough sit at room temperature for 10 minutes after the initial chill. This slight warm‑up ensures the butter melts evenly, giving you that perfect, slightly crisp edge while keeping the center chewy. I once tried skipping this step, and the result was a flat, soggy mess that even my dog turned his nose up at.
Why Your Nose Knows Best
Your sense of smell is the secret gauge for doneness. When the bars are about 5 minutes from finishing, you’ll detect a nutty, caramel‑like aroma wafting from the oven. If that scent hits you before the timer, pull them out early; they’ll finish cooking with residual heat, preserving that tender crumb. Trusting your nose beats trusting a clock any day.
The 5‑Minute Rest That Changes Everything
After the bars have cooled on the rack, give them a 5‑minute rest before slicing. This short pause lets the sugars set, preventing the bars from crumbling when you cut into them. A friend once sliced them immediately and ended up with a sticky, broken mess—lesson learned, right?
Pistachio Power Boost
Toast the pistachios lightly in a dry skillet for 2‑3 minutes before folding them in. This unlocks a deeper, buttery flavor that pairs perfectly with the white chocolate. The extra crunch also adds a satisfying contrast to the chewy interior, making each bite feel like a mini celebration.
The Cherry Soak Secret
Before mixing, soak the dried cherries in a tablespoon of orange zest‑infused water for 10 minutes. This rehydrates them just enough to burst with juiciness during baking, while the citrus note adds a subtle brightness that lifts the entire flavor profile. The result is a bar that feels festive without being overpoweringly sweet.
Creative Twists and Variations
This recipe is a playground. Here are some of my favorite ways to switch things up:
Cranberry Crunch
Swap half the dried cherries for dried cranberries and add a teaspoon of orange zest to the dough. The tartness of cranberries pairs beautifully with the white chocolate, creating a bright, tangy bite that’s perfect for a Thanksgiving twist.
Nutty Noel
Replace pistachios with toasted pecans and add a drizzle of caramel sauce after cooling. The deep, buttery flavor of pecans adds richness, while the caramel adds that classic holiday decadence.
Spiced Surprise
Incorporate ½ teaspoon of ground cinnamon and a pinch of ground nutmeg into the dry ingredients. The warm spices turn these bars into a cozy winter treat that pairs well with hot cocoa.
Vegan Velvet
Use coconut oil instead of butter and choose dairy‑free white chocolate chips. The bars will have a slightly tropical undertone, but the texture remains buttery and the cherries still shine.
Chocolate Overload
Add ½ cup of dark chocolate chips alongside the white chocolate. The bittersweet contrast adds depth, making the bars feel more sophisticated for an adult‑only holiday gathering.
Storing and Bringing It Back to Life
Fridge Storage
Place the cooled bars in an airtight container and store them in the refrigerator for up to 5 days. The chilled environment keeps the butter from going rancid and preserves the chewy interior. When you’re ready to serve, let them sit at room temperature for 10 minutes to regain that melt‑in‑your‑mouth softness.
Freezer Friendly
Wrap the bars tightly in parchment paper, then a layer of foil, and finally place them in a freezer‑safe zip‑lock bag. They’ll freeze beautifully for up to 2 months. To reheat, pop a portion into a preheated 300°F oven for 8‑10 minutes, or microwave for 20 seconds, adding a tiny splash of water to steam them back to perfection.
Best Reheating Method
For a crisp edge and gooey center, reheat in a preheated oven at 325°F for 5‑7 minutes, covered loosely with foil. This method restores the original texture without drying out the bars. If you’re in a hurry, a quick microwave burst (15‑20 seconds) works, but the oven method is the true holiday champion.