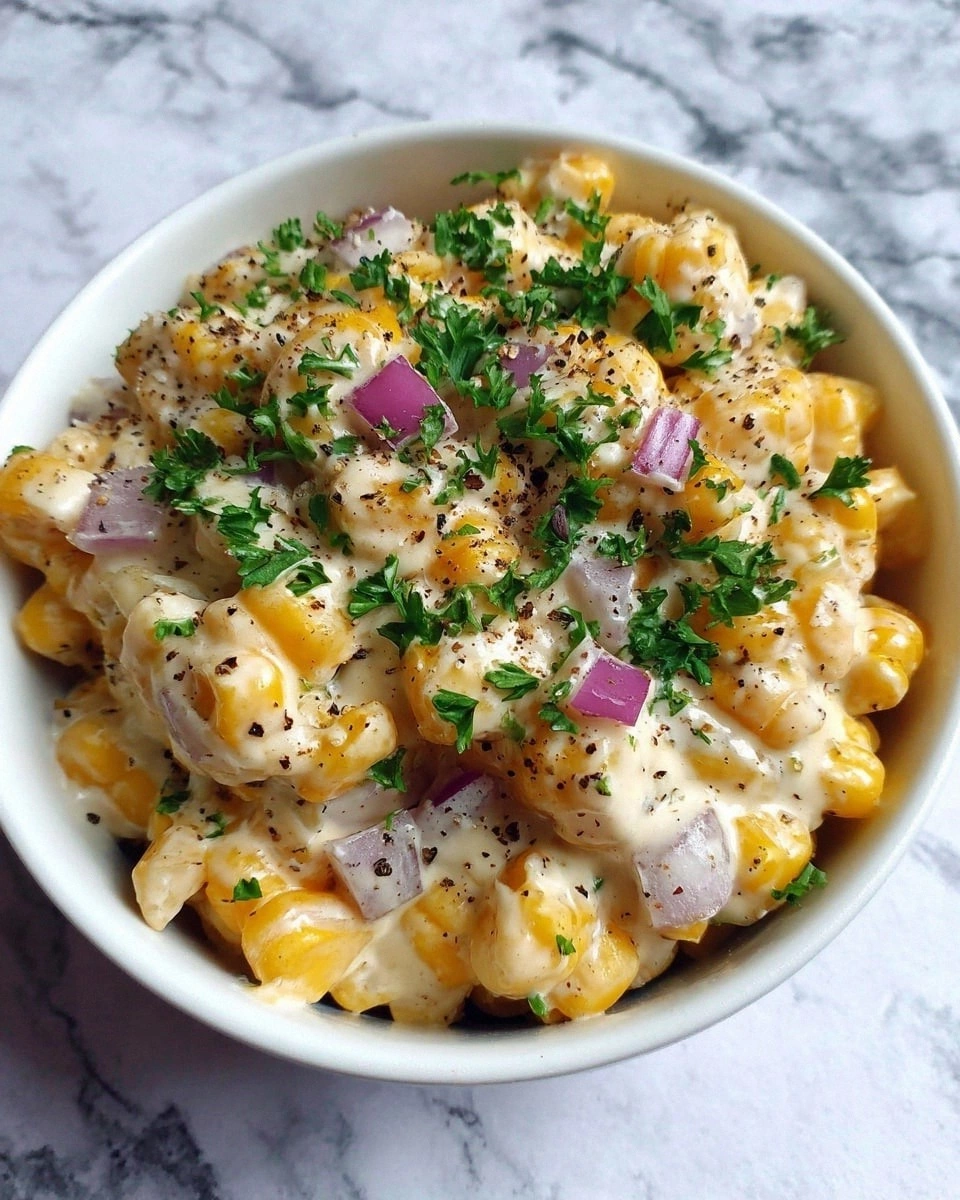
I was standing in a kitchen that felt more like a culinary battlefield than a place of comfort. My friend had dared me to recreate the legendary black‑eyed pea salad that had turned his backyard barbecue into a legend. I stared at the can of peas, the handful of grape tomatoes, and that bright bell pepper that looked like a tiny, edible sun. The moment I opened the can, the scent of sweet, earthy peas hit me like a warm hug. I could almost hear the crunch of the tomatoes and the whisper of fresh herbs. That instant, I knew this was going to be more than just a side dish—it was an invitation to taste something unforgettable.
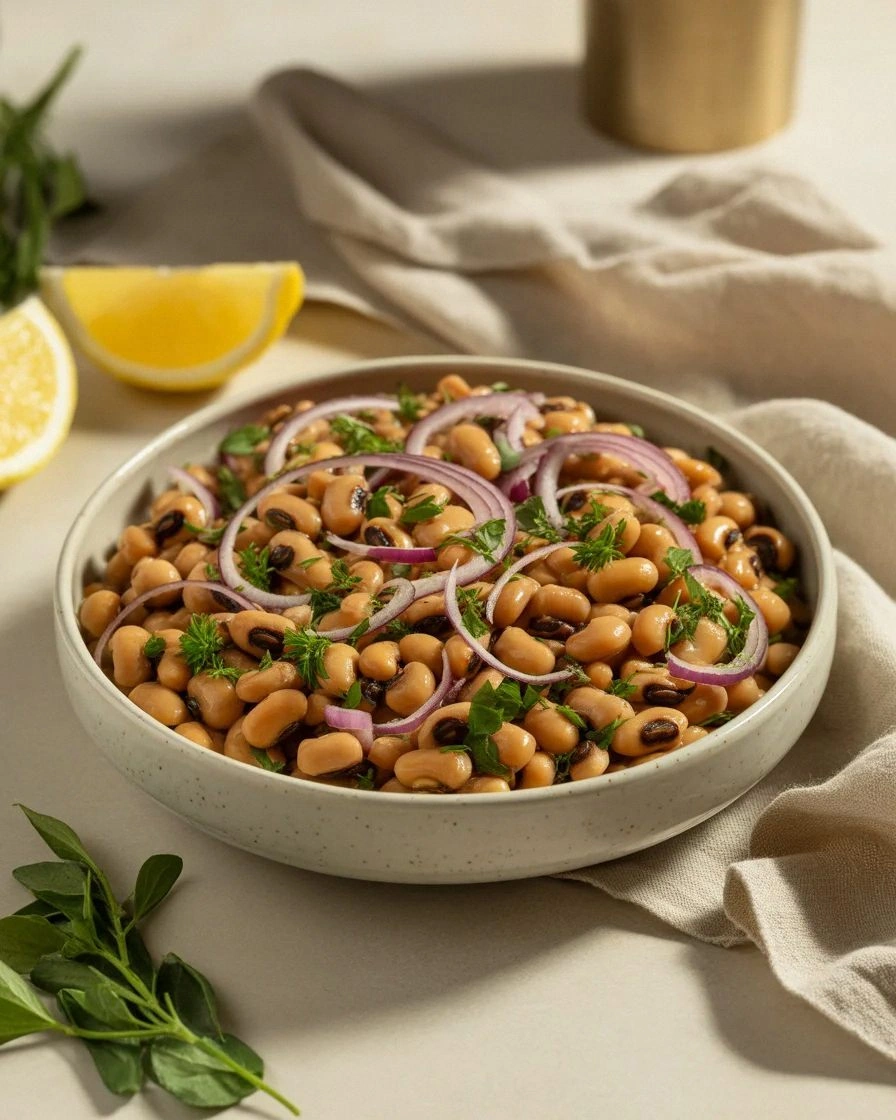
Picture this: the salad sits on a wooden board, glistening with a drizzle of olive oil that catches the afternoon light. The green parsley shimmers, the red onion slices look like tiny moons, and the lemon juice adds a citrusy sparkle that cuts through the earthiness. I could almost hear the gentle pop of the bell pepper as it meets the pan, the faint hiss of olive oil warming. The first bite is a symphony—sweet tomatoes, peppery crunch, the subtle heat of hot sauce, all balanced by the creamy texture of the peas. The flavor profile is a dance, with each ingredient stepping in time, not competing but complementing. And that, dear reader, is why this version stands out from the endless sea of “black‑eyed pea” recipes out there.
What makes this salad truly special is not just the ingredients, but the way I combine them. I use a simple, no‑fuss dressing that lets the peas shine, yet the lemon and hot sauce add a zing that keeps your palate engaged. The secret is in the timing—letting the vegetables retain their crispness while the peas soak up the dressing. And if you’re thinking you can skip the parsley or the lemon, think again. Those tiny tweaks make the difference between “good” and “great.” I dare you to taste this and not go back for seconds. This is hands down the best version you'll ever make at home. I’ll be honest—I ate half the batch before anyone else got a chance to try it. If you've ever struggled with getting the right balance of flavors, you're not alone—and I've got the fix.
Most recipes get this completely wrong. They either over‑season the peas or under‑cook the vegetables, resulting in a bland, mushy dish. Here’s what actually works: a quick sear on the bell pepper, a splash of lemon juice right before serving, and a dash of hot sauce that’s not too overpowering. Picture yourself pulling this out of the oven, the whole kitchen smelling incredible, the colors popping like a fresh painting. And if you’re worried about timing, don’t be—this salad is ready in less than 45 minutes. Okay, ready for the game‑changer? This next part? Pure magic. And now the fun part. Stay with me here—this is worth it.
What Makes This Version Stand Out
- Flavor: The balance between sweet, earthy peas and bright citrus creates a dynamic taste that lingers on the tongue. The hot sauce adds a subtle heat that wakes up the palate without overpowering.
- Texture: Fresh vegetables retain their crunch, while the peas stay tender yet distinct. The dressing lightly coats the ingredients like a whisper, keeping each bite vibrant.
- Simplicity: No need for exotic spices or long prep times. The recipe relies on pantry staples that you already have, yet it delivers restaurant‑quality flavor.
- Uniqueness: A dash of hot sauce and a splash of lemon juice give this dish a modern twist on a classic, setting it apart from other black‑eyed pea salads.
- Crowd Reaction: Friends and family rave about the fresh, zesty bite. The dish is a conversation starter at gatherings, and it always leaves a lasting impression.
- Ingredient Quality: Using fresh, high‑quality ingredients—like ripe bell peppers and hand‑picked parsley—ensures a vibrant color and robust flavor.
- Cooking Method: A quick sear on the bell pepper adds depth, while the dressing is tossed at the last moment to preserve freshness.
- Make‑Ahead Potential: The salad holds up well in the fridge; the flavors actually deepen, making it perfect for meal prep or next‑day lunches.
Inside the Ingredient List
The Flavor Base
The black‑eyed peas are the heart of this dish. They bring a creamy, slightly nutty flavor that pairs beautifully with bright, fresh vegetables. If you skip them, the salad loses its depth, turning into a simple vegetable mix. When you use a fresh can, the peas maintain their natural sweetness. If you’re short on time, a single serving of canned peas works just fine—just adjust the dressing accordingly. The key is to keep them tender but not mushy, so rinse them well to remove excess starch.
The Texture Crew
Bell pepper and grape tomatoes add that satisfying crunch and burst of juiciness. The bell pepper’s sweet, crisp bite contrasts the softness of the peas, while the tomatoes provide a juicy counterpoint. If you’re in a hurry, pre‑cut the bell pepper into strips; just be careful not to over‑cook them. A quick sear in a hot pan brings out their natural sugars, giving them a subtle caramelized flavor. Skipping the bell pepper will make the salad less vibrant—color and crunch are essential for a balanced bite.
The Unexpected Star
Red onion is the subtle hero that adds a sharp, aromatic punch. When finely chopped, it releases a sweet, mild flavor that lingers without overpowering the peas. If you’re sensitive to raw onions, blanch them briefly in hot water to soften their bite. The onion’s texture adds a gentle crunch, and its bright color makes the dish pop. Skipping onion will result in a flat, one‑dimensional flavor profile.
The Final Flourish
Fresh parsley (or cilantro) provides a burst of herbal brightness that lifts the entire dish. Its delicate leaves carry a slightly peppery aroma that balances the sweet and savory notes. If you’re out of parsley, a handful of fresh basil or mint works as a refreshing alternative. The lemon juice is the finishing touch that brightens the flavors, cuts through the richness, and adds a refreshing zing. The olive oil coats the ingredients, creating a silky texture that ties everything together. A dash of hot sauce is optional but recommended for those who like a little heat.
Everything’s prepped? Good. Let’s get into the real action.
The Method — Step by Step
- Step 1: Prepare the Vegetables – Chop the bell pepper into thin strips, halve the grape tomatoes, and finely dice the red onion. The goal is uniform pieces so they cook evenly. If you’re using a mandoline, set it to a medium thickness to keep the veggies crisp. Keep the vegetables in a bowl until you’re ready to toss them with the peas. This step sets the foundation for a balanced texture.
- Step 2: Sear the Bell Pepper – Heat a large skillet over medium‑high heat and add a splash of olive oil. Once hot, add the bell pepper strips. Sear for 2–3 minutes, just until they start to soften but still retain their crunch. The quick sear caramelizes the natural sugars, giving the pepper a deeper flavor. Watch the edges; they should be slightly browned, like a gentle kiss from the pan.
- Step 3: Add the Tomatoes – Drop the halved grape tomatoes into the skillet. Cook for an additional 1–2 minutes, just enough to warm them and release their juices. The tomatoes should not be mushy; they need to maintain a bite. This short sauté intensifies their sweetness and adds a subtle char that elevates the overall dish.
- Step 4: Rinse and Drain the Peas – While the vegetables are cooking, rinse the can of black‑eyed peas under cold water. Drain them well to remove excess sodium and any canning liquid. Rinsing also helps the peas absorb the dressing better and keeps the dish from becoming too salty.
- Step 5: Combine All Ingredients – Transfer the sautéed vegetables to a large mixing bowl. Add the drained peas, finely chopped red onion, and fresh parsley. Toss gently to combine, making sure the peas are evenly distributed among the vegetables. This step ensures every bite is balanced.
- Step 6: Make the Dressing – In a small bowl, whisk together 2 tablespoons of olive oil, the juice of one lemon, a dash of hot sauce, and a pinch of salt and pepper. The lemon juice brightens the flavors and the hot sauce adds a subtle kick. Whisk until the mixture emulsifies, creating a silky coating that will cling to every ingredient.
- Step 7: Dress the Salad – Pour the dressing over the salad and toss thoroughly. The dressing should coat each pea and vegetable without overwhelming them. Taste and adjust seasoning if necessary. The final product should feel light yet flavorful, with a gentle heat from the hot sauce.
- Step 8: Serve and Enjoy – Transfer the salad to a serving bowl or platter. Garnish with a few extra parsley leaves or a squeeze of lemon for a fresh finish. Serve immediately or chill in the fridge for up to 24 hours. The flavors deepen, making it a perfect make‑ahead option.
That's it — you did it. But hold on, I've got a few more tricks that'll take this to another level.
Insider Tricks for Flawless Results
The Temperature Rule Nobody Follows
Many people cook the vegetables at too low a temperature, causing them to steam rather than sear. The result is a soggy texture that defeats the purpose of this dish. I always start with a hot pan and a splash of oil. The high heat caramelizes the sugars and creates a slight char that adds depth. If the pan is too hot, the oil will smoke; if it’s too cool, the veggies will release water and become mushy. Finding that sweet spot is key to a crisp, flavorful salad.
Why Your Nose Knows Best
When the bell pepper starts to brown, your nose will pick up a nutty, toasted aroma. This is the signal that the vegetables are ready. If you’re unsure, taste a small piece; it should be tender yet still have a bite. The aroma and taste are the quickest ways to judge doneness, so trust your senses. This trick saves you from overcooking and ensures the salad has the perfect texture.
The 5‑Minute Rest That Changes Everything
After tossing the salad with dressing, let it rest for 5 minutes before serving. During this time, the flavors meld, and the peas absorb the dressing fully. A short rest also allows the hot sauce to distribute evenly, preventing any one bite from being too spicy. I’ve had friends say the salad tastes better the next day, and that’s because the rest period really enhances the depth of flavor. It’s a simple step that yields big results.
The Secret Ingredient Swap
If you’re looking for a protein boost, swap the black‑eyed peas for chickpeas or lentils. Both work well, adding a slightly different texture and nutty flavor. The cooking times remain the same, so it’s a hassle‑free upgrade. I tried this swap once for a vegetarian dinner, and the result was a crowd‑pleaser. Don’t be afraid to experiment; cooking is about making the dish your own.
The Quick Chill Trick
If you’re preparing the salad for a picnic or a potluck, chill it in the fridge for at least an hour. The cold temperature locks in freshness and prevents the salad from wilting. Before serving, let it sit at room temperature for 10 minutes to bring out the flavors. The peas stay plump, and the vegetables remain crisp. This trick is especially useful when you’re serving a large group.
Creative Twists and Variations
This recipe is a playground. Here are some of my favorite ways to switch things up:
Mediterranean Medley
Swap the bell pepper for sun‑dried tomatoes and add a handful of Kalamata olives. Toss in a sprinkle of feta cheese for a salty, tangy finish. The olives bring briny depth, while the feta adds creaminess. This version is perfect for a summer lunch or a light dinner.
Spicy Southwest
Replace the hot sauce with chipotle in adobo sauce for a smoky heat. Add corn kernels and diced avocado for extra texture. A squeeze of lime juice replaces the lemon for a citrusy kick that complements the chipotle. This version turns the salad into a bold, flavorful side that pairs with grilled meats.
Herb‑Infused Delight
Use a mix of fresh herbs—basil, mint, and oregano—to replace parsley. Add a drizzle of balsamic glaze for a sweet, tangy finish. The herbs create a fragrant bouquet that elevates the dish. This variation is ideal for a Mediterranean‑inspired gathering.
Protein‑Packed Power
Swap black‑eyed peas for diced grilled chicken or tofu cubes. Add a splash of soy sauce to the dressing for an umami boost. This version transforms the salad into a hearty main dish, perfect for a quick weeknight meal.
Breakfast Boost
Serve the salad over a bed of scrambled eggs and top with a sprinkle of chives. The savory eggs complement the bright flavors of the salad, creating a breakfast that’s both protein‑rich and refreshing. This twist is ideal for a weekend brunch or a quick start to a busy day.
Storing and Bringing It Back to Life
Fridge Storage
Store the salad in an airtight container in the refrigerator for up to 24 hours. The flavors deepen, and the peas remain plump. When you’re ready to serve, give it a quick stir and add a splash of water or lemon juice to re‑hydrate the dressing. This method keeps the salad fresh and vibrant.
Freezer Friendly
The salad can be frozen for up to 2 weeks. Separate the dressing and vegetables to prevent sogginess. When thawing, let the salad sit at room temperature for 20 minutes, then toss with a splash of olive oil to restore moisture. The peas will hold their texture, and the veggies will remain crisp.
Best Reheating Method
If you need to reheat, use a microwave on low power for 30 seconds, then stir. Alternatively, warm the salad in a skillet over low heat, adding a splash of water to create steam. This gentle heat preserves the delicate flavors and textures. Remember to add a tiny splash of water before reheating—it steams back to perfection.